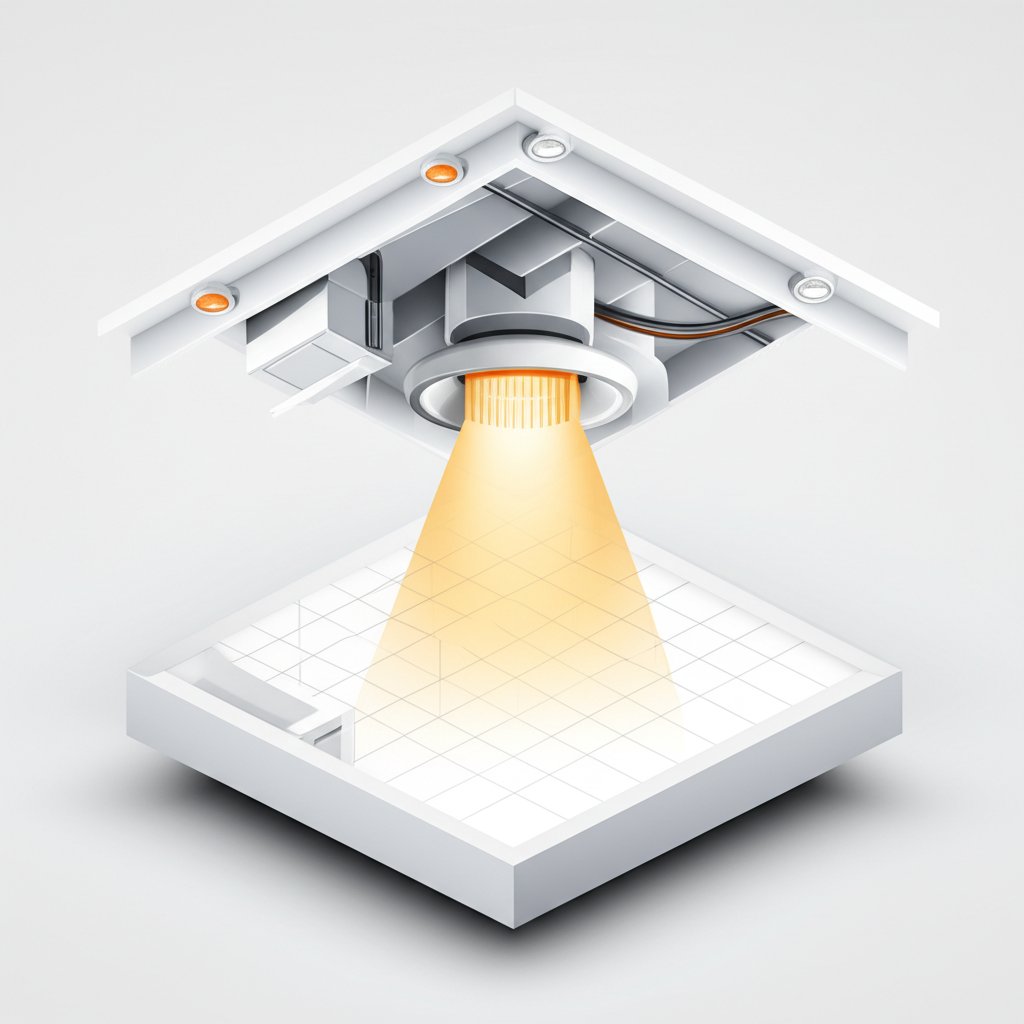
Forget the single, dim fixture that casts more shadows than light. The right bathroom ceiling spotlights with LED technology can do more than just illuminate—they can transform a purely functional room into a serene, spa-like retreat. They can make your morning routine smoother, your makeup application more accurate, and your small space feel surprisingly expansive. But navigating the world of lumens, IP ratings, and color temperatures can feel like a chore.
It doesn’t have to be.
This is your definitive guide to getting it right. We’ll demystify the technical jargon and give you the practical, real-world advice you need to choose and place lights that look fantastic and perform flawlessly for years to come.
At a Glance: Your Lighting Cheat Sheet
- Safety First: Bathroom lighting requires specific moisture protection. Look for an “IP rating” (like IP44 or IP65) to ensure your fixtures are safe for damp or wet locations.
- Focus on Lumens, Not Watts: Lumens measure actual brightness. For a bathroom, aim for a total of 500-800 lumens per square meter (or roughly 50-75 lumens per square foot) for good overall visibility.
- Layer Your Light: The best-lit bathrooms use a combination of light types. Use spotlights for focused task lighting (at the vanity, in the shower) and pair them with a general ambient light for overall illumination.
- Color Matters: The “color temperature” (measured in Kelvins) sets the mood. 3000K offers a soft, relaxing white, while 4000K-5000K provides a crisp, energizing daylight feel ideal for grooming.
- Placement is Everything: Where you put your lights is as important as which ones you buy. Poor placement creates harsh shadows, while strategic placement makes the room feel brighter and more functional.
More Than Just a Light Bulb: The Power of Strategic Lighting
For too long, bathroom lighting has been an afterthought—a single vanity bar or a central flush mount expected to do all the work. The result? A room that feels either clinical and harsh or gloomy and cavelike. Great lighting design, however, hinges on a simple principle: layering.
Think of it like painting a room. You don’t just use one color; you have a main wall color, an accent color, and trim. Lighting works the same way, with three primary layers:
- Ambient Light: This is the foundational, general illumination for the room. It’s the soft, even light that lets you navigate the space safely. This often comes from a central ceiling fixture, like a flush mount or a grid of recessed spotlights.
- Task Light: This is the focused, bright light you need for specific activities like applying makeup, shaving, or tweezing. This is where bathroom ceiling spotlights led truly shine—pun intended. They are perfect for targeting the vanity area or illuminating the inside of a shower.
- Accent Light: This is the “drama” layer. It’s used to highlight architectural features, a beautiful tiled wall, or a piece of art. A well-placed, adjustable spotlight can turn a plain wall into a stunning focal point.
By combining these layers, you create a space that is not only perfectly functional but also rich, inviting, and flexible. You can have bright, clear light when you need it and soft, moody light when you want to relax in the tub.
The Anatomy of a Perfect Bathroom Spotlight
When you start shopping, you’ll be hit with a wall of technical specifications. Don’t get intimidated. Only a few key factors truly matter for making a smart decision. The process of Choosing bathroom ceiling spotlights can feel overwhelming, but breaking it down by these key features makes it manageable.
First, Let’s Talk Safety: Understanding IP Ratings
Water and electricity are a dangerous mix, which is why bathroom light fixtures have a specific safety designation called an IP (Ingress Protection) rating. This two-digit number tells you how well the fixture is protected against solids (first digit) and liquids (second digit).
For bathrooms, you mainly need to pay attention to the second digit. Here’s a simple breakdown based on bathroom “zones”:
- Zone 0 (Inside the bath or shower tray): Requires highly specialized, low-voltage lights with a rating of IP67 or higher. These are fully submersible.
- Zone 1 (Directly above the bath or shower): This area gets hit with a lot of spray. You need a fixture rated at least IP65.
- Zone 2 (The area just outside the shower/bath and around the sink): This zone is prone to splashing. A rating of IP44 is the minimum requirement.
- Outside Zones (Everywhere else): While there’s no specific requirement, using IP44-rated fixtures throughout the bathroom is a smart move for durability and peace of mind.
Bottom line: Never install a light fixture in a bathroom unless it has an IP rating appropriate for its specific location. When in doubt, go for a higher rating.
Brightness Isn’t Magic, It’s Lumens
For decades, we bought bulbs based on watts. With hyper-efficient LEDs, wattage only tells you how much energy a bulb uses, not how bright it is. The real measure of brightness is lumens (lm).
So, how many lumens do you need?
- For general ambient lighting: Aim for around 20 lumens per square foot.
- For focused task lighting (at the vanity): You’ll want much more, closer to 70-80 lumens per square foot in that specific area.
A typical 50-square-foot bathroom would benefit from around 1,000 lumens of ambient light, plus an additional 700-800 lumens of task lighting at the mirror. A fixture like the SunRider LED Flush Mount, which offers a powerful 2400 lumens, could single-handedly provide the ambient light for a very large bathroom, which you could then supplement with targeted spotlights.
Setting the Mood: Color Temperature (Kelvins)
The color of white light, known as its color temperature, has a huge impact on the feel of your bathroom. It’s measured in Kelvins (K).
- Warm White (2700K – 3000K): This is the cozy, yellowish light reminiscent of a traditional incandescent bulb. It’s perfect for creating a relaxing, spa-like atmosphere, especially if your bathroom is primarily for unwinding.
- Neutral or Cool White (3500K – 4000K): A crisp, white light that’s more balanced. It’s a great all-around choice that feels clean and modern without being too stark. Many multi-option fixtures, like the 8PACK LED Flush Mount, allow you to select this middle ground.
- Daylight (5000K – 6500K): This is a very bright, blue-toned white that mimics natural daylight. It’s fantastic for task-oriented spaces because it renders colors accurately and promotes alertness. The Lepro 8.7 inch Flush Mount LED is a great example, offering a crisp 5000K light ideal for grooming.
Many modern LED fixtures are color-selectable, letting you choose the temperature during installation or even change it on the fly with a remote.
See Colors Clearly: Why Color Rendering Index (CRI) Matters
Have you ever put on makeup in a bathroom only to walk outside and realize the colors are completely wrong? That’s the fault of a low Color Rendering Index (CRI).
CRI is a scale from 0 to 100 that measures how accurately a light source reveals the true colors of objects. For a room where you match clothing and apply cosmetics, a high CRI is non-negotiable.
- CRI 80+: This is the standard for most residential lighting. It’s acceptable, but not ideal for a bathroom.
- CRI 90+: This is the gold standard. Light with a CRI of 90 or higher will show skin tones, makeup, and textiles in their true, natural hues. Always look for fixtures with a CRI of 90+ for your bathroom, especially around the vanity.
Choosing Your Weapon: Recessed, Surface-Mounted, and More
“Spotlight” is a broad term. In the context of a bathroom ceiling, it usually refers to one of these three popular styles.
The Sleek Choice: Recessed Spotlights (Downlights)
Recessed lights are installed directly into the ceiling, so the fixture itself is almost invisible. This creates an exceptionally clean, modern, and minimalist aesthetic.
- Pros: Unobtrusive design, provides excellent focused light, makes small rooms feel larger.
- Cons: Installation is more complex and requires cutting into the ceiling; less suitable for concrete ceilings.
- Varieties:
- Fixed: Shines straight down. Great for creating a grid for general ambient light.
- Adjustable (Gimbal): The inner light can be tilted. Perfect for accent lighting, like highlighting a tiled shower wall.
- Shower Trim: These are specially designed recessed lights that are wet-rated (IP65+) and sealed to protect against moisture, making them the only safe choice for inside a shower.
The Easy Install: Surface-Mounted Spotlights
As the name suggests, these fixtures mount directly onto the surface of the ceiling. They are bulkier than recessed lights but offer a simple installation process.
- Pros: Easy to install without major ceiling surgery, great for retrofitting or when ceiling joists get in the way.
- Cons: Visually more prominent, can make low ceilings feel even lower.
- When to Use Them: They are a fantastic problem-solver in older homes, basements with concrete ceilings, or any situation where recessed lighting isn’t feasible.
The Flexible Option: Track Lighting
Track lighting involves a rail (the track) that mounts to the ceiling, with individual light “heads” that can be positioned and aimed anywhere along it.
- Pros: Extremely versatile and adjustable, a single electrical point can power multiple lights, great for sloped ceilings or long, narrow bathrooms.
- Cons: The track and heads can look visually cluttered in a very small bathroom.
- Modern Twist: Forget the clunky tracks of the 1980s. Today’s options are sleek, with minimalist heads and finishes like matte black or brushed nickel that can complement any decor.
The Strategist’s Guide to Placement
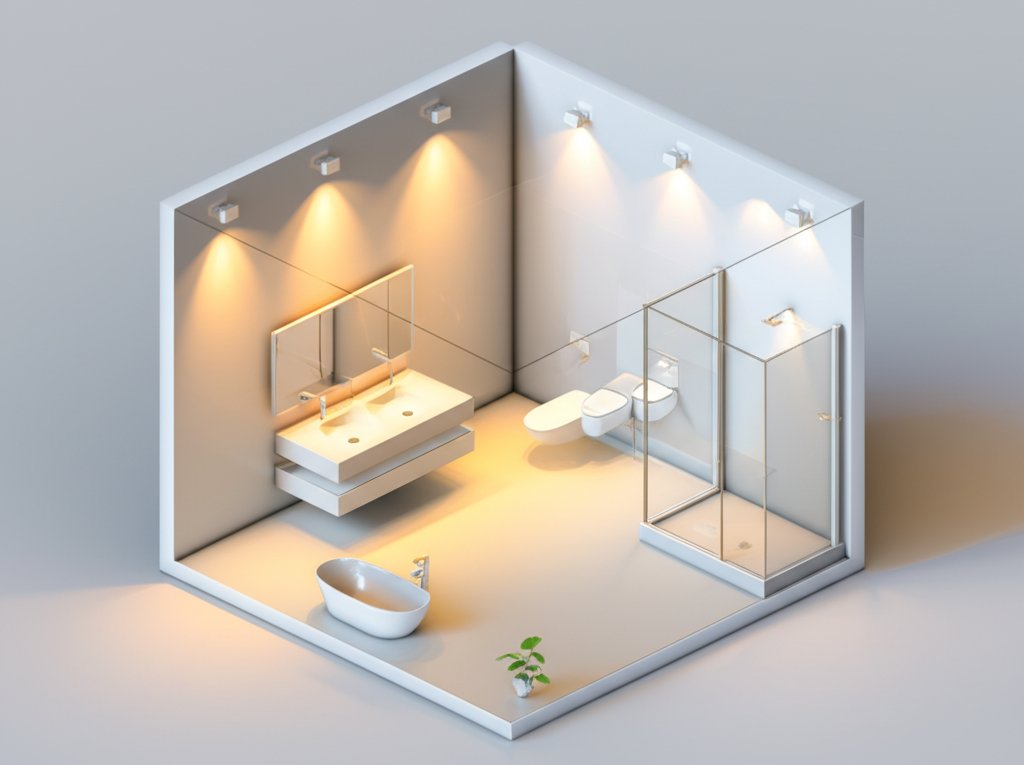
The best fixtures in the world will fail if they’re put in the wrong place. Proper placement eliminates shadows, maximizes functionality, and ensures a flattering glow.
Lighting the Vanity Like a Pro
The biggest mistake: Placing a single recessed spotlight directly over your head while you’re standing at the sink. This creates deep, unflattering shadows under your eyes, nose, and chin—a phenomenon makeup artists call “monster lighting.”
The professional solution:
- Best: Flank the mirror with vertical sconces at eye level. This provides even, cross-illumination with no shadows.
- Next Best: If you must use ceiling lights, place two recessed spotlights in the ceiling, positioned so they are slightly in front of you when you’re at the sink. They should be about 20-30 inches from the wall and spaced about 3 feet apart. This directs light towards your face, not down onto your head.
Illuminating the Shower and Tub
A dark shower is not just gloomy—it can be a safety hazard. A single, wet-rated recessed spotlight (IP65+) is a non-negotiable addition for any enclosed shower. Center it in the shower stall for the most even coverage. If you have a larger walk-in shower or a shower-tub combo, two fixtures will provide better, more luxurious illumination.
Creating General Ambient Light
For overall room lighting, you can create a simple grid of recessed spotlights. A good rule of thumb for spacing is to divide your ceiling height by two. For an 8-foot ceiling, you’d place your spotlights about 4 feet apart. For a small bathroom, a 2×2 grid of four spotlights is often sufficient. For a larger space, you might need a 2×3 grid.
Building Your Lighting System: Foundational Fixtures
While spotlights are masters of task and accent lighting, they work best when paired with a great source of ambient light. Based on extensive testing of over 20 fixtures, several stand out as excellent foundational choices to build your layered lighting plan around.
- Top Pick for Versatility (8PACK LED Flush Mount): This fixture is a fantastic starting point. With an impressive 1500 lumens and three selectable color temperatures (3000K, 4000K, 6500K), it allows you to dial in the perfect ambient mood for your space. Pair it with a couple of CRI 90+ recessed lights at the vanity for a complete solution.
- Upgrade Pick for Wet Areas (Lepro 8.7 inch Flush Mount): If you need a powerful, waterproof ambient light that can handle anything, this is it. It’s specifically designed for bathrooms, delivering 1500 lumens of bright 5000K daylight. Its robust build makes it an excellent choice as the primary light, which can then be supplemented by adjustable spotlights.
- Budget Pick for Smaller Spaces (Globe Electric 63357 2-Light Semi-Flush Mount): For smaller bathrooms or powder rooms, this stylish semi-flush mount provides a great look without breaking the bank. Its frosted glass shade diffuses light softly, creating a pleasant ambient base layer. You can then add a single spotlight over the shower to complete the functional setup.
Think of these fixtures as the workhorses providing the broad strokes of light, while your carefully placed spotlights act as the fine-tipped pens, adding detail and focus exactly where you need it.
Your Bathroom Lighting FAQ
Still have questions? You’re not alone. Here are crisp answers to the most common queries we hear.
Can I use regular LED spotlights in a bathroom?
No. You must use fixtures specifically rated for damp or wet locations. Check the product specifications for an IP rating (e.g., IP44, IP65) to ensure it’s safe for the intended zone in your bathroom.
How many spotlights do I need for my bathroom?
This depends on the room size, layout, and the lumen output of the lights you choose. A simple formula is to multiply your bathroom’s square footage by 50-75 to get your total target lumens. Then, divide that number by the lumen output of your chosen spotlight to estimate how many you’ll need for general lighting. Remember to add extra task lighting where needed.
What’s the best way to clean these fixtures?
Turn off the power at the circuit breaker first. For most recessed and surface-mounted fixtures, a simple wipe-down with a soft, damp cloth is all that’s needed. Avoid harsh chemical cleaners, as they can damage the finish or the lens.
What are the biggest installation mistakes to avoid?
The top three are: 1) Using a fixture without the correct IP rating for the location, 2) Placing lights directly over the vanity mirror, creating harsh shadows, and 3) Improper wiring. For safety and performance, we always recommend hiring a licensed electrician for installation.
How do I choose between warm white and cool white light?
Think about the primary use of the bathroom. If it’s a guest powder room or a master bath where relaxation is key, a warm white (3000K) creates a cozy, inviting feel. If it’s a busy family bathroom used for morning prep, a cooler, brighter daylight (4000K-5000K) is more functional and energizing.
Your Weekend Project: A Brighter, Better Bathroom
Upgrading your bathroom lighting is one of the highest-impact changes you can make. It’s a project that pays dividends every single day, from the moment you get ready in the morning to when you wind down at night.
Don’t just replace one bad fixture with a slightly less-bad one. Take this opportunity to design a system that truly works for you.
Here’s your action plan:
- Assess Your Needs: Stand in your bathroom and identify where you need light most. Where are the dark corners? Where do you perform tasks?
- Plan Your Layers: Decide what you’ll use for ambient light and where you’ll add focused spotlights for tasks.
- Choose the Right Specs: Armed with your knowledge of IP ratings, lumens, Kelvin, and CRI, select fixtures that meet the demands of the space.
- Map Your Placement: Sketch out where each light will go, paying close attention to vanity and shower placement to avoid common pitfalls.
- Install with Confidence: Whether you do it yourself or hire a professional, you can be sure that the result will be a bathroom that is safer, more functional, and infinitely more beautiful.

- DIY Bathroom Mirror Frame Designs on a Budget - October 12, 2026
- Creative Bathroom Mirror Border Ideas for Every Style and Budget - October 11, 2026
- Bathroom Finishes That Handle Moisture and Look Great - October 10, 2026










