That harsh, glaring overhead light in most bathrooms does the job, but it does nothing for the soul. The difference between a purely functional bathroom and a personal sanctuary often comes down to the lighting. By embracing concealed lighting for bathrooms, you shift the focus from the fixture to the effect, creating a seamless, architectural look that feels both luxurious and effortlessly modern. It’s the secret to washing walls with a soft glow, eliminating shadows at the vanity, and making a small space feel open and serene.
At a Glance: Your Takeaways
- What is concealed lighting? It’s any light source—recessed, cove, or integrated—that is hidden from direct view, allowing you to see the light’s effect without seeing the fixture itself.
- Why it’s perfect for bathrooms: The minimalist approach reduces visual clutter, and modern LED options are built with the necessary moisture ratings for safety and longevity.
- Key types to know: Recessed lights for powerful task and ambient light, cove lighting for a soft architectural glow, and integrated fixtures for the ultimate seamless look.
- Layering is crucial: Combining different types of concealed lighting for ambient, task, and accent purposes creates a balanced, flexible, and professional-grade result.
- Safety first: Understanding the difference between “damp-rated” and “wet-rated” fixtures is non-negotiable for any bathroom installation.
Beyond the Basics: What “Concealed Lighting” Really Means for Your Bathroom
At its core, concealed lighting is a design philosophy. Instead of choosing a decorative sconce or a prominent ceiling fixture, you’re strategically hiding the light sources to create an experience. The light becomes a building material, just like tile or stone.
This approach offers a powerful psychological benefit. With fixtures tucked away inside the ceiling or hidden within architectural details, the room feels cleaner, more spacious, and less cluttered. As experts at Lumens note, recessed fixtures “[add] a functional element to the bathroom without taking up too much room on the ceiling.” The result is a calm, spa-like atmosphere where light seems to emanate naturally from the room’s structure.
The Three Pillars of Concealed Bathroom Lighting

While the concept is simple, execution involves choosing the right tools. Concealed lighting for bathrooms generally falls into three main categories, each serving a distinct purpose.
Recessed Downlights: The Workhorse of Hidden Illumination
Recessed lights are the most common form of concealed lighting. These fixtures, often called can lights or pot lights, are mounted flush within the ceiling, providing clean downlighting. Modern LED versions have become incredibly versatile, with slim “canless” wafer designs that can fit into tight ceiling plenums, making them perfect for remodels.
They serve two primary functions:
- General (Ambient) Lighting: A grid of four or more recessed lights can evenly illuminate the entire bathroom, replacing a single, central fixture.
- Task Lighting: When placed strategically, they provide focused light exactly where you need it. A single wet-rated fixture is the standard for illuminating a shower, ensuring safety and visibility. For a detailed breakdown of options specifically for this critical zone, our comprehensive Smart LED Shower Lighting Guide covers everything from beam angles to smart controls.
The trim—the visible portion of the light—also plays a key role. A simple baffled trim reduces glare, while a reflector trim maximizes light output. Gimbal trims are adjustable, allowing you to direct the light toward a specific feature, like a tiled accent wall.
Cove and Valance Lighting: The Secret to a Soft, Architectural Glow
Cove lighting is the key to achieving that high-end, indirect glow. This technique involves placing linear LED strips inside a ledge, trough, or soffit near the ceiling. The light is aimed upward or outward, washing the ceiling or wall in a soft, even layer of illumination.
- Case Snippet: The Floating Effect. A homeowner wanted their new freestanding tub to be a focal point. Instead of a chandelier, their designer built a shallow dropped ceiling soffit directly above the tub’s footprint. An upward-facing, dimmable LED strip installed in the soffit created a “halo” of soft light on the main ceiling, making the space feel intimate and dramatic without a single visible fixture.
Similarly, LED strips can be hidden under floating vanities or along the toe-kick of cabinets to create a gentle, floor-level nightlight effect. This is pure mood lighting—functional yet incredibly atmospheric.
Integrated Lighting: The Sleekest Form of Concealment
Integrated lighting is the most seamless of all. Here, the light source is built directly into another bathroom element, effectively making the fixture disappear. This is where technology and design merge completely.
Common examples include:
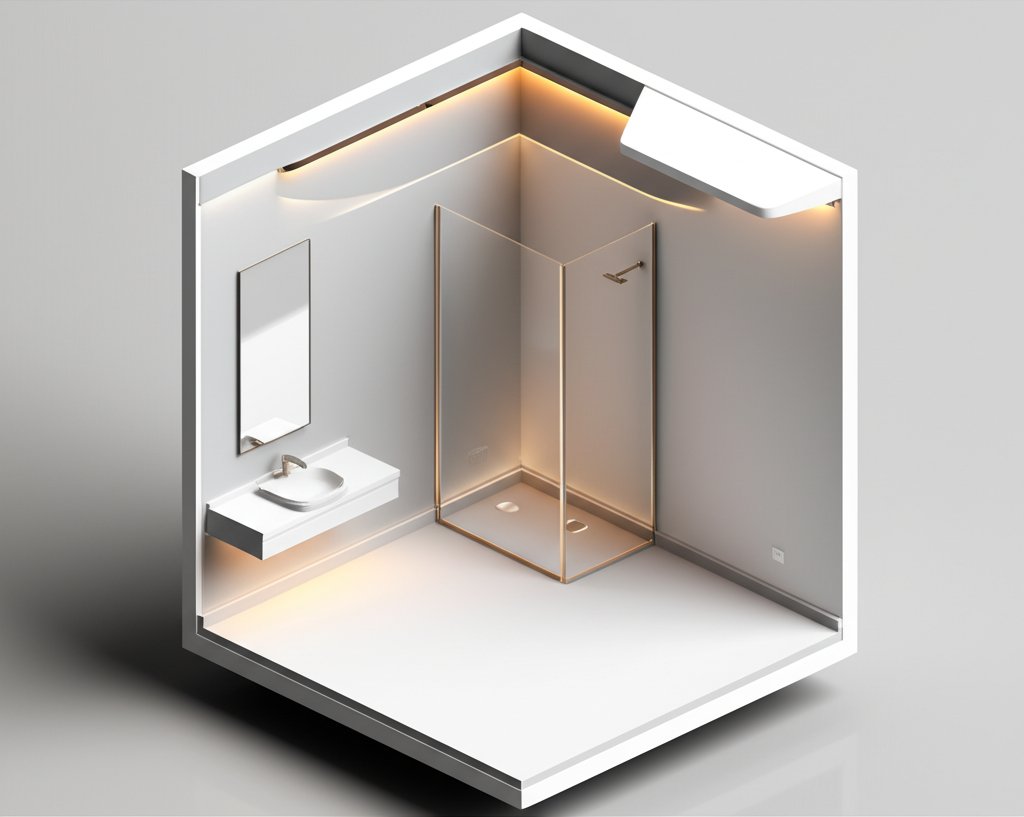
- Backlit Mirrors: LED strips are embedded behind the mirror glass, often along the edges, casting a shadow-free glow perfect for grooming tasks.
- Illuminated Medicine Cabinets: Vertical light bars are built into the sides of the cabinet, providing perfect cross-illumination for your face.
- Lit Shower Niches: Waterproof LED channels installed into the top of a recessed shower niche can turn a simple storage spot into a stunning architectural feature.
The primary benefit of integrated lighting is its minimalist purity. There is zero visual clutter, making it an ideal choice for modern, contemporary, and transitional bathroom designs.
Your Game Plan: Layering Concealed Lights for a Flawless Bathroom
A truly great lighting plan isn’t about picking one type of light; it’s about layering them to serve different needs. Think of it in three steps, moving from the general to the specific.
Step 1: Establish the Ambient Foundation
This is your base layer of light, the overall illumination that makes the room feel bright and usable. For most bathrooms, a simple grid of 3-inch or 4-inch recessed LED lights on a dimmer switch is a perfect solution. They provide clean, even coverage that recedes into the ceiling. Alternatively, for a softer effect, extensive cove lighting around the room’s perimeter can create a beautiful ambient glow.
Step 2: Pinpoint Your Task Zones
Next, identify where you perform specific tasks. The two most critical zones are the vanity and the shower.
- Vanity: Avoid placing a single recessed light directly over your head—this creates unflattering shadows. Instead, place two smaller recessed lights in the ceiling, positioned about 18-24 inches from the wall, aligned with the edges of your sink. This directs light towards you at a better angle. Better yet, pair this with integrated vertical lighting from a mirror or medicine cabinet for truly shadowless illumination.
- Shower: This zone requires a dedicated, wet-rated recessed light installed in the center of the shower ceiling. It’s a non-negotiable for safety and functionality.
Step 3: Add Accent and Mood Lighting
This final layer is all about creating mood and highlighting architectural features. It’s what elevates the room from functional to fantastic. These lights should always be on a separate dimmer switch for maximum control.
- Practical Example: A bathroom remodel uses four 4-inch recessed lights for ambient lighting (Layer 1). Two additional recessed lights are placed over the vanity, and one is in the shower (Layer 2). For the final touch, a waterproof LED strip is installed in the shower niche, and another is placed under the floating vanity (Layer 3). The result is a room that can be bright and functional for the morning rush or dim and atmospheric for a relaxing evening bath.
The Practical Playbook: Navigating a Concealed Lighting Project
Moving from idea to implementation requires a few key decisions.
Choosing the Right Hardware: A Quick Decision Guide
| Lighting Type | Best For | Relative Cost | Installation Difficulty |
|---|---|---|---|
| Recessed Lights | General ambient & focused task lighting (showers, vanities). | $$ | Moderate to High (Requires cutting holes, wiring). |
| Cove/Strip Lights | Soft ambient & accent lighting (mood, architectural details). | $-$$$ | Low to High (DIY strips vs. custom soffits). |
| Integrated Lights | Ultimate clean look & shadow-free task lighting (mirrors). | $$$ | Low (if part of a pre-made unit like a mirror). |
Decoding Safety Ratings: Damp vs. Wet Location
This is the most critical technical detail for bathroom lighting. The UL (Underwriters Laboratories) rating tells you where a fixture can be safely installed.
- Damp-Rated: These fixtures can withstand moisture, steam, and condensation but not direct contact with water. They are suitable for most of the bathroom, including the area above the vanity and general ceiling spaces outside the shower.
- Wet-Rated: These fixtures are built to withstand direct exposure to water. They are required for any light placed inside a shower or directly over a bathtub where it could be splashed by a showerhead. Think of it this way: damp-rated is for a steamy room; wet-rated can take a direct hit from a hose.
New Construction vs. Remodel: What You Need to Know
The type of recessed housing you need depends on your project.
- New Construction Housings: These have mounting bars designed to be attached directly to ceiling joists before the drywall goes up. They are the most secure option.
- Remodel Housings: These are designed to be installed from below through a hole in existing drywall. They use clips that spring out to hold the housing firmly against the ceiling.
- Canless Wafer Lights: A game-changer for remodels, these ultra-thin LED fixtures don’t require a bulky “can” housing at all. The driver is in a small remote box, and the light itself is held in place by spring clips, allowing installation in ceilings with very little clearance.
Quick Answers to Common Questions
Q: Can I put all my concealed bathroom lights on one dimmer?
You can, but it’s a missed opportunity. The power of a layered lighting plan is flexibility. By putting your ambient, task, and accent lights on separate dimmers, you can create different scenes. For example: full brightness on all layers for cleaning, just task lights for getting ready, and only the accent lights for a relaxing bath.
Q: What color temperature (Kelvin) is best for concealed bathroom lighting?
This is a matter of preference, but 3000K (soft white) is a popular, versatile choice that isn’t too yellow or too sterile. For vanity areas where color accuracy matters (e.g., for makeup), 3500K or 4000K (neutral white) is often recommended. Better yet, look for “dim-to-warm” or “tunable white” LED technology, which allows you to change the color temperature from bright and cool to dim and warm.
Q: Do I need an electrician to install concealed lighting for bathrooms?
For installing new recessed lights or hardwiring LED strips, yes, absolutely. Working with electricity in a wet environment is dangerous and should be left to a licensed professional who understands local building codes. While some plug-in integrated mirrors might be a DIY task, any work inside your walls or ceiling requires an expert.
Q: How many recessed lights do I need?
A general guideline is to space 4-inch lights about 4 feet apart and 6-inch lights about 6 feet apart for even ambient coverage. However, this depends heavily on your ceiling height, the light’s beam angle, and lumen output. It’s always best to draw a simple layout on paper first to visualize placement and ensure you don’t have dark spots or overpowering hot spots.
From Plan to Sanctuary
Ultimately, planning concealed lighting for bathrooms is about designing with light itself, not just picking out hardware. Start by standing in your bathroom and mapping out your daily routines and desired moods. Where do you need clarity? Where do you crave softness?
By layering recessed, cove, and integrated fixtures, you move beyond simple illumination. You create a space that adapts to your needs—bright and energizing in the morning, calm and restorative at night. It is the definitive way to merge invisible technology with visible comfort, transforming a utilitarian room into your own private retreat.

- DIY Bathroom Mirror Frame Designs on a Budget - October 12, 2026
- Creative Bathroom Mirror Border Ideas for Every Style and Budget - October 11, 2026
- Bathroom Finishes That Handle Moisture and Look Great - October 10, 2026










