You’re chopping vegetables, but your own shadow falls across the cutting board. You’re trying to read a recipe, but the light from the single overhead fixture seems miles away. If this sounds familiar, you’re not alone. The right led kitchen lights do more than just illuminate; they reinvent the heart of your home, making it more functional, beautiful, and energy-efficient.
Poor lighting makes a kitchen feel dated and frustrating. Great lighting makes it feel like a professional, welcoming space where you want to spend time. And today, thanks to the versatility and quality of LEDs, achieving that transformation is more accessible than ever.
Your Kitchen Lighting Upgrade: At a Glance
Here’s the core of what you need to know to get started, without the technical overload:
- Think in Layers, Not Lights: The secret to great kitchen lighting isn’t one giant, bright fixture. It’s about combining three layers: overall (ambient), focused (task), and decorative (accent) lighting.
- Color Temperature is Key: The “warmth” or “coolness” of your light (measured in Kelvins) sets the entire mood. We’ll show you the sweet spot for a kitchen that’s both inviting and functional.
- Lumens Trump Watts: Forget everything you know about judging a bulb by its wattage. For LEDs, lumens measure brightness, and it’s the only number that really matters for performance.
- Placement Over Power: Where you put your lights is more important than how bright they are. Good placement eliminates shadows on your countertops, sink, and stove—your primary work zones.
Before You Buy: Ditch the “One Big Light” Mindset
For decades, the standard for kitchen lighting was a single fluorescent box or a lonely flush-mount fixture plopped in the center of the ceiling. Its job was simple: blast the room with enough light to keep you from tripping. The result? A room that’s simultaneously glaring and full of shadows.
The Problem with Old-School Kitchen Lighting
Traditional incandescent and fluorescent lights create common problems you’ve probably just learned to live with:
- Work-Zone Shadows: A central fixture behind you casts a shadow over your countertops exactly where you need to see.
- Poor Color Accuracy: That old fluorescent tube can make your fresh salmon look dull and your green vegetables look washed out.
- Energy Hogs: Incandescent and halogen bulbs convert most of their energy into heat, not light, driving up your energy bill and warming up your kitchen.
- Constant Maintenance: Who enjoys climbing a ladder to replace a burnt-out bulb over the kitchen island every year?
The LED Advantage: Efficiency, Longevity, and Control
LED (Light Emitting Diode) technology solves all these problems. It’s not just a new type of bulb; it’s a fundamental shift in how we can design with light.
LEDs are more efficient, lasting up to 25 times longer than their incandescent cousins while using a fraction of the energy. They produce very little heat, and their compact size allows them to be integrated into strips, pucks, and ultra-thin fixtures—perfect for places old bulbs could never go. Most importantly, they give you unprecedented control over brightness and color.
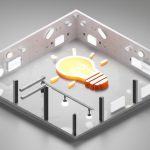
Layering Light Like a Pro: The Foundation of Good Kitchen Design
Professional lighting designers don’t think about fixtures first. They think in layers. Your kitchen needs a combination of lighting types working together to be truly effective. Imagine you’re painting a picture; you start with a base coat, add the main subjects, and then finish with highlights.
Layer 1: Ambient Lighting (The General Glow)
This is your base layer, the overall illumination that fills the room and allows you to navigate it safely. It sets the foundational brightness for the entire space. Ambient light is soft and diffuse, not harsh or directed.
- Best Fixtures for the Job: Recessed lights (also called can lights or downlights) are the modern champion here. Spaced correctly, they provide smooth, even coverage. Flush-mount or semi-flush-mount ceiling fixtures are also excellent choices, especially for kitchens with lower ceilings.
Layer 2: Task Lighting (The Workhorse)
This is the most critical layer in any kitchen. Task lighting provides focused, brighter light directly over your primary work areas: the countertops, the sink, and the stove. This is the light that banishes shadows from your cutting board and helps you see exactly what you’re doing.
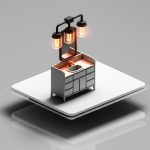
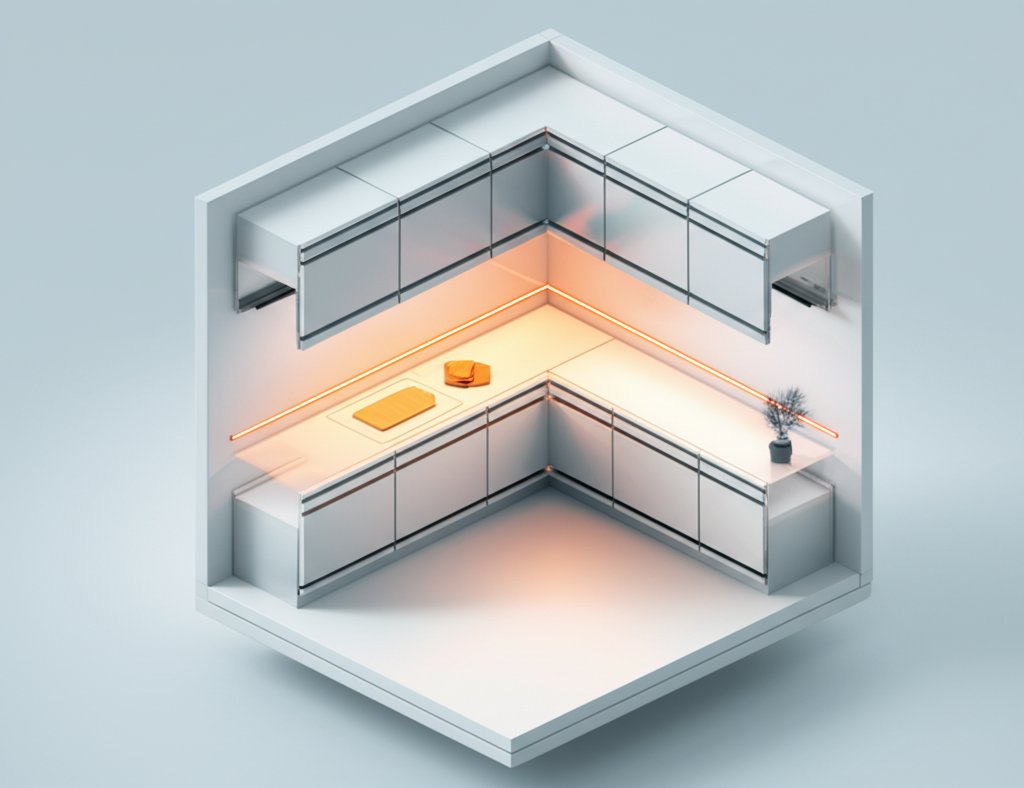
- Best Fixtures for the Job: Under-cabinet lighting is the undisputed hero of kitchen task lighting. It puts light right on your prep surfaces. Pendants hung over a kitchen island or peninsula are another fantastic option, providing both targeted light and a strong design statement.
Layer 3: Accent Lighting (The Wow Factor)
This is the fun part. Accent lighting adds depth, dimension, and personality. It’s used to highlight architectural features or decorative elements, like a textured backsplash, a collection of glassware inside a cabinet, or the space above your cabinetry.
- Best Fixtures for the Job: LED tape or strip lights are incredibly versatile for this. Use them for toe-kick lighting for a floating effect, inside glass-front cabinets to make them glow, or as uplighting on top of cabinets to make the ceiling feel higher.
Lumens, Kelvins, and CRI: The Only Specs You Need to Know
Walking down the lighting aisle can feel like studying for a physics exam. Don’t get overwhelmed. You only need to understand three simple concepts to choose the perfect LED lights for your kitchen.
Lumens (Brightness): How Much Light is Enough?
Lumens (lm) measure the total amount of visible light from a bulb or fixture. More lumens mean a brighter light. Forget watts—that just tells you how much energy the bulb uses.
For a kitchen, a good rule of thumb from the Illuminating Engineering Society (IES) is to aim for:
- Ambient Lighting: 20-50 lumens per square foot.
- Task Lighting: 70-150 lumens per square foot over your work areas.
Quick Example: For a 150-square-foot kitchen, you’d want a total of 3,000–7,500 lumens for your general ambient light. This could come from six recessed lights that produce 800 lumens each (6 x 800 = 4,800 lumens), which falls comfortably in that range.
Kelvin (Color Temperature): From Cozy Warmth to Crisp Daylight
Kelvin (K) measures the color appearance of the light. It’s what makes a light feel “warm” and cozy or “cool” and energizing. Think of it like a sunrise:
- 2700K: The warm, intimate glow of a traditional incandescent bulb. Great for a dining nook, but can feel a bit too yellow for food prep.
- 3000K (Warm White): A crisp yet still inviting white light. This is an excellent all-around choice for kitchens, balancing ambiance and clarity.
- 4000K (Cool White): A clean, neutral white light that feels bright and modern. It’s fantastic for task areas as it enhances focus. Many contemporary kitchens mix 4000K for tasks and 3000K for ambient.
- 5000K+ (Daylight): A very cool, bluish-white light similar to direct noon sunlight. It can feel sterile or clinical in a home setting, so use it with caution.
For most kitchens, sticking within the 3000K to 4000K range is a safe and effective bet.
CRI (Color Rendering Index): Seeing Your Food in True Color
CRI measures a light source’s ability to faithfully reveal the colors of objects. The scale goes up to 100 (the color rendering of natural sunlight). A low CRI light can make food look unappetizing—browns look muddy, and reds look pale.
For a kitchen, look for an LED with a CRI of 90 or higher. This ensures that your ripe red tomatoes look truly red and that you can easily tell if meat is properly cooked. It’s a small detail that makes a huge difference in daily use.
Choosing Your Fixtures: The Right Tool for Every Job
With your layers and specs in mind, you can now confidently pick your hardware.
Under-Cabinet Lighting: The Unsung Hero
If you make only one change to your kitchen lighting, this should be it. It’s the single most effective way to improve your kitchen’s functionality. When you begin to Explore kitchen LED lighting options, under-cabinet fixtures offer the biggest impact for the least effort.
- LED Strips/Tape: Provide a continuous, even line of light with no “hot spots” or dark areas. They are ultra-low profile and perfect for modern, seamless looks.
- LED Pucks: Offer pools of light. They work well for highlighting specific areas or for a more traditional look.
- Installation: You can choose from easy-to-install plug-in models or have a professional hardwire them for a cleaner, switch-controlled setup.
Recessed Lights (Can Lights): The Modern Standard for Ambient Light
Recessed lights are popular for a reason: they provide clean, widespread ambient light without cluttering your ceiling.
- Spacing is Crucial: A common mistake is spacing them too far apart, creating dark spots. A general rule is to divide your ceiling height by two. For an 8-foot ceiling, you’d space your lights about 4 feet apart.
- Trim Style: The visible ring around the light is the trim. Choose a style and color (white, black, metallic) that blends with your ceiling or complements your other fixtures.
Pendants and Chandeliers: Your Island’s Centerpiece
These are the jewelry of your kitchen. Pendants over an island or peninsula provide excellent task lighting while serving as a major style element.
- Scale and Quantity: Don’t choose pendants that are too small or too large for your island. For a long island, two or three smaller pendants often look better than one large one.
- Hanging Height: A good guideline is to hang them so the bottom is 30-36 inches above the countertop. This provides light without obstructing your view.
Flush & Semi-Flush Mounts: The Go-To for Lower Ceilings
If your kitchen ceiling is under 8 feet, or if recessed lighting isn’t an option, a sleek LED flush-mount or semi-flush-mount fixture is a perfect solution for providing ambient light without sacrificing headroom.
Your 4-Step Plan for a Flawless Lighting Upgrade
Feeling ready to take action? Follow this simple plan.
- Sketch Your Layout & Identify Work Zones: Draw a simple bird’s-eye view of your kitchen. Mark your key work areas: countertops, sink, stove, and island. Where do you need the most focused light?
- Assign a Layer to Each Zone: Decide where each of the three layers will go. Ambient light (recessed or flush mounts) will cover the whole ceiling. Task lighting (under-cabinet, pendants) goes directly over your work zones. Accent lighting (toe-kicks, in-cabinets) goes where you want to add flair.
- Choose Your Fixtures and Bulbs: Based on your plan, select the fixtures for each layer. For each one, decide on the target lumens and your preferred Kelvin temperature (e.g., 4000K under the cabinets, 3000K for the ambient ceiling lights).
- Don’t Forget the Dimmers!: This is non-negotiable. Installing dimmers on every layer of light gives you ultimate control. You can have bright, focused light for cooking and then dim everything down for a relaxing dinner or a late-night snack. Ensure your LED bulbs and fixtures are listed as “dimmable.”
Your Kitchen Lighting Questions, Answered
Let’s tackle some of the most common questions and concerns people have when upgrading to LED kitchen lights.
Can I just replace my old bulbs with LEDs?
Yes, for the most part. You can find LED bulbs that fit nearly any standard socket (A19, GU10, candelabra, etc.). However, if you have an old dimmer switch, it might not be compatible with the low power draw of LEDs, which can cause flickering. Upgrading to an LED-compatible dimmer is a simple fix.
How far apart should I space my recessed lights?
As mentioned, a good starting point is to space them roughly half the distance of your ceiling height (e.g., 4 feet apart for an 8-foot ceiling). It’s also important to place them so they illuminate the front of your cabinets and countertops, not the empty floor in the middle of the room. A typical placement is about 24-30 inches out from the wall.
Are smart LED lights worth it for the kitchen?
They can be! Smart lights that you can control from your phone or voice assistant offer amazing convenience. You can change brightness, color temperature, and even set schedules. Imagine saying “Hey Google, set kitchen to ‘cooking mode'” to get bright, cool task lighting, and later “set to ‘dinner mode'” for warm, dimmed ambient light.
What’s the biggest mistake people make with kitchen lighting?
Relying on a single, central ceiling fixture for everything. This is what we call the “shadow factory.” It guarantees that your body will block the light you need most when working at the counter. Layering your light, especially by adding under-cabinet task lighting, is the single best way to fix this.
Your Kitchen’s Bright Future Starts Now
Upgrading your kitchen lighting is one of the most impactful home improvement projects you can undertake. It changes the way your space looks, feels, and functions every single day.
You don’t have to do it all at once. Start with the layer that will make the biggest difference: add some simple LED under-cabinet lighting. From there, you can build out your plan for ambient and accent lighting.
By thinking in layers, paying attention to lumens and color temperature, and placing light where you actually need it, you can move beyond simple illumination. You can design an experience—creating a kitchen that’s not just brighter, but better in every way.

- LED Kitchen Lights That Transform Your Homes Cooking Space - July 5, 2026
- Basement Recessed Lighting Buyers Guide To Transform Dark Rooms - July 4, 2026
- Basement Light Fixture Types For Brighter, More Efficient Spaces - July 3, 2026