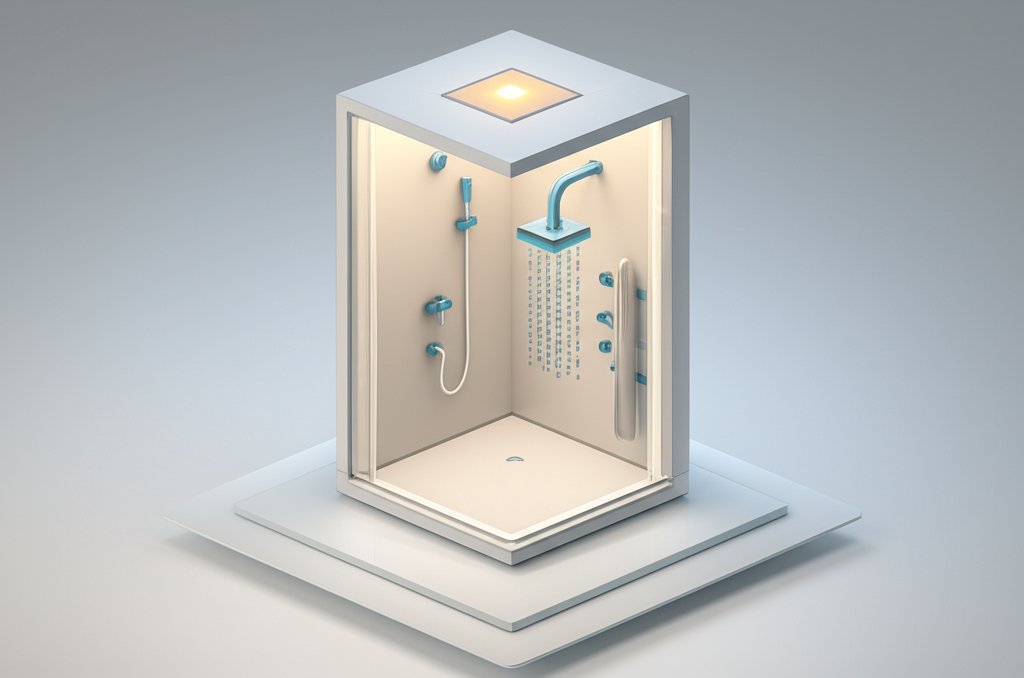
That beautiful, bright stream of light illuminating your shower can feel like a small slice of spa-like luxury. But getting recessed lighting in the shower wrong is one of the most common—and dangerous—mistakes in bathroom remodeling. It’s a project where a mix of water, electricity, and a misunderstanding of the rules can create a serious hazard. The good news is that installing it safely is straightforward once you understand the core principles of location ratings and electrical code.
This isn’t just about picking a fixture that looks good. It’s about ensuring every component, from the housing to the final seal against the ceiling, is designed to keep you safe.
At a Glance: Your Shower Lighting Safety Briefing
Before you cut any holes in the ceiling, here’s what you absolutely need to know to get this right:
- “Wet” vs. “Damp” Ratings: Understand the crucial difference. A light directly inside the shower footprint must be “wet-location rated,” not just “damp-rated.”
- The NEC “Shower Zone”: Electrical code defines a specific zone around your shower (3 feet horizontally and 8 feet vertically) where certain types of lights are strictly forbidden.
- GFCI Protection is Non-Negotiable: Any lighting circuit in a shower must be protected by a Ground Fault Circuit Interrupter (GFCI) for shock prevention.
- Modern Fixtures Simplify Safety: Canless LED “wafer” lights are often inherently sealed and wet-rated, making them a superior choice over older can-and-trim combinations.
- The Seal is Everything: Proper installation with a tight, waterproof gasket is just as important as the fixture’s rating itself.
Understanding “Wet” vs. “Damp” Ratings: It’s More Than Just a Little Steam
The single most important factor for shower lighting safety is the fixture’s location rating. Underwriters Laboratories (UL) and other testing agencies certify fixtures for specific environments. Getting this wrong is a direct violation of electrical code and a major safety risk.
- Damp Location Rated: These fixtures are built to withstand moisture and condensation but are not designed for direct contact with water. Think of the area of your bathroom ceiling outside the shower curtain or the light over a vanity.
- Wet Location Rated: These fixtures are engineered to prevent water intrusion from direct spray or saturation. They feature sealed housings, waterproof gaskets, and often a protective lens to shield all electrical components. This is the only acceptable rating for a light inside the shower stall.
According to the National Electrical Code (NEC), specifically Article 410.10(D), any luminaire located within the outside dimensions of the bathtub or shower stall up to 8 feet vertically from the tub’s edge or shower’s threshold must be marked for damp locations. Critically, if it’s subject to shower spray, it must be marked for wet locations.
The Expert’s Rule: Don’t split hairs. If the light is within the footprint of your shower curb or tub, install a wet-rated fixture. Period. This simple decision eliminates any ambiguity and guarantees you’ve chosen the safest option.
A Quick Case Snippet: A homeowner in Austin, TX, installed a sleek, damp-rated recessed light just inside their new walk-in shower. It looked perfect. Six months later, it started flickering. An electrician discovered that constant, high-humidity steam—not even direct spray—had caused condensation to seep past the insufficient gasket. The internal connections were corroded, creating a fire hazard. A wet-rated fixture, with its robust, sealed design, would have prevented the issue entirely.
The NEC Shower Zone: A 3-Foot Bubble of Caution

Beyond the wet/damp rating, the NEC defines a restricted zone around your shower and tub to prevent specific electrical dangers. This rule is designed to keep fixtures that could easily be damaged or pose a shock risk far away from water.
Imagine a zone that extends 3 feet horizontally and 8 feet vertically from the top edge of your bathtub or the threshold of your shower stall.
Within this zone, the following types of light fixtures are strictly prohibited:
- Pendant lights
- Lighting track (and track heads)
- Fixtures suspended by chains or cords
- Ceiling fans (even light-equipped ones)
The logic is clear: these fixtures have exposed parts or hanging elements that could be touched or damaged, creating a direct path for electricity in a wet environment.
So, what is allowed in this zone? - Recessed luminaires with a proper wet-location rating.
- Surface-mounted luminaires (like a sealed ceiling light) that are also wet-location rated.
These fixtures are permitted because their design is inherently safer—they are sealed, fixed in place, and have no dangling components. Choosing the right type of fixture is the first step in creating a smart, efficient, and safe bathroom. For a complete overview of the latest technology and design ideas, see Your Guide to Smart Shower Lights.
Why a GFCI Is Your Most Important Safety Net
Even with the perfect wet-rated fixture, one final layer of protection is essential: the Ground Fault Circuit Interrupter (GFCI).
A GFCI is a fast-acting device that monitors the flow of electricity in a circuit. If it detects a tiny imbalance—like current flowing through water or a person instead of back through the neutral wire—it instantly shuts off the power, preventing a potentially lethal shock. Think of it as an airbag for your electrical system.
While local codes can vary, it is an undisputed best practice to have any circuit powering lights, fans, or outlets in a bathroom protected by a GFCI. This protection can be located in two places:
- At the Breaker: A GFCI circuit breaker in your main electrical panel protects everything on that circuit.
- At an Outlet: A GFCI outlet can be wired to protect other outlets and fixtures “downstream” from it on the same circuit.
Before you begin your installation, test your circuit to ensure it has GFCI protection. If it doesn’t, adding it is the most important safety upgrade you can make.
Your Recessed Lighting Playbook: From Box to Brilliance

With the safety theory covered, let’s get practical. Here’s how to select and install your shower light correctly.
Step 1: Choose the Right Fixture – Can vs. Canless
For decades, recessed lighting meant a metal “can” housing nailed to the joists and a separate trim piece. Today, a better option exists for most shower applications.
| Feature | Traditional Can Light | Modern Canless (Wafer) Light | Expert’s Take |
|---|---|---|---|
| Design | Separate housing & trim. Trim must be wet-rated. | All-in-one sealed LED unit with remote junction box. | Canless is simpler and safer. The entire fixture is often wet-rated out of the box. |
| Installation | Bulky housing requires clearance around joists. | Ultra-thin profile (about ½ inch) fits almost anywhere. | Canless is far easier for retrofits. No need to worry about can placement. |
| Air Sealing | Requires a specific “Air-Tite” rated housing to be efficient. | Inherently air-tight due to its design. | Canless wins for energy efficiency. It helps maintain your home’s thermal seal. |
| IC Rating | Must be “IC-rated” to touch insulation. | Most are IC-rated by default. | Both have IC-rated options, but it’s standard with quality canless fixtures. |
| For a shower, a canless LED wafer light is almost always the superior choice. It’s easier to install, more energy-efficient, and its integrated, sealed design provides a more reliable waterproof barrier. |
Step 2: The Pre-Installation Safety Checklist
Before a single wire is touched, run through this list.
- [ ] Kill the Power: Shut off the corresponding breaker in your electrical panel. Post a note so no one turns it back on.
- [ ] Verify Power is Off: Use a non-contact voltage tester at the switch and the existing fixture location to confirm there is no live current.
- [ ] Check the Box: Confirm your new fixture is clearly marked “Suitable for Wet Locations.” If it’s not on the box or the fixture itself, return it.
- [ ] Confirm GFCI Protection: Use a circuit tester at a nearby outlet on the same circuit to confirm it’s GFCI-protected.
- [ ] Plan Your Location: Check the ceiling cavity for obstructions like joists, plumbing pipes, or HVAC ducts before cutting your hole.
Step 3: Key Installation Details That Matter
A wet-rated fixture is only effective if it’s installed to create a perfect seal.
- Cut a Precise Hole: Use the template provided with your light. A hole that is too large will compromise the seal of the gasket. A sloppy cut creates gaps for moisture to enter.
- Seat the Gasket Properly: Most wafer lights and wet-rated trims come with a foam or silicone gasket. This must sit flush and be compressed evenly against the ceiling surface (drywall) to create a watertight barrier.
- Secure All Connections: Make all wire connections inside the provided junction box using properly sized wire nuts. Ensure the junction box cover is securely closed. No exposed wires or connections should be left in the ceiling cavity.
- Lock the Fixture in Place: Engage the spring-loaded clips to pull the fixture tight against the ceiling. There should be no visible gap between the fixture’s flange and the ceiling.
Common Questions About Recessed Lighting in the Shower
Here are quick answers to the most frequent misconceptions we encounter.
Q: Can I put a regular recessed light in my shower if I just use a waterproof bulb?
No. This is a dangerous misunderstanding. The hazard isn’t the bulb getting wet; it’s water or steam reaching the electrical socket and wiring inside the fixture housing. The entire fixture assembly—from the internal wiring to the trim that meets the ceiling—must be rated for wet locations.
Q: Do I really need a wet-rated light if my shower ceiling is 9 feet tall?
Yes. The NEC defines the restricted zone up to 8 feet, but steam and condensation don’t stop at an invisible line. They rise and collect on the ceiling. Any fixture installed directly within the shower’s footprint, regardless of height, should be wet-rated for long-term safety and durability.
Q: What is an IC rating and does it matter for a shower light?
IC stands for “Insulation Contact.” An IC-rated fixture is certified to be in direct contact with ceiling insulation without being a fire hazard. This is crucial for maintaining your home’s energy efficiency. Most modern LED wafer lights are IC-rated, making them an excellent choice for insulated ceilings. A Non-IC fixture requires a minimum 3-inch clearance from insulation.
Q: My recessed light trim has a glass lens. Does that automatically make it wet-rated?
Not necessarily. While a lens is a common feature of wet-rated trims, it’s the combination of the lens, a robust gasket, and sealed construction that earns the official “Wet Location” rating from a body like UL or ETL. Always look for that specific certification on the product’s label or spec sheet.
Your Final Safety Check: Go or No-Go?
Before you flip that breaker back on, ask yourself these four questions. If the answer to any is “no” or “I’m not sure,” it’s time to pause and consult a licensed electrician.
- Is the fixture explicitly marked “Suitable for Wet Locations”?
- (If no, stop. You have the wrong product.)
- Is it a permitted fixture type (recessed or approved surface-mount)?
- (If it’s a pendant or track light inside the shower zone, stop.)
- Is the circuit protected by a functional GFCI?
- (If no, this must be installed before proceeding.)
- Am I confident it will be installed with a perfect, watertight seal against the ceiling?
- (If you have any doubt, call a professional.)
Getting your recessed lighting in the shower right is the finishing touch on a safe, functional, and beautiful bathroom. By respecting the electrical code and prioritizing the right materials, you ensure that your personal oasis is as secure as it is stunning.

- DIY Bathroom Mirror Frame Designs on a Budget - October 12, 2026
- Creative Bathroom Mirror Border Ideas for Every Style and Budget - October 11, 2026
- Bathroom Finishes That Handle Moisture and Look Great - October 10, 2026










