
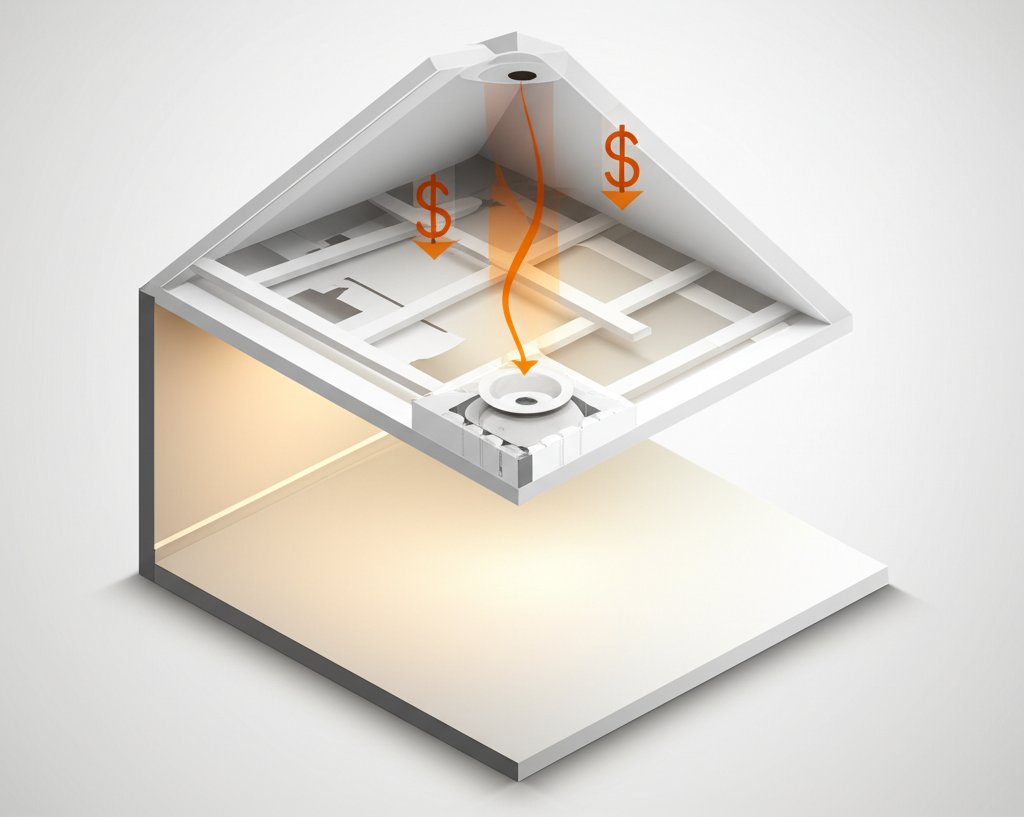
That subtle draft you feel indoors might not be coming from a window. It could be flowing directly through your recessed lighting casing, turning each fixture into a small, open chimney to your attic. These unsealed housings create significant energy leaks, letting your conditioned air escape while inviting in dust, moisture, and pests. Solving this requires more than just a new bulb; it demands a dedicated insulation cover.
These covers create an essential barrier around the fixture, transforming a point of energy loss into a sealed, safe, and efficient part of your ceiling. Getting it right boosts home comfort, lowers utility bills, and critically, prevents fire hazards.
At a Glance: Key Takeaways
- Identify Your Fixture Type: Determine if your existing recessed lighting casing is IC-rated (Insulation Contact) or Non-IC. This is the single most important factor for safety.
- Prioritize Certified Safety: Always choose covers that are fire-rated and tested to standards like UL 1598 to ensure they can safely handle heat and direct contact with insulation.
- Seal for Maximum Savings: An airtight cover can reduce heat loss and air leakage through a single fixture by up to 90%, leading to tangible savings on your heating and cooling bills.
- Choose the Right Material: Modern covers are typically made from advanced polymers or metal. Polymers are often more flexible and easier to install, while both must be flame-retardant.
- Think Beyond Energy: A well-sealed casing cover also improves indoor air quality by blocking attic dust and acts as an effective sound barrier, reducing noise from floors above.
Why Your Recessed Light Casing Is a Hidden Energy Drain
Most older homes with recessed lights have a thermal boundary problem. The ceiling is supposed to be a continuous layer of insulation, separating your living space from the unconditioned attic or crawlspace. But every non-airtight recessed light casing punches a hole right through that barrier.
Think of it like having a dozen small, open windows in your ceiling. In winter, warm air rises and escapes through the gaps in and around the metal housing—a phenomenon known as the “chimney effect.” In summer, hot, humid attic air pushes down into your air-conditioned rooms. This constant air exchange forces your HVAC system to work harder, wasting energy and money.
While a complete fixture modernization is a great long-term solution, which our Recessed light upgrade guide details, installing a dedicated cover is a powerful and targeted first step. It directly addresses the air leakage and insulation gaps that are costing you money and compromising your comfort.
The Critical Difference: IC-Rated vs. Non-IC Rated Casings
Before you can choose a cover, you must understand what kind of recessed light casing you have. This isn’t just about efficiency; it’s a fundamental safety issue.
What Is an IC-Rated Fixture?
“IC” stands for “Insulation Contact.” An IC-rated housing is specifically designed with a double-wall construction or features that prevent the exterior from getting hot enough to ignite building materials. Because of this, insulation can be packed directly against and over the fixture without creating a fire hazard. You can typically identify them by a label inside the can.
The Dangers of Non-IC Rated Fixtures
Non-IC rated housings are older designs that lack these safety features. They get hot during operation and require at least three inches of clearance from any insulation on all sides. If insulation—especially flammable types like blown-in cellulose or spray foam—comes into contact with a hot Non-IC can, it can smolder and ignite.
How a Cover Solves the Non-IC Dilemma
This is where insulation covers prove their worth as a safety device. By placing a certified, fire-retardant cover over a Non-IC fixture, you create a permanent, non-combustible air gap. This protective dome allows you to safely insulate over the cover, sealing the air leaks without risking contact between the hot fixture and the insulation. You effectively upgrade the safety of your existing casing.
Selecting the Right Insulation Cover: A Practical Checklist
Choosing a cover isn’t as simple as matching the diameter of your can light. The right product balances safety certifications, material science, and ease of installation. Use this checklist to make an informed decision.
1. Verify Fire Safety and Thermal Certifications
This is non-negotiable. A proper cover must be tested and listed for its intended purpose. Look for these key certifications:
- UL 1598: This standard tests for thermal performance, ensuring the cover won’t trap excessive heat and cause the light fixture to overheat, which could lead to premature bulb failure or a fire risk.
- UL 263 / ASTM E119: These standards test for fire resistance, indicating how long the cover can withstand fire. A product like the FF109X cover, for example, provides up to 120 minutes of fire protection, helping maintain the fire barrier of your ceiling.
- IEC 60598-1: An international standard that also covers thermal and safety requirements for luminaires.
A cover without these certifications is a gamble you shouldn’t take.
2. Compare Cover Materials: Polymer vs. Metal
| Material | Pros | Cons | Best For |
|---|---|---|---|
| High-Quality Polymer | Lightweight, flexible (great for tight attic spaces), often tool-free installation, excellent airtightness. | May have specific wattage/heat limitations. | DIY-friendly projects, attics with obstructions, and sealing around low-profile LED retrofits. |
| Metal (Steel/Aluminum) | Extremely durable, high heat resistance, rigid structure. | Can be heavier, may require tools for assembly, can be less forgiving in tight spaces. | Commercial applications or situations requiring maximum physical durability. |
| For most residential applications, a high-quality, flame-retardant polymer cover offers the best combination of safety, performance, and ease of use. |
3. Ensure an Airtight Seal
A cover that isn’t airtight is only doing half the job. The primary goal of energy efficiency is to stop air leakage. Look for designs that feature:
- A wide, flat flange at the base that allows for a solid bead of acoustic sealant or fire-rated caulk.
- Integrated gaskets or foam seals around the rim.
- Built-in wire management that allows you to run the electrical cable through a sealed port.
Case Snippet: A homeowner in Minnesota was struggling with ice dams every winter. An energy audit revealed massive heat loss through 15 non-IC recessed lights in their top-floor ceiling. After installing airtight, IC-rated covers and adding insulation, they not only stopped the ice dams but also reported a 20% reduction in their winter heating bills. The covers paid for themselves in just over one season.
4. Check Compatibility with Your Fixture and Insulation
Don’t get caught with a cover that doesn’t fit. Before buying, confirm:
- Dimensions: Measure the diameter and height of your recessed lighting casing. Ensure the cover provides enough clearance, especially for older, taller can lights.
- Wattage Rating: The cover will specify the maximum wattage it’s designed to handle (e.g., safe for use with up to a 13.5W LED). This is crucial for preventing heat buildup.
- Insulation Type: Most modern covers, like the FF130R, are compatible with all common insulation types, including blown-in fiberglass/cellulose and even spray polyurethane foam (SPF). Always verify this on the product’s spec sheet.
From Box to Ceiling: Installation Best Practices

Installing a recessed light cover is a straightforward project, but following the correct steps is crucial for both safety and effectiveness.
A Simple Step-by-Step Installation Guide
- Safety First: Kill the Power. Go to your circuit breaker and turn off the power to the lights you’ll be working on. Use a voltage tester to confirm the power is off at the fixture.
- Access the Fixture. This work is done in the attic or the space above the ceiling. Wear appropriate safety gear, including a dust mask, gloves, and safety glasses.
- Clear the Area. Carefully pull back any existing insulation from around the recessed light casing, observing the required 3-inch clearance if it’s a Non-IC fixture.
- Route the Wires. If not already done, carefully thread the fixture’s electrical wire through the designated sealed opening on the cover.
- Place the Cover. Seat the cover firmly over the entire recessed lighting casing, ensuring it sits flat against the drywall or ceiling joist.
- Seal the Base. This is the most critical step for energy efficiency. Apply a continuous bead of fire-rated caulk or acoustic sealant around the entire perimeter where the cover’s flange meets the drywall. This creates the all-important airtight seal.
- Insulate. You can now safely push insulation back against the sides of the cover and bury it completely. Your thermal barrier is now complete and continuous.
Common Installation Pitfalls to Avoid
- Forgetting to Seal the Base: Skipping the caulk means you’ve installed a fire-safe box but haven’t stopped the air leaks, defeating a primary purpose of the project.
- Choosing the Wrong Size: A cover that’s too small won’t fit over the fixture, and one that’s too large can be difficult to seal and position correctly between joists. Measure twice, buy once.
- Pinching Wires: Ensure the electrical cable is not pinched or damaged when placing the cover. Use the provided cable knockouts or grommets.
Quick Answers to Common Casing Cover Questions
Can’t I just build a box out of wood or drywall to cover my lights?
Absolutely not. Using flammable materials like wood, plywood, or even standard drywall to build a box around a hot light fixture is a serious fire hazard and violates building codes. Always use a commercially available, fire-rated product tested for this specific application.
Do I really need a cover for my IC-rated lights?
While not strictly required for fire safety (since IC-rated cans can touch insulation), adding an airtight cover is still highly recommended for energy efficiency. Most IC-rated cans are not inherently airtight. A cover adds that final seal, maximizing your energy savings and further improving sound insulation.
Are these covers compatible with modern LED retrofit kits?
Yes, most are. In fact, they’re a perfect match. Low-profile LED inserts generate far less heat than old incandescent bulbs, and specialized covers like the FF130R are designed specifically for them. Just confirm the height and wattage compatibility.
How much can I really save?
Studies by building science experts have shown that a single unsealed 6-inch recessed light can leak about $15-30 worth of energy per year, depending on your climate and utility rates. For a home with 20 such lights, that’s up to $600 in annual waste. The covers provide a fast ROI.
Do these covers help with soundproofing?
Yes, significantly. The same properties that make a cover an effective thermal and air barrier also make it an acoustic one. The sealed dome disrupts sound waves, reducing noise transmission between floors. It’s a noticeable benefit in multi-story homes, home theaters, or quiet offices.
Your Next Step: Seal, Insulate, and Save
Upgrading your recessed lighting casing with a proper insulation cover isn’t just a minor tweak—it’s a fundamental improvement to your home’s safety, comfort, and energy performance. It closes a major loophole in your home’s building envelope, delivering immediate and lasting benefits.
Your path forward is clear:
- Inspect Your Attic: Safely identify whether your existing recessed light cans are IC or Non-IC rated.
- Measure Your Fixtures: Note the diameter and height of the casings to ensure you purchase a compatible cover.
- Invest in Certified Covers: Use the checklist above to select a fire-rated, airtight cover that meets safety standards.
By taking this simple, proactive step, you’re not just installing a piece of plastic or metal; you’re investing in a safer, quieter, and more efficient home.

- Bathroom Materials Selection Offers Quality Fixtures for Home Design Projects - October 9, 2026
- Best Cosmetic Storage Containers For a Tidy Vanity - October 8, 2026
- Best Makeup Storage Boxes to Keep Your Vanity Spotless - October 7, 2026










