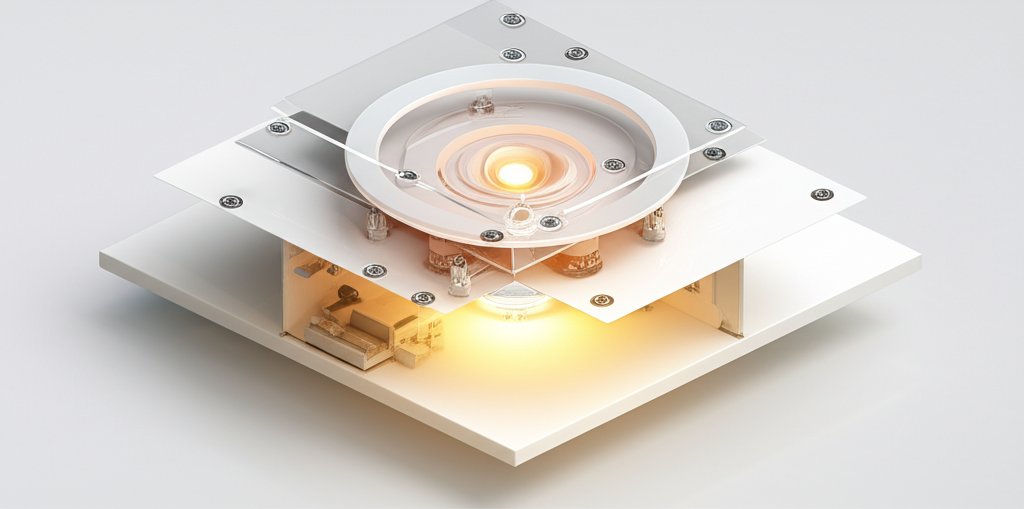
Walk into any thoughtfully designed modern home, and you’ll notice the lighting feels intentional, clean, and seamlessly integrated. Much of that magic comes from recessed lights, but the beautiful trim and the warm glow you see are just the finishing touches. The real workhorse is hidden inside your ceiling: the recessed lighting housings. These essential components are the structural and electrical foundation for every can light, determining not just how it looks but how it performs and, most importantly, how safely it operates.
Choosing the right housing isn’t just a technicality for your contractor—it’s the single most important decision you’ll make for your recessed lighting project. It dictates what kind of bulbs you can use, how energy-efficient your home will be, and whether your installation will meet critical safety codes. Get it right, and you’re setting the stage for decades of flawless, beautiful light.
At a Glance: Key Housing Decisions
Feeling overwhelmed? Don’t be. Every recessed lighting project boils down to a few core choices. Here’s what you need to know to get started:
- Installation Type: Are you working with an open ceiling (new construction) or cutting into an existing one (remodel)? This is your first and most important fork in the road.
- Insulation Safety: Will the housing touch your ceiling insulation? If yes, you absolutely need an IC-rated (Insulation Contact) housing. Using the wrong type is a serious fire hazard.
- Energy Efficiency: To prevent drafts and save on energy bills, look for Airtight (AT) housings. Many building codes now require them.
- Size and Purpose: The diameter of the housing (typically 4, 5, or 6 inches) influences the light spread and trim styles available, defining its role as accent, task, or general lighting.
- Voltage: Most projects use standard line voltage (120V) housings. Low voltage (12V) options require a transformer but offer more precise light control for accenting artwork or architectural features.
What Exactly Is a Recessed Lighting Housing?
Think of a recessed lighting housing as the chassis of a car. You don’t see it when the car is driving down the road, but it provides the essential structure, holds the engine, and connects the wheels. Similarly, the housing (also called a “can” or “rough-in”) is the metal canister that gets installed inside your ceiling joists.
It serves three critical functions:
- Structural Support: It securely holds the light trim and the bulb (or integrated LED module) in place, flush with your ceiling.
- Electrical Connection: It contains the socket, junction box, and all the wiring needed to safely connect to your home’s power supply.
- Heat Dissipation: It acts as a protective barrier, managing the heat generated by the light source and preventing it from coming into contact with combustible materials like wood joists and insulation.
Without the correct housing, you have no light. More importantly, you have a potential safety risk. That’s why understanding the different types is not just smart—it’s non-negotiable.
New Construction vs. Remodel: Your First Major Choice
Before you look at a single feature, you must determine which of these two categories you fall into. It has nothing to do with how old your house is and everything to do with whether your ceiling is open or closed.
New Construction Housings: For Open Ceilings
If you can see the wooden ceiling joists—either in a brand-new build, a major renovation where the drywall is torn out, or an unfinished basement—you need new construction housings.
These are designed to be installed before the ceiling drywall goes up. They feature long mounting brackets, called “hanger bars” or “bar hangers,” that extend to fasten directly onto the joists with nails or screws. This makes them incredibly secure and easy to position perfectly. Because they are anchored to the home’s structure, they are the most stable and robust option available.
Choose New Construction if:
- You’re building a new home or an addition.
- You’re doing a gut renovation and the ceiling is open.
- You have easy access to the ceiling joists from an attic above.
Remodel Housings: For Existing Ceilings
What if your ceiling is already finished and you have no desire to tear it down? That’s where remodel housings come in. These are engineered for installation from below.
The process involves cutting a precise hole in the existing drywall. The remodel housing, which is more compact and lacks the long hanger bars, is then pushed up through the hole. A clever system of retaining clips springs out and clamps down on the back of the drywall, holding the housing firmly in place. It’s a brilliant solution that makes adding recessed lighting to a finished room possible without major demolition.
Choose Remodel if:
- You’re adding lights to a finished room.
- You cannot access the ceiling from an attic.
- You want to upgrade existing fixtures with minimal disruption.
The Critical Safety Rating: IC vs. Non-IC
Once you’ve settled on new construction or remodel, your next decision is the most important for safety and code compliance: the insulation rating. This determines whether the housing can safely be in direct contact with your home’s insulation.
IC-Rated: The Standard for Insulated Ceilings
IC-rated stands for “Insulation Contact.” These housings are specifically designed and tested to be safely buried in or covered by ceiling insulation. They are built as a “box-in-a-box,” with an outer can that keeps the hot inner can from ever touching the combustible insulation.
You must use an IC-rated housing if:
- Your recessed lights will be installed in a ceiling that has insulation.
- This applies to most top-floor ceilings (with an attic above) and any insulated floor between levels.
Using a non-IC housing in contact with insulation can cause a massive buildup of heat, creating a serious fire hazard. Modern IC-rated housings are the default choice for most residential projects because they are safer and allow for proper insulation, which is key to your home’s energy efficiency.
Non-IC-Rated: For Uninsulated Spaces Only
Non-IC-rated housings are an older design that requires a minimum clearance—typically 3 inches on all sides and the top—from any insulation. They rely on open air to dissipate heat.
While they are sometimes slightly cheaper, their use is limited. They are only suitable for ceilings where there is no insulation and there never will be. For example, the ceiling between a first and second floor in some climates might not be insulated, or you might be installing lights in a soffit or drop ceiling with plenty of air circulation.
The Golden Rule: You can always use an IC-rated housing in a non-insulated space, but you can never use a non-IC-rated housing in an insulated space. When in doubt, always choose IC-rated.
Don’t Forget “Airtight” (AT) for Energy Savings
A related and equally important designation is Airtight (AT). An airtight housing is sealed to prevent conditioned air from leaking from your living space into the unconditioned attic or ceiling cavity. Think of a non-AT housing as a tiny chimney, constantly letting your heating or air conditioning escape.
This air leakage wastes a significant amount of energy and can contribute to moisture problems. For this reason, many local and national building codes now require recessed lighting installed in ceilings that border unconditioned space to be both IC-rated and Airtight. You’ll often see housings labeled as “ICAT” to signify they meet both standards.
Sizing, Voltage, and Other Technical Specs

With the big safety and installation decisions made, you can now focus on the details that shape the quality and function of your light.
Housing Size: Matching the Can to the Job
Recessed housings come in several standard diameters, with the most common being 4-inch, 5-inch, and 6-inch.
- 6-Inch Housings: The long-time workhorse for general, ambient illumination. They cast a wide pool of light and are perfect for lighting up entire rooms like kitchens, basements, and living areas.
- 5-Inch Housings: A slightly more modern alternative to the 6-inch, offering a good balance of broad coverage and a less obtrusive appearance. They are also excellent for general lighting.
- 4-Inch Housings: The go-to size for task and accent lighting. Their narrower beam is ideal for highlighting artwork, washing a fireplace wall with light, or providing focused light over a kitchen counter or reading nook.
- 3-Inch and Smaller: These are primarily for specialized accent lighting—pinpointing small objects or creating dramatic effects.
Line Voltage vs. Low Voltage
This choice determines the type of power running directly to the bulb.
- Line Voltage (120V): This is the standard voltage in U.S. homes. These housings are simpler, less expensive, and connect directly to your home’s wiring. They are perfect for general lighting with standard bulbs like A19, PAR, and BR types, as well as many integrated LED trims.
- Low Voltage (12V): These housings have a built-in transformer that “steps down” the 120V power to 12V. They are typically used with bulbs like MR16s, which are known for their crisp, well-defined light beams. While more complex and expensive, low voltage systems offer superior optical control, making them the professional’s choice for accent lighting where precision matters.
Specialty Housings for Tricky Ceilings
Sometimes, a standard housing just won’t fit. That’s why manufacturers offer a range of problem-solving options. Navigating the world of fixtures can be complex, but it’s worth the time when Exploring light housing solutions to find the perfect fit for your unique space.
Shallow Ceiling Housings
What if you have a duct, pipe, or a low-clearance ceiling joist right where you want to put a light? Standard cans are typically 6 to 7 inches tall, but shallow ceiling housings (or “pancake” housings) can be as little as 3.5 inches tall, allowing you to install recessed lighting where it was previously impossible.
Sloped Ceiling Housings
Installing a standard housing in a vaulted or angled ceiling will cause the light to shine out at an odd angle. Sloped ceiling housings are designed with an adjustable socket and an angled aperture to ensure the light beam is directed straight down, regardless of the ceiling’s pitch. This provides proper illumination and prevents uncomfortable glare.
Common Questions, Answered
Let’s clear up a few of the most frequent points of confusion about recessed lighting housings.
What’s the difference between a “housing” and a “trim”?
The housing is the functional fixture inside the ceiling—the can, the socket, and the junction box. The trim is the decorative, visible part you see from the room below. It includes the outer ring and the interior reflector or baffle. The housing and trim must be compatible, usually from the same manufacturer and product family.
Can I install recessed lighting housings myself?
While a skilled DIYer can tackle the job, especially with remodel housings, it involves working with 120V electricity, cutting into your ceiling, and understanding building codes. For safety, compliance, and peace of mind, hiring a licensed electrician is almost always the best course of action.
Do LED lights still need a housing?
Yes, most of the time. While some ultra-thin “canless” LED wafer lights are now available, the vast majority of residential recessed lighting uses an LED trim or an LED bulb that fits into a traditional housing. The housing still provides the crucial structural and electrical foundation.
Are all 6-inch housings compatible with all 6-inch trims?
No! This is a common and costly mistake. While sizes are standardized, the mounting mechanisms (springs, clips, etc.) are proprietary. You must buy a trim that is specifically listed as compatible with your housing model. Stick to the same brand and series for both parts.
Bringing It All Together: Your Path to Perfect Lighting
Choosing the right recessed lighting housings doesn’t have to be a chore. It’s a logical process that empowers you to build a lighting system that is safe, efficient, and beautiful. By focusing on the fundamentals—installation type, insulation rating, and intended purpose—you demystify the options and make confident decisions.
Your housing is the unseen foundation. It’s the smart first step that unlocks all the creative possibilities of recessed lighting, from the trim style you choose to the mood you create. Invest the time to get this foundational piece right, and you’ll be rewarded with a professionally lit space that enhances your home for years to come.

- Bathroom Materials Selection Offers Quality Fixtures for Home Design Projects - October 9, 2026
- Best Cosmetic Storage Containers For a Tidy Vanity - October 8, 2026
- Best Makeup Storage Boxes to Keep Your Vanity Spotless - October 7, 2026










