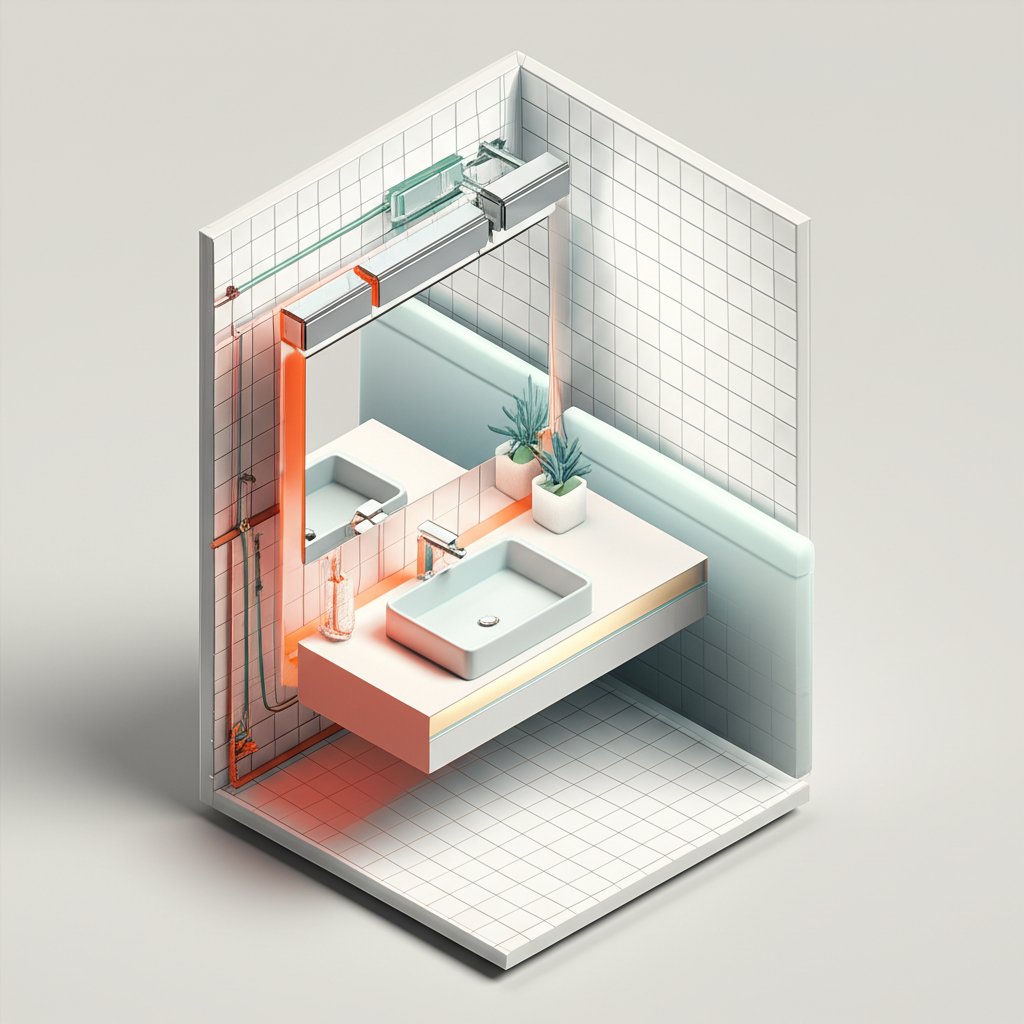
The paint is dry, the new vanity is in place, and the tile feels cool underfoot. But something’s missing. The final, functional piece of jewelry for the room: the lighting. For a look that’s simultaneously timeless and completely current, nothing finishes a space with more polish and confidence than a chrome vanity light. It’s the crisp, clean, and versatile choice that works harder than almost any other fixture in your home.
This isn’t just about screwing in a light bulb. It’s about casting the perfect glow for your morning routine, eliminating harsh shadows, and tying your entire design together. Choosing the right one can feel overwhelming, but it doesn’t have to be.
At a Glance: Your Quick Guide to Chrome Vanity Lights
Short on time? Here’s what you need to know to make a smart choice:
- Timeless, Not Trendy: Polished chrome has been a bathroom staple for decades for a reason. It’s a design chameleon that complements styles from stark modernism to art deco glam.
- Size Is Everything: A common rule of thumb is to choose a fixture that’s about 75% of your mirror’s width. For double vanities, you can use one long bar light or two smaller fixtures centered over each sink.
- Light Direction Matters: Lights pointing down (downlighting) are best for task-oriented activities like shaving or applying makeup. Lights pointing up (uplighting) provide softer, ambient light that can make a space feel larger.
- Color Temperature is Key: For bathrooms, look for bulbs in the 3000K to 4000K range. This “cool white” or “bright white” light renders colors accurately without feeling sterile or overly yellow.
- Installation Can Be DIY: Swapping an old fixture for a new one is a manageable project for most handy homeowners, but know when to call a professional for safety.
Why Chrome Remains the Reigning Champion of Bathroom Fixtures
In a world of fleeting trends—brushed brass, matte black, oil-rubbed bronze—polished chrome stands apart. It’s not just a finish; it’s a design statement that communicates cleanliness, brightness, and precision.
Think about it. Chrome’s reflective surface bounces light around the room, making even small bathrooms feel more open and airy. Its cool, silvery hue pairs effortlessly with virtually any color palette, from bold navy blues to serene, all-white schemes.
Unlike some specialty finishes that require delicate handling, chrome is famously durable and easy to clean. A quick wipe with a soft cloth and a gentle cleaner is all it takes to restore that brilliant, mirror-like shine. This low-maintenance appeal is a lifesaver in a high-traffic area like a bathroom. It resists moisture and corrosion, ensuring your investment looks as good in five years as it does today.
Finding Your Perfect Match: How to Choose the Right Chrome Vanity Light
Selecting the right fixture is a balancing act between form and function. You need light that is both flattering and practical, housed in a style that elevates your space. Let’s break down the three most important decisions you’ll make.
Size and Scale: The Golden Rules
Getting the proportions right is the single most effective way to make your lighting look intentional and high-end. An undersized light can look lost, while an oversized one can overwhelm the space.
- For a Single Vanity/Mirror: Aim for a light fixture that is roughly 75% of the width of your vanity mirror. For example, if your mirror is 32 inches wide, look for a fixture in the 24-inch range. It doesn’t have to be exact, but this guideline prevents the light from looking comically small or awkwardly large.
- For a Double Vanity: You have two excellent options. You can either use one long light bar that spans a significant portion of the total width (again, think ~75% of the mirror width), or you can place two smaller, identical fixtures centered over each sink. The two-fixture approach often creates a more custom, balanced look.
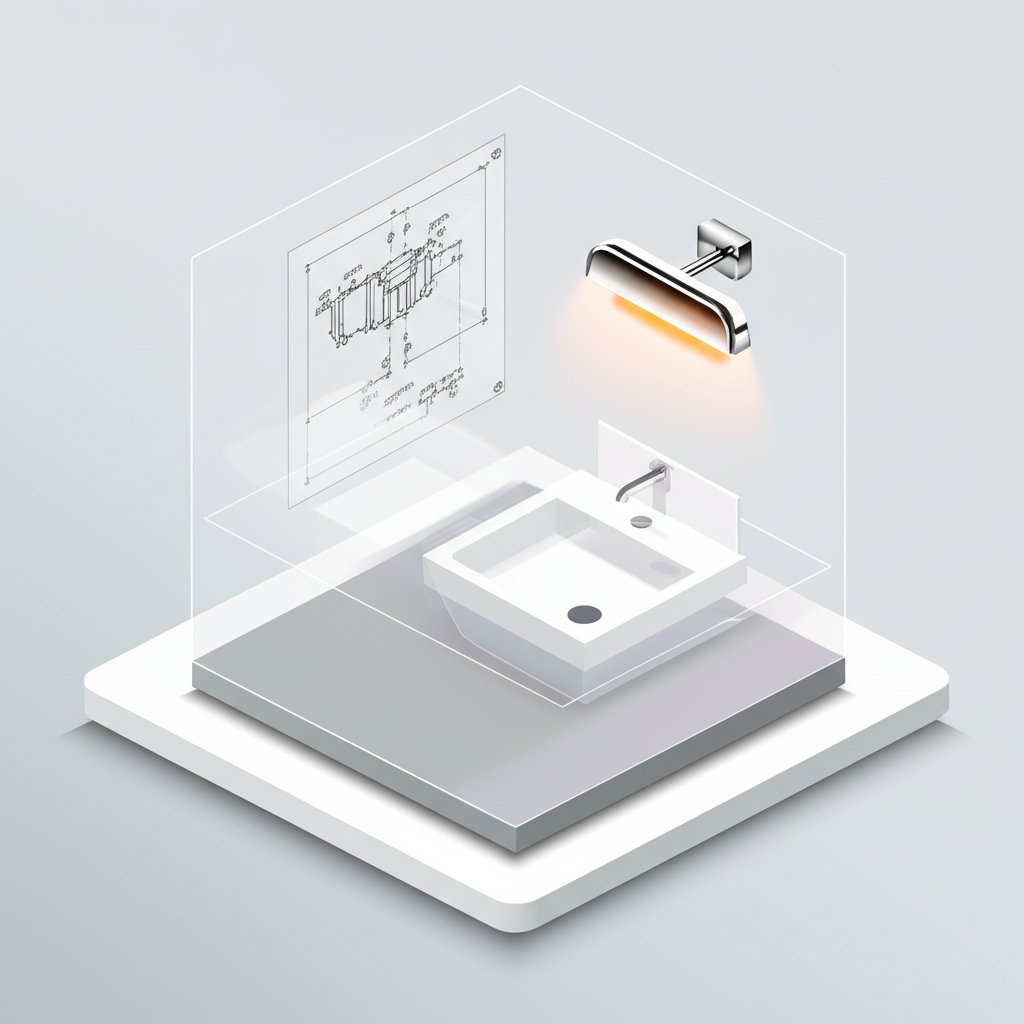
- Placement is Paramount: If you’re mounting the light above the mirror, position it 3 to 5 inches above the frame. For sconces mounted on the sides of a mirror, the center of the light should be roughly at your eye level, or about 60-65 inches from the floor. This side placement is fantastic for eliminating shadows under your chin and eyes.
Let There Be Light: Understanding Bulbs and Brightness
The most beautiful fixture is useless if the light it casts is dim, unflattering, or harsh. It’s time to talk about what’s inside the glass.
Lumens, Not Watts: Forget everything you learned about watts. Watts measure energy consumption, while lumens measure actual brightness. For a primary bathroom vanity, you’ll want a total of about 700-800 lumens per square meter (or around 70-80 lumens per square foot) directed at the task area (your face at the mirror). For a typical 3-bulb, 24-inch vanity light, this means each bulb should be around 800 lumens (the equivalent of a 60-watt incandescent bulb).
Color Temperature (Kelvin): This is arguably the most critical element for bathroom lighting. Measured in Kelvins (K), it determines if the light appears warm (yellowish) or cool (bluish).
- 2700K (Warm White): Creates a cozy, relaxing, almost candle-lit ambiance. Great for a powder room or for winding down, but terrible for seeing true colors when applying makeup.
- 3000K-3500K (Soft/Bright White): The sweet spot for most bathrooms. It’s a clean, neutral white light that’s flattering and provides excellent color accuracy without feeling cold or clinical.
- 4000K-5000K (Cool White/Daylight): A very crisp, blue-toned light. It’s fantastic for task-heavy areas and provides the most accurate color rendering, but some people find it too intense or sterile for a home environment.
Integrated LED vs. Replaceable Bulbs:
Many modern chrome vanity lights come with integrated LED arrays. - Pros of Integrated LED: Extremely energy-efficient, incredibly long lifespan (often 25,000-50,000 hours), and allows for super-sleek, minimalist designs that aren’t possible with traditional bulbs.
- Cons of Integrated LED: If the light fails, you often have to replace the entire fixture, not just a bulb. You’re also locked into the color temperature it came with.
- Replaceable Bulbs: Offer you the flexibility to choose your own brightness and color temperature and easily swap them out if one burns out or you decide you want a warmer or cooler light.
Style Speaks Volumes: From Minimalist to Modern Glam
Chrome’s versatility shines brightest when you see the incredible range of styles available. Your fixture should be a reflection of your bathroom’s overall aesthetic.
- Modern & Minimalist: Look for sleek, linear light bars, simple tubular designs, or fixtures with unadorned spherical or cylindrical glass shades. The beauty here is in the clean lines and the high-polish chrome finish.
- Industrial Chic: This style often features exposed “Edison” style bulbs, clear glass shades (like bell jars or seeded glass), and functional details like visible hardware or articulating arms. The chrome adds a touch of polish to the otherwise raw aesthetic.
- Transitional: This is the perfect blend of modern and traditional. Think of updated versions of classic sconces, fixtures with fabric shades, or designs that pair the clean chrome base with more traditional glass shapes. It’s a safe and sophisticated bet for almost any home.
- Art Deco & Glam: Here’s where chrome truly gets to show off. Look for fixtures with crystal elements, faceted glass shades, and strong geometric patterns. The reflective chrome amplifies the sparkle, creating a luxurious, hotel-like feel.
Up or Down? The Great Light Direction Debate
Should the shades on your vanity light point toward the ceiling or down at your counter? This decision impacts both the function and the feel of your room.
Downlighting (Shades Point Down):
This is the most common and practical choice for a vanity. It directs focused, bright light downward onto the countertop and your face.
- Pros: Excellent for tasks like applying makeup, shaving, or styling hair. It minimizes shadows on the task surface.
- Cons: Can sometimes cast shadows under your eyes and chin if it’s the only source of light.
Uplighting (Shades Point Up):
This configuration casts light up toward the ceiling, which then bounces back down to fill the room with a soft, diffused glow. - Pros: Creates beautiful ambient lighting, reduces glare, and can make the ceiling feel higher and the room more spacious.
- Cons: Not ideal as the sole source of task lighting, as it doesn’t provide direct illumination for detailed grooming. It can also be a magnet for dust and bugs inside the shades.
The Hybrid Solution: For the best of both worlds, consider a layered lighting approach. Use a down-firing chrome vanity light for task lighting and supplement it with a central ceiling fixture or recessed lights for overall ambient illumination. Some fixtures also use frosted or opal glass to diffuse the light in all directions, offering a nice compromise.
The Installation Game Plan: A DIY-Friendly Guide (and When to Call a Pro)
For those comfortable with basic electrical work, replacing an existing vanity light is a very doable weekend project.
Safety First: Always, always, always turn off the power to the circuit at your breaker box before you begin. Use a voltage tester to confirm the wires are dead.
Here’s a simplified overview:
- Power Down: Shut off the corresponding breaker.
- Remove the Old Fixture: Carefully unscrew the old fixture from the wall. You’ll likely see three wires: black (hot), white (neutral), and a bare copper or green wire (ground). Disconnect them.
- Install the New Mounting Bracket: Your new light will come with a mounting bracket. Screw this into the electrical junction box in the wall.
- Connect the Wires: This is the crucial part. Using the provided wire nuts, connect the wires from your new fixture to the wires in the wall: black to black, white to white, and ground to ground. Give each connection a gentle tug to ensure it’s secure.
- Mount the New Fixture: Tuck the wires neatly into the junction box and secure the new fixture’s base plate to the mounting bracket.
- Finishing Touches: Install your light bulbs, attach any glass shades, and restore power at the breaker box.
- Test It Out: Flip the switch and enjoy your new light!
When to Call an Electrician
Don’t hesitate to call a professional if you encounter any of these situations:
- You’re installing a light where there wasn’t one before (this requires running new wiring).
- The wiring in your wall is old (e.g., knob-and-tube or crumbling insulation).
- You want to add a new switch or dimmer.
- You feel even the slightest bit unsure. An hour of a professional’s time is well worth the peace of mind.
While installing a single fixture is one thing, planning your entire Chrome Bathroom Vanity Lighting scheme can involve more complexity, making professional advice even more valuable.
Common Questions, Answered
Even with a plan, a few questions always pop up. Here are quick answers to the most frequent ones.
Q: How do I clean a chrome vanity light without scratching it?
A: The best method is the simplest. Use a soft, damp microfiber cloth with a drop of dish soap. For water spots or tougher grime, a 50/50 solution of white vinegar and water works wonders. Never use abrasive cleaners, scouring pads, or harsh chemicals, which can permanently damage the finish.
Q: Is polished chrome going out of style?
A: Absolutely not. While other finishes have their moments, polished chrome is a design classic. It’s like a white subway tile or a little black dress—it simply doesn’t go out of style. Its ability to work with any color and its association with cleanliness make it a permanent fixture (pun intended) in bathroom design.
Q: Can I put my chrome vanity light on a dimmer?
A: Most likely, yes! But you need to check three things: the light fixture itself must be rated as dimmable, the bulbs you use must be dimmable (look for it on the packaging), and you need to have a compatible dimmer switch installed. Using non-dimmable bulbs on a dimmer switch can cause flickering and damage the bulb.
Q: What’s the real difference between polished chrome and brushed nickel?
A: It’s all about the finish. Polished chrome is highly reflective and mirror-like with a cool, blue undertone. Brushed nickel (or satin nickel) has a softer, textured finish that diffuses light, giving it a warmer, slightly yellowish tone. Chrome shows water spots and fingerprints more easily but offers a higher-impact shine; brushed nickel is more forgiving but has a more subdued look.
Your Bathroom’s Brightest Future
Choosing a chrome vanity light is more than a practical necessity; it’s an opportunity to define the character of your bathroom. It’s the final detail that can transform a functional room into a polished, personal retreat.
By considering the right size, the ideal brightness and color, and a style that speaks to you, you’re not just illuminating a mirror. You are investing in a piece of functional art that will brighten your daily routine for years to come. So go ahead, embrace the brilliant shine and timeless appeal of chrome. Your bathroom will thank you for it.

- Chrome Vanity Light Elevates Any Modern Bathroom Design - June 21, 2026
- Discount Wall Sconces Offer Stylish Lighting Without High Prices - June 20, 2026
- Find Cheap Wall Sconces for Stylish, Budget-Friendly Home Lighting - June 19, 2026