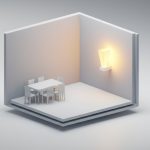
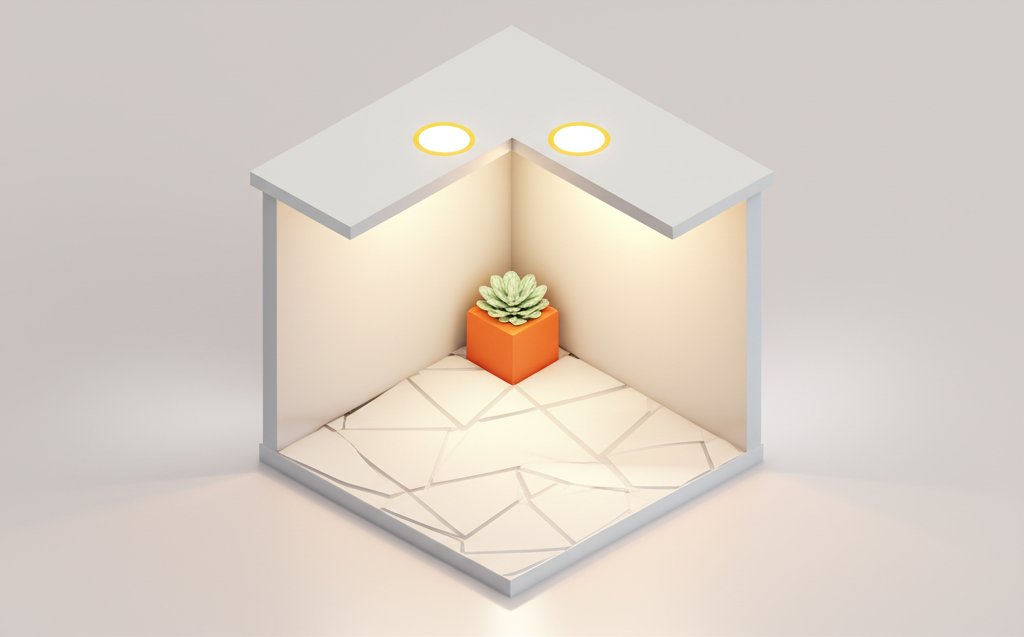
The sun sets, and your beautiful patio, garden, and walkways vanish into the darkness. You’ve invested in creating an outdoor space you love, but for half the day, it’s invisible. This is where the subtle magic of exterior recessed lighting comes in, transforming your property from a dark void into a warm, inviting, and secure extension of your home. Unlike bulky floodlights or string lights that scream for attention, recessed fixtures integrate seamlessly into your home’s architecture, providing sophisticated illumination exactly where you need it.
They are the secret weapon of architects and landscape designers, creating pockets of light that guide your feet, highlight stunning textures, and turn a simple porch into an evening sanctuary. But choosing the right ones can feel like navigating a technical maze of ratings, lumens, and installation types.
This guide cuts through the noise. We’ll walk through everything you need to know to select, plan, and enjoy an outdoor lighting system that adds value, beauty, and safety to your home.
At a Glance: Your Outdoor Lighting Cheat Sheet
Short on time? Here are the most important takeaways for choosing the right recessed lights for your exterior:
- Define the Mission First: Decide if you need light for safety (stairs, paths), ambiance (patios, decks), accent (trees, stonework), or security (eaves, driveways). Your goal dictates every other choice.
- Location Determines the Rating: Fixtures exposed to rain and snow need a Wet Rating. Those in covered areas, like a porch ceiling, need a Damp Rating. Using the wrong one is a safety hazard.
- LED is the Only Way to Go: LED lights are the gold standard. They use a fraction of the energy, last up to 25 times longer than old incandescent bulbs, and are far more durable against the elements.
- Warm vs. Cool Light Matters: Color temperature (measured in Kelvins) sets the mood. Warm white (~2700K-3000K) is cozy and inviting, while cool white (~4000K-5000K) is crisp and modern, often used for security.
- Layout is Everything: Proper spacing prevents the “airport runway” look. Plan your layout to create balanced, layered light rather than harsh, uniform brightness.
Define Your Mission: Matching Light to Purpose
Before you even look at a single fixture, ask yourself a simple question: “What do I want this light to do?” The answer will guide your entire project. Exterior lighting isn’t a one-size-fits-all solution; it’s a strategic system with four primary goals.
For Safety and Navigation
This is the most practical application of outdoor lighting. The main objective is to prevent trips, falls, and fumbles in the dark. The light should be functional and direct, clearly illuminating potential hazards without creating harsh glare.
- Where to use it: Stairways, walkways, deck perimeters, and near entry doors.
- Fixtures to consider: Recessed step lights embedded into stair risers or adjacent walls, and low-profile in-ground well lights to define a path.
For Curb Appeal and Drama (Accent Lighting)
Here, light becomes an artistic tool. Accent lighting is all about creating visual interest by highlighting your home’s best features. It adds depth, texture, and a high-end feel to your property after dark. Think of it as painting with light.
- Where to use it: Aimed up at a textured stone facade, washing light down from soffits to graze a brick wall, or placed in the ground to uplight a beautiful oak tree or sculpture.
- Fixtures to consider: Soffit-mounted downlights with adjustable gimbals, and narrow-beam in-ground well lights.
For General Use and Gatherings (Ambient Lighting)
Ambient light creates a comfortable, usable environment for relaxing or entertaining. It’s the broad, foundational layer of light that makes an outdoor room feel welcoming and whole. The goal is soft, even illumination that’s bright enough to see your friends’ faces but not so bright that it feels like a stadium. Our comprehensive Guide to outdoor recessed lighting covers how to balance these different layers for a professional result.
- Where to use it: Covered patios, screened-in porches, gazebos, and outdoor kitchens.
- Fixtures to consider: A grid of ceiling-mounted recessed lights in a covered porch or outdoor living area.
For Peace of Mind (Security Lighting)
While any light can deter intruders, dedicated security lighting is about broad, consistent illumination of vulnerable areas. It’s designed to eliminate dark corners and give you a clear view of your property’s perimeter. Unlike accent lighting, which is subtle, security lighting is meant to be seen.
- Where to use it: Under the eaves along the sides of your house, over the garage door, and illuminating driveways or back gates.
- Fixtures to consider: Wide-beam recessed downlights installed in your home’s soffits. These can function like traditional floodlights but with a much cleaner, integrated look.
Decoding the Specs: Wet vs. Damp Ratings
You wouldn’t wear a windbreaker in a downpour. The same logic applies to outdoor lighting fixtures. Electrical components and moisture are a dangerous mix, which is why Underwriters Laboratories (UL) created a rating system to tell you exactly where a fixture can be safely installed. Choosing the wrong one isn’t just a mistake—it’s a code violation and a serious safety risk.
Wet-Rated: Built for Direct Exposure
Think of a wet-rated fixture as completely weatherproof. It’s designed and sealed to withstand direct contact with rain, sleet, snow, and even spray from your sprinklers. The internal components are fully protected by gaskets and watertight seals.
- When to use it: Any location directly exposed to the elements.
- Examples: Recessed lights in your home’s eaves or soffits, in-ground lights in your lawn or garden beds, lights in an uncovered pergola, and underwater lights for pools.
Damp-Rated: For Sheltered, Moist Areas
Damp-rated fixtures can handle moisture, condensation, and humidity, but they aren’t designed to be hit directly by rain. They have some protection but lack the robust sealing of their wet-rated counterparts.
- When to use it: Any covered outdoor area that is protected from direct rain but might still get damp.
- Examples: The ceiling of a covered front porch, a screened-in patio, a covered breezeway, or a carport.
Using a damp-rated fixture in a wet location will lead to premature failure and potential electrical shorts. When in doubt, always choose a wet-rated fixture. It provides a higher level of protection and can be used in both damp and wet locations.
Choosing Your Fixture: A Guide to Outdoor Recessed Styles
Once you know your goal and the required rating, you can start exploring the fun part: the fixtures themselves. Recessed lighting isn’t a single product but a family of solutions designed for specific applications.
Ceiling and Soffit Lights: The Workhorse of Outdoor Ambiance
These are the most common type of exterior recessed lighting. Installed in the overhangs of your roof (the soffits or eaves) or in the ceiling of a covered structure, they serve multiple purposes. They can wash light down the walls of your home to create dramatic accent lighting, provide general ambient light for a porch, or act as security lights over a driveway. For a deep dive into this specific application, see our Recessed Porch Lighting Guide.
- Best for: Ambient, Accent, and Security lighting.
- Pro Tip: Choose “gimbal” or adjustable models if you want to aim the light beam precisely onto a wall, column, or other architectural feature.
In-Ground and Well Lights: Highlighting from the Ground Up
Installed flush with the ground, these powerful little fixtures are perfect for uplighting. They can make a majestic tree look even more stunning at night, highlight the texture of a stone retaining wall, or graze light up architectural columns. They’re also an excellent way to define the edge of a long driveway or garden path without adding posts or bollards that clutter the landscape during the day.
- Best for: Accent and Path lighting.
- Installation Note: Proper drainage is critical for in-ground lights. They should be installed in a bed of gravel to prevent water from pooling around the fixture.
Step and Wall Lights: Guiding the Way with a Subtle Glow
Small, low-profile, and low-wattage, these fixtures are all about safety and subtle design. Installed directly into stair risers or the vertical walls alongside a staircase, they cast a gentle wash of light across the treads, making nighttime navigation safe and easy. They add a high-end, custom look and prevent the need for a single, glaring overhead light.
- Best for: Safety and Task lighting.
- Design Tip: Stagger them on alternating sides of a wide staircase for a more dynamic and visually interesting effect.
Underwater Lights: Bringing Pools and Fountains to Life
This is a highly specialized category. Designed to be fully submerged, underwater recessed lights are sealed to an extreme degree and operate on low voltage for safety. They transform a pool, pond, or fountain from a dark “hole” in your yard into a shimmering, magical centerpiece at night.
- Best for: Accent and special-purpose lighting.
- Safety First: Due to the combination of water and electricity, installation is strictly a job for a licensed electrician who specializes in pool and spa wiring.
Bright Ideas: Why LED is King for Outdoor Lighting
A decade ago, you had choices: incandescent, halogen, fluorescent. Today, for outdoor lighting, the discussion begins and ends with LED (Light Emitting Diode). The technology has become so superior in every metric that choosing anything else is a waste of money and effort.
Unbeatable Energy Efficiency and Longevity
This is the biggest win. LEDs consume up to 85% less energy than traditional incandescent bulbs to produce the same amount of light. An outdoor lighting system that might have cost a fortune to run a decade ago now adds just a few dollars to your monthly utility bill. Furthermore, a quality LED fixture is rated to last 25,000 to 50,000 hours. That’s years—even decades—of nightly use without ever changing a bulb.
Built to Last in Tough Conditions
Unlike fragile incandescent filaments, LEDs are solid-state devices. They are incredibly resistant to shock, vibration, and temperature swings—all common conditions for an outdoor fixture. This durability means fewer failures and less time spent on a ladder.
The Spectrum of Color: Kelvin Temperature Explained
LEDs give you precise control over the mood of your light. This is measured in Kelvins (K). Lower numbers produce a warm, yellowish light, while higher numbers produce a cool, bluish light.
| Kelvin (K) Range | Light Appearance | Best For… |
|---|---|---|
| 2700K – 3000K | Warm White | Creating a cozy, inviting, traditional feel. |
| 3500K – 4000K | Neutral/Cool White | A clean, modern look; good for task/security areas. |
| 5000K+ | Daylight | Very crisp, blue-toned light; best for security. |
| For most residential ambient and accent lighting, 2700K to 3000K is the sweet spot. It mimics the warm glow of traditional bulbs and complements most home architectural styles. |
From Blueprint to Brilliance: How to Plan Your Lighting Layout
A successful lighting plan is 90% planning and 10% installation. Randomly placing fixtures will result in a space that’s either spotty and dark or obnoxiously bright. Follow these steps for a professional-looking result.
Step 1: Sketch Your Space
You don’t need to be an artist. Grab a piece of paper and draw a simple overhead map of your property. Include the house footprint, walkways, patios, stairs, large trees, and any other key features you want to light. This visual aid is invaluable.
Step 2: Layer Your Lighting
Using your sketch, start placing lights based on their function (the “mission” we defined earlier). Use different symbols for each layer:
- Ambient: Mark the general lighting for your patio or porch ceiling.
- Task: Pinpoint the exact spots that need light for safety, like each step on a staircase.
- Accent: Draw arrows from fixture locations to the features you want to highlight, like a tree or a wall.
Step 3: Mind the Spacing
Proper spacing is the key to avoiding common mistakes. While every situation is unique, here are some solid rules of thumb:
- Soffit Downlights: For washing walls with light, place fixtures about 18-24 inches away from the wall. Space them 4-6 feet apart from each other for even coverage.
- Path Lights: Space in-ground path lights 6-8 feet apart. Stagger them on opposite sides of the path for a more natural look.
- Step Lights: Place one light for every two or three steps, typically around 4-6 feet apart.
Common Pitfalls to Avoid
- The Runway Effect: Placing too many lights in a perfectly straight, tightly spaced line. It looks unnatural and commercial. Stagger fixtures where possible.
- Light Trespass: Aiming your lights in a way that spills onto your neighbor’s property or shines into their windows. Be a good neighbor and keep your light contained.
- Forgetting Glare: The goal is to see the effect of the light, not the bulb itself. Use shields, louvers, or careful aiming to hide the light source from direct view.
Your Recessed Lighting Questions, Answered
Can I install exterior recessed lighting myself?
While it might seem like a manageable DIY project, exterior electrical work is best left to a professional. A licensed electrician will ensure the installation is safe, watertight, and compliant with all local building codes. Improper wiring outdoors can pose a serious risk of fire or electric shock.
How do I choose the right brightness (lumens)?
Brightness is measured in lumens, not watts. For outdoor use, you don’t need overwhelming brightness.
- Step & Path Lights: 100-200 lumens is plenty for safe navigation.
- Accent & Wall Washing: 300-700 lumens is a good range, depending on the height and surface.
- Ambient Porch Lighting: 600-900 lumens per fixture provides comfortable illumination.
Are smart exterior recessed lights worth it?
Smart (Wi-Fi or Bluetooth-enabled) fixtures are a fantastic investment for convenience and control. The benefits include scheduling (lights turn on automatically at sunset), dimming to set the perfect mood, changing colors for holidays, and integrating with your home security system. The added cost is often justified by the enhanced functionality.
What’s the difference between “remodel” and “new construction” housings?
This refers to how the fixture’s housing (the “can” that goes into the ceiling) is installed.
- New Construction: These have mounting bars designed to be nailed or screwed to joists before the ceiling material (like drywall or beadboard) is installed. They are for new builds or major renovations.
- Remodel: These are designed to be installed from below after the ceiling is finished. Clips on the housing spring out to hold it tight against the existing ceiling material.
Illuminate Your Outdoors with Confidence
Choosing the right exterior recessed lighting boils down to a clear, logical process. By starting with your goal, matching the fixture rating to the location, and embracing the efficiency of modern LEDs, you can create a system that is both beautiful and built to last.
Don’t just light up your yard—bring it to life. A well-designed lighting plan elevates your home’s architecture, expands your living space after dark, and provides a deep sense of security and welcome. It’s an investment that pays dividends every single night, transforming the way you see and use the home you love.

- Exterior Recessed Lighting Buyers Guide for Your Outdoor Space - June 25, 2026
- Dining Room Wall Sconces Brighten Your Decor with Elegant Layered Light - June 24, 2026
- Dining Room Sconces Beautifully Layer Light For A Perfect Ambiance - June 23, 2026