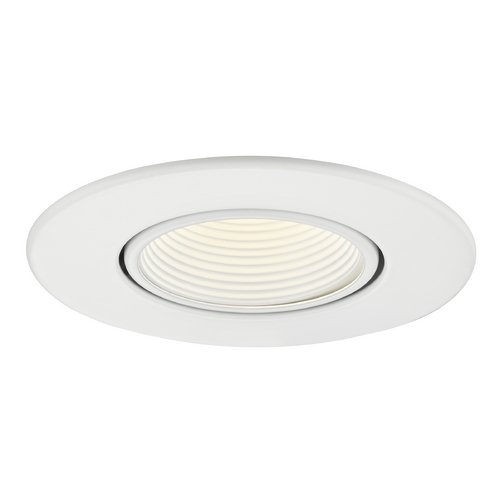
For the bigger picture and full context, make sure you read our main guide on Choosing The Right 3 Recessed Can Light For Your Space.
Are you tired of dark corners and outdated lighting fixtures? Perhaps you’re renovating and want a streamlined, modern look? Implementing just three can lights can dramatically transform a space, offering focused illumination and a clean aesthetic.
At a glance:
- Discover the optimal placement for three can lights to maximize brightness and eliminate shadows.
- Learn how to choose the right size, type, and color temperature of recessed lighting for various rooms.
- Understand the key differences between LED, halogen, and incandescent options for 3 can lights.
- Get a step-by-step guide to installing 3 can lights safely and efficiently.
- Address common challenges and troubleshoot potential issues with recessed lighting.
Why Choose 3 Can Lights? Balancing Functionality and Aesthetics
Three can lights represents a sweet spot. It’s enough to provide significant lighting improvement in a smaller room, highlight key features, or supplement existing fixtures without overwhelming the space or your budget. They offer targeted light where you need it most.
Consider these scenarios where 3 can lights excel:
- Small Kitchens: Three evenly spaced can lights can provide excellent task lighting over countertops.
- Hallways: Strategically placed, they illuminate the walkway and eliminate dark corners.
- Bathrooms: Placed above the vanity, three can lights offer bright, even lighting for grooming.
- Accent Lighting: Highlighting a piece of artwork, a fireplace, or a bookshelf.
Planning Your 3 Can Light Layout: A Room-by-Room Guide
Proper planning is crucial for optimal results. You need to consider room size, ceiling height, and desired lighting effect.
1. Assessing the Space:
- Room Size: Smaller rooms (under 100 square feet) often benefit most from 3 can lights. Larger rooms may require additional fixtures.
- Ceiling Height: Lower ceilings (8 feet or less) might need smaller (3-4 inch) can lights to avoid a cluttered look. Higher ceilings can accommodate larger fixtures.
- Existing Light Sources: Factor in natural light and other fixtures when planning your layout. You might need fewer can lights if the room already has ample light.
2. Determining Lighting Needs: - Task Lighting: Focus on areas where specific tasks are performed, such as kitchen counters or bathroom vanities.
- Ambient Lighting: Aim for general illumination to create a comfortable and inviting atmosphere.
- Accent Lighting: Highlight architectural features, artwork, or decorative elements.
3. Placement Strategies: - Symmetrical Layout: Evenly space the three can lights for balanced illumination. This works well in square or rectangular rooms.
- Triangular Layout: Position the lights in a triangular pattern to create a focal point or highlight a specific area.
- Linear Layout: Arrange the lights in a line to illuminate a hallway, walkway, or long countertop.
Example:
Imagine a 8×10 bathroom with a single vanity. A symmetrical layout of three 3-inch can lights, placed about 2-3 feet apart, directly above the vanity will provide excellent task lighting.
Selecting the Right Can Lights: Size, Type, and Color Temperature
Choosing the right can lights involves considering several factors, including size, type (LED, halogen, incandescent), and color temperature. Here are a few options, considering different contexts: * Find the Perfect Recessed Light * Choosing Recessed Can Lighting * Recessed Lighting Buying Guide * Select Recessed Lighting Here * Your Recessed Lighting Guide.
1. Size Matters:
- 3-inch Can Lights: Ideal for smaller spaces and lower ceilings. They offer a more discreet appearance.
- 4-inch Can Lights: A versatile option for a variety of rooms and ceiling heights.
- 6-inch Can Lights: Best suited for larger spaces and higher ceilings, providing more powerful illumination.
2. Light Source Options:
| Feature | LED | Halogen | Incandescent |
|——————-|———————————————|———————————————-|———————————————|
| Energy Efficiency | Very High | Moderate | Low |
| Lifespan | Up to 50,000 hours | 2,000-4,000 hours | 1,000 hours |
| Heat Output | Low | High | Very High |
| Cost | Higher upfront cost, lower long-term costs | Lower upfront cost, higher long-term costs | Lowest upfront cost, highest long-term costs |
| Dimmability | Generally Dimmable | Dimmable | Dimmable |
Recommendation: LED is generally the best choice for recessed lighting due to its energy efficiency, long lifespan, and low heat output.
3. Color Temperature:
Color temperature, measured in Kelvin (K), affects the mood and ambiance of a room. - 2700K-3000K (Warm White): Creates a cozy and inviting atmosphere, suitable for bedrooms, living rooms, and dining rooms.
- 3500K-4000K (Cool White/Neutral White): Provides a balanced and natural light, ideal for kitchens, bathrooms, and offices.
- 5000K-6500K (Daylight): Offers a bright and energizing light, best for task lighting in workshops or studios.
Example:
For a relaxing living room, opt for 3 can lights with a warm white (2700K-3000K) color temperature. For a bright and functional kitchen, choose cool white (3500K-4000K).
Installation Guide: A Step-by-Step Approach for 3 Can Lights
Installing recessed lighting requires careful planning and execution. If you’re not comfortable working with electrical wiring, it’s best to hire a qualified electrician.
Safety First:
- Turn off the power at the circuit breaker before starting any electrical work.
- Wear safety glasses and gloves to protect yourself.
- Follow all local electrical codes and regulations.
Tools You’ll Need: - Stud finder
- Drill with hole saw attachment
- Wire stripper
- Wire connectors
- Pencil
- Measuring tape
- Recessed lighting fixtures
Step-by-Step Instructions:
- Mark the Locations: Use a stud finder to identify joists and avoid cutting into them. Mark the desired locations for your 3 can lights.
- Cut the Holes: Use a hole saw attachment on your drill to cut the holes for the recessed lighting fixtures.
- Wiring: Run electrical wiring from the power source to the first can light location, then from the first to the second, and finally to the third.
- Connect the Wires: Connect the wires using wire connectors, following the manufacturer’s instructions. Typically, black wires connect to black wires, white wires connect to white wires, and ground wires connect to ground wires.
- Install the Fixtures: Insert the recessed lighting fixtures into the holes and secure them in place.
- Test the Lights: Turn on the power at the circuit breaker and test the lights to ensure they are working properly.
Example Scenario:
Let’s say you are installing three 4-inch LED can lights in a hallway. You’ve located the joists, marked your positions 4 feet apart, and cut the holes. Now carefully run the wiring, ensuring all connections are secure and properly insulated. Install the fixtures and test.
Troubleshooting Common Issues
Even with careful planning, you might encounter some common issues during or after installation.
1. Lights Don’t Turn On:
- Check the circuit breaker to ensure it hasn’t tripped.
- Verify that all wiring connections are secure.
- Test the bulb or LED module to ensure it’s not faulty.
2. Lights Flicker: - Ensure the dimmer switch is compatible with the LED lights.
- Check for loose wiring connections.
- Consider a higher-quality LED driver.
3. Lights Buzz: - The dimmer switch may not be compatible with the LED lights
- The LED driver could be failing
4. Uneven Lighting: - Adjust the aiming angle of the recessed lights.
- Ensure all bulbs or LED modules have the same wattage and color temperature.
- Consider adding or repositioning lights to achieve more even illumination.
Practical Playbook: Quick Start & Best Practices
Here’s a practical playbook to help you implement your 3 can lights project quickly and effectively.
Quick Start Checklist:
- Assess the Space: Measure the room, identify existing light sources, and determine your lighting needs.
- Choose the Right Fixtures: Select the appropriate size, type, and color temperature of recessed lighting.
- Plan the Layout: Determine the optimal placement for your 3 can lights to maximize brightness and minimize shadows.
- Install the Lights: Follow the step-by-step installation guide or hire a qualified electrician.
- Test and Adjust: Verify that the lights are working properly and adjust the aiming angles as needed.
Best Practices:
- Use LED Lights: For energy efficiency, long lifespan, and low heat output.
- Choose Dimmable Lights: For greater flexibility and control over lighting levels.
- Consider the Color Temperature: To create the desired mood and ambiance.
- Follow Local Electrical Codes: For safety and compliance.
- Hire a Professional: If you’re not comfortable working with electrical wiring.
Quick Answers: FAQs About 3 Can Lights
Q: Can I install 3 can lights myself?
A: If you’re comfortable working with electrical wiring and have experience with home improvement projects, you can install recessed lighting yourself. However, if you’re unsure or uncomfortable, it’s best to hire a qualified electrician.
Q: How far apart should 3 can lights be spaced?
A: The ideal spacing depends on the room size, ceiling height, and desired lighting effect. Generally, space lights evenly, about 2-4 feet apart, for balanced illumination.
Q: Are LED can lights better than halogen or incandescent?
A: Yes, LED can lights are generally better due to their energy efficiency, long lifespan, and low heat output. While they may have a higher upfront cost, they save money in the long run.
Q: What color temperature should I choose for my 3 can lights?
A: Choose warm white (2700K-3000K) for cozy spaces like bedrooms and living rooms, cool white (3500K-4000K) for kitchens and bathrooms, and daylight (5000K-6500K) for task lighting in workshops or studios.
Taking the Next Steps
Implementing three can lights is a straightforward way to enhance the lighting and aesthetics of your home. By carefully planning the layout, selecting the right fixtures, and following the installation steps, you can achieve professional-looking results. Remember to prioritize safety and consult a qualified electrician if needed. Now you have the information to make an informed decision!

- DIY Bathroom Mirror Frame Designs on a Budget - October 12, 2026
- Creative Bathroom Mirror Border Ideas for Every Style and Budget - October 11, 2026
- Bathroom Finishes That Handle Moisture and Look Great - October 10, 2026










