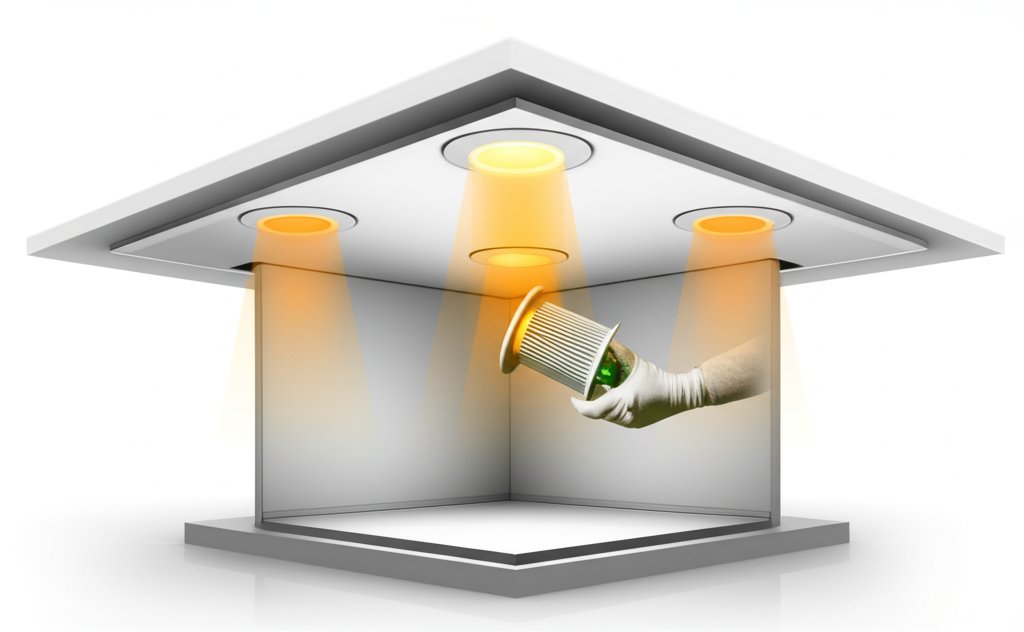
Flickering, buzzing, and a color that makes your living room look sickly—these are the telltale signs of outdated recessed lighting. For years, the fix meant calling an electrician or living with it. But a modern led retrofit recessed kit changes the game entirely, letting you transform the look, feel, and energy use of a room in about ten minutes per light, with no major rewiring. It’s one of the most impactful DIY upgrades you can make, combining serious energy savings with a clean, updated aesthetic.
This isn’t just about swapping a bulb; it’s a complete fixture overhaul in a single, elegant package. You get a brand-new trim and a high-efficiency LED light engine that lasts for decades, not months.
At a Glance: Your LED Retrofit Takeaways
- Measure First, Buy Once: Verify if your existing can lights are 4, 5, or 6 inches in diameter before purchasing a kit. Most modern retrofits are designed to fit both 5- and 6-inch housings.
- Color Temperature is Your Secret Weapon: Choose a kit with selectable color temperature (5CCT) to dial in the perfect ambiance for each room, from warm and cozy (2700K) to crisp and modern (5000K).
- Safety Ratings Aren’t Optional: Look for UL or ETL certification for electrical safety. If your fixture is in a ceiling with insulation, an “IC” (Insulation Contact) rating is mandatory to prevent a fire hazard.
- Dimming Requires the Right Switch: While most LED retrofits are dimmable, they perform best with a modern LED-compatible dimmer (often labeled “C.L.” or “LED+”). Using an old incandescent dimmer may cause flickering or buzzing.
- Installation is Surprisingly Simple: The process typically involves unscrewing the old bulb, removing the old trim, screwing in an adapter, and snapping the new LED module into place.
Why Your Old Can Lights Are Draining Your Wallet
Before we dive into the “how,” let’s quickly cover the “why.” That old incandescent or halogen bulb in your recessed can is essentially a tiny, inefficient space heater that happens to produce light.
A typical 75-watt halogen bulb burns hot, wastes over 90% of its energy as heat, and lasts maybe a year or two with regular use. A comparable led retrofit recessed kit uses just 12 or 13 watts to produce the same, if not better, light. It also generates very little heat and is rated to last 50,000 hours or more—that’s potentially over 20 years of service. The energy savings alone often pay for the upgrade in a short time.
This switch addresses three major pain points:
- High Energy Bills: An LED uses about 85% less electricity for the same brightness.
- Constant Maintenance: You can go decades without changing a “bulb.”
- Poor Light Quality: Old bulbs often have a harsh glare or a muddy, yellow hue. Modern LEDs offer superior color rendering, making colors in your home look more vibrant and true.
For a broader look at how these kits fit into the overall landscape of can lighting solutions, our main guide can help you Simplify Recessed Lighting Upgrades. It provides a complete framework for modernizing your home’s built-in lighting.
Decoding the Specs: Your Guide to Choosing the Right LED Retrofit
Shopping for an LED retrofit kit can feel overwhelming with all the technical jargon. Let’s break down the five key factors that matter most, using real-world examples to make sense of the numbers.
1. Size and Compatibility: The First Crucial Check
Recessed light housings come in standard diameters. The most common residential sizes are 5 inches and 6 inches. The beauty of modern retrofit kits is that many are designed with adjustable spring clips or torsion springs to fit snugly in either size.
- Action Step: Before you buy, measure the inside diameter of your existing can opening. Don’t guess. A 4-inch can requires a 4-inch kit, and a 5/6-inch kit won’t fit.
2. Brightness vs. Energy Use (Lumens & Watts)
Forget watts as a measure of brightness. In the world of LEDs, lumens measure brightness, and watts measure energy consumption.
- Lumens (lm): This is the total amount of visible light. For a standard room, 800-1100 lumens per fixture is a great target.
- Example: The Amico 5/6-inch kit produces a powerful 1050 lumens, making it ideal for kitchens and workspaces. The budget-friendly 4-Pack produces 800 lumens, perfect for hallways or ambient living room light.
- Watts (W): This tells you how much power it consumes. The goal is high lumens for low wattage.
- Example: The Sunco 12-pack replaces a 75W bulb but only uses 13W. The Amico kit replaces a 110W equivalent while only using 12W. This is where your energy savings come from.
3. Finding Your Perfect Vibe with Color Temperature (CCT)
Color Correlated Temperature (CCT) determines the color of the white light, measured in Kelvin (K). This is arguably the most important aesthetic choice you’ll make.
- 2700K (Warm White): The cozy, yellowish glow of a traditional incandescent bulb. Perfect for bedrooms and dens.
- 3000K (Soft White): A slightly crisper warm white. Great for living rooms and kitchens.
- 4000K (Cool White/Neutral): A balanced, neutral white light that’s excellent for task-oriented spaces like kitchens, garages, and basements.
- 5000K+ (Daylight): An intense, blue-white light that mimics direct sunlight. Best for workshops, craft rooms, or areas where maximum visibility is key.
Expert Tip: To avoid “analysis paralysis,” choose a 5CCT selectable switch model. These kits, like the popular Sunco and Amico models, have a small switch on the back that lets you select from five different color temperatures (e.g., 2700K, 3000K, 4000K, 5000K, 6000K) during installation. You can set the kitchen to 4000K and the adjacent living room to 3000K for the perfect mood.
4. Dimmability: Not All LEDs Are Created Equal
Most LED retrofit kits are dimmable, but they require a modern dimmer switch designed for LEDs to work properly. Using an older dimmer designed for high-wattage incandescent bulbs will often lead to flickering, buzzing, or a limited dimming range.
- Action Step: If you plan to dim your new lights, check your existing dimmer switch. If it’s an old rotary or slide dimmer, plan on replacing it with an LED-compatible model from brands like Lutron or Leviton. This is a simple swap that ensures smooth, flicker-free performance.
5. Safety First: Understanding IC, UL, and ETL Ratings
These acronyms are your assurance of safety and quality.
- UL/ETL Listed: Underwriter Laboratories (UL) and Intertek (ETL) are nationally recognized labs that test products to ensure they meet safety standards. A UL or ETL mark means the product has been rigorously tested for electrical safety and fire risk.
- IC-Rated (Insulation Contact): This is a critical one. An IC-rated fixture is approved for direct contact with ceiling insulation. A non-IC-rated fixture requires an air gap around it to dissipate heat. If you have insulation in your ceiling, you must use an IC-rated kit to prevent a fire hazard. The Amico kit is a great example of an IC-rated model.
Comparing Popular LED Retrofit Recessed Kits: A Practical Look
Let’s ground this in reality by comparing a few common options based on the research. This helps illustrate how different features serve different needs.
| Model / Type | Key Feature | Best For… |
|---|---|---|
| Sunco 12 Pack 5CCT Retrofit | Versatile 5CCT switch, 50,000+ hour lifespan | Whole-home upgrades where you want to customize the light color in each room. A solid, reliable all-rounder. |
| Amico 5/6 Inch 5CCT | High brightness (1050 lm), IC-rated | Kitchens, home offices, and ceilings with insulation where you need bright, safe, efficient light. |
| Budget 4-Pack 5/6″ | Low upfront cost, simple 2700K warm light | Smaller projects on a tight budget, like hallways or closets, where you want a classic warm glow and don’t need color options. |
| 12-Pack with Night Light | Dual-mode (standard + amber night light) | Bedrooms, hallways, or bathrooms where a low-level, 24/7 night light is useful without being disruptive. |
| Scenario Snippet: | ||
| A homeowner is renovating their kitchen and adjacent family room. For the kitchen, they need bright, clean task lighting. They choose the Amico 5CCT kits and set them to 4000K. For the family room, they want a cozy, relaxing atmosphere. They use the Sunco 5CCT kits and set them to 3000K. The selectable CCT feature allows them to create distinct, tailored lighting environments with the same type of product. |
The Installation Playbook: A Quick Step-by-Step
Installing a led retrofit recessed kit is one of the most satisfying DIY projects. Always follow the manufacturer’s specific instructions, but here is the general process:
- Kill the Power: Go to your circuit breaker and turn off the power to the lights you’re working on. Double-check with a non-contact voltage tester. Safety is paramount.
- Remove the Old Trim and Bulb: Unscrew the existing light bulb. The old trim (the ring around the light) is usually held in by springs. Gently pull it straight down until you can see the springs, then squeeze them together to release the trim from the can.
- Screw in the Adapter: Your retrofit kit will come with a standard E26 screw-in base adapter (it looks like the base of a regular light bulb). Screw this into the socket inside the recessed can.
- Connect the Module: The adapter will have a small wire with a connector. Plug this into the matching connector on the back of your new LED retrofit module.
- Secure the New Unit: Squeeze the spring clips or torsion springs on the sides of the LED module and carefully guide it up into the recessed can. The springs will expand and hold the unit firmly in place, flush against the ceiling.
- Power Up and Test: Turn the circuit breaker back on and flip the light switch. Enjoy your brand-new light!
Quick Answers to Common Retrofit Questions
Q: Do I need an electrician to install these?
A: For a simple one-for-one swap, it’s generally considered a DIY-friendly project. It requires no rewiring. However, if you are uncomfortable working with electricity, have old or faulty wiring, or need to install a new dimmer switch, hiring a licensed electrician is always the safest choice.
Q: Why is my new LED light flickering?
A: The number one cause is an incompatible dimmer switch. Old dimmers were designed for the high-resistance load of incandescent bulbs. You need to replace it with a modern dimmer rated for LEDs (often labeled C.L, LED+, or ELV).
Q: What’s the difference between a retrofit kit and just an LED bulb (like a BR30)?
A: An LED bulb (like a BR30 or PAR30) only replaces the light source, leaving your old, often yellowed, trim in place. A led retrofit recessed kit is an all-in-one unit that replaces both the bulb and the trim. This creates a seamless, modern look and seals the fixture, which can improve air-tightness and efficiency.
Q: Can I put one of these in a shower?
A: Yes, provided you choose a kit that is “wet-rated” or “damp-rated.” A damp-rated fixture is fine for bathrooms, but for directly inside a shower enclosure, a wet-rated fixture is necessary for safety.
Your Simple Decision Framework for a Flawless Upgrade
Ready to get started? Follow this simple path to make the right choice every time.
- Assess Your Canvas: Go to the room you’re upgrading. Measure the diameter of your existing cans (4″, 5″, or 6″?). Note if the ceiling is insulated.
- Define the Mission: What is this room used for?
- Task & Energy: Kitchen, office, garage → Prioritize high lumens (1000+), a neutral color (4000K), and IC-rating if needed.
- Relaxation & Ambiance: Bedroom, living room → Prioritize excellent dimming, a warm color (2700K-3000K), and consider a night light feature.
- Unsure or Multi-Use: Get a 5CCT selectable model. It offers maximum flexibility and is nearly foolproof.
- Choose Your Features: Do you need dimming? A special feature like a night light? A specific trim color (most are white, but other finishes exist)?
- Buy with Confidence: Select a UL or ETL-listed product from a reputable brand with a strong warranty. While buying used parts can save money, new models offer superior efficiency and longevity, making them a better long-term investment.
Upgrading to LED recessed retrofits is more than just a lighting project. It’s an investment in your home’s comfort, value, and efficiency—a bright idea in every sense of the word.

- Bathroom Materials Selection Offers Quality Fixtures for Home Design Projects - October 9, 2026
- Best Cosmetic Storage Containers For a Tidy Vanity - October 8, 2026
- Best Makeup Storage Boxes to Keep Your Vanity Spotless - October 7, 2026










