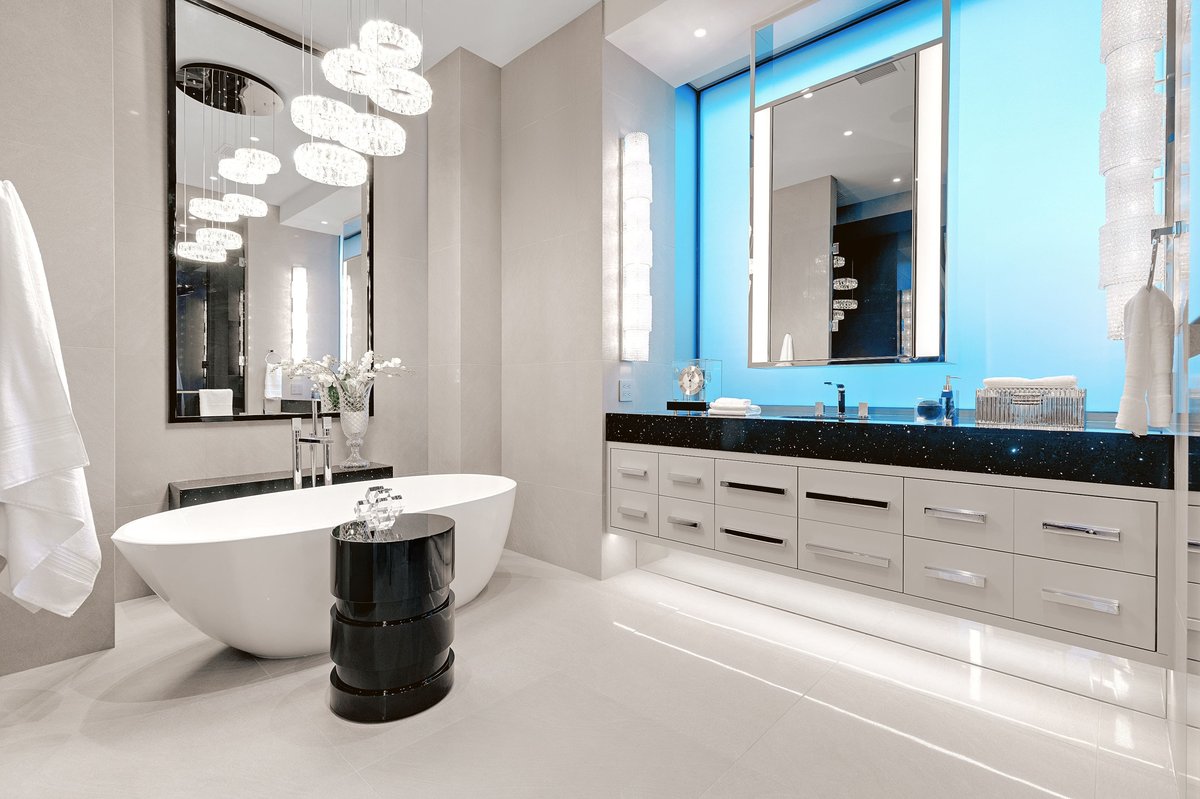
Remodeling a bathroom often feels like stepping into the unknown. You’ve got Pinterest boards full of inspiration and a head buzzing with ideas, but translating those visions into reality can be a daunting leap of faith. Will that bold tile choice actually work in your space? How will a walk-in shower impact the overall flow? This is where a bathroom visualizer tool becomes your ultimate design ally, letting you test-drive your dream remodel before a single hammer swings or a tile is laid. It’s about replacing guesswork with tangible, shareable previews, giving you the confidence to move forward.
At a Glance: What You’ll Gain from a Bathroom Visualizer Tool
- Eliminate Guesswork: See your design choices come to life in 2D, 3D, or photorealistic renderings.
- Save Money & Time: Avoid costly mistakes by identifying what works (and what doesn’t) before purchase.
- Explore Limitless Styles: Experiment with different layouts, materials, fixtures, and color schemes risk-free.
- Boost Confidence: Make informed decisions, ensuring your final remodel perfectly matches your vision.
- Streamline Communication: Easily share your designs with contractors, family, or designers for clear feedback.
Why a Bathroom Visualizer Tool Is Your Design Secret Weapon
Gone are the days of trying to piece together fabric swatches and paint chips, hoping they’ll magically combine into your dream bathroom. A bathroom visualizer tool transforms abstract concepts into concrete images, offering a crucial bridge between imagination and execution. This isn’t just about pretty pictures; it’s about smart planning, budget protection, and ensuring your renovation aligns perfectly with your lifestyle and aesthetic preferences.
By allowing you to virtually swap out tiles, experiment with vanity styles, or even reconfigure an entire layout, these tools offer invaluable clarity. They empower you to make informed decisions and tackle your remodel with confidence, rather than crossing your fingers and hoping for the best. To dive deeper into the overarching benefits of these innovative platforms, you can always Visualize your bathroom design ideas and understand how they streamline the entire design process.
Understanding Your Visualizer Options: A Spectrum of Power
Not all bathroom visualizer tools are created equal. They range from simple surface swatch apps to sophisticated AI-powered platforms that can transform a photo of your current bathroom into a high-fidelity render. Choosing the right tool depends entirely on the scope of your project and your comfort level with technology.
Surface-Focused Simplicity: Perfect for Material Decisions
For projects primarily focused on updating finishes – think new tiles, a fresh backsplash, or a different paint color – tools like the MSI Surfaces Bathroom Visualizer shine. These are generally straightforward, offering a digital showroom experience.
How They Work: You typically select a pre-designed bathroom scene or upload a basic layout. Then, you click on different areas (floor, walls, backsplash) and apply various product options from a curated library. It’s like having an interior designer’s sample board at your fingertips, but instantly rendered. You can mix and match color palettes and material textures to see how they interact.
Use Case Example: Imagine you’re debating between marble-look porcelain tiles and a classic subway tile for your shower walls, along with three different options for your floor. A surface visualizer lets you cycle through these combinations in seconds, allowing you to quickly spot the winning pairing for your modern bathroom aesthetic. Once satisfied, you can usually save, print, or email your selections to kickstart your material procurement.
Full Layout & Spatial Planning: For Architectural Changes
When your remodel involves more than just aesthetics – perhaps moving a wall, adding a new shower enclosure, or changing the entire footprint of the bathroom – a comprehensive planner tool is essential. Planner 5D’s Bathroom Planner Tool is a prime example of this category. These tools help you understand spatial relationships and ensure everything fits before you commit.
How They Work: These tools often start with a 2D floor plan interface, where you can drag and drop walls, windows, doors, and fixtures. You can adjust dimensions, change room shapes, and essentially “build” your bathroom from the ground up, or modify an existing layout. Once your 2D plan is in place, a single click can often transform it into an immersive 3D view, allowing you to “walk through” your design. This dual functionality is critical: 2D ensures accurate measurements and spatial planning, while 3D provides visual clarity and helps you compare different configurations.
Use Case Example: You’re considering expanding a small half-bath into a full bathroom by incorporating space from an adjacent closet. With a layout planner, you can draw out the new walls, place a freestanding tub, a double vanity, and a separate walk-in shower. You can then toggle to 3D mode to see if the room feels cramped, if there’s enough clearance around fixtures, or if your grand ideas for flow actually translate well in a three-dimensional space. The drag-and-drop technology makes it accessible even without prior design experience.
AI-Powered Photorealism: Seeing It in Your Space
For the ultimate “what if” scenario, tools like Visualizee.ai’s AI Bathroom Design leverage artificial intelligence to create photorealistic renders of your actual bathroom transformed. This is a game-changer for envisioning a complete overhaul with incredible detail.
How They Work: The process is elegantly simple:
- Snap a photo of your current bathroom from any angle.
- Describe your dream bathroom in plain language (e.g., “Spa-like with a walk-in shower and floating vanity,” or “Modern with black fixtures and large format tiles”). The AI interprets your text.
- Receive AI-generated designs in seconds.
- Refine with chat commands (“Make the tiles lighter,” “Try a different vanity material,” “Add a freestanding tub”) to get unlimited variations.
The AI’s capabilities are astonishing. It understands nuanced descriptions, visualizes different tile patterns (herringbone, subway, straight lay), sizes, and materials (marble, porcelain). You can experiment with various vanity styles, sink configurations, fixture finishes, and even different lighting scenarios (natural daylight vs. warm evening ambiance). It can transform your bathroom into distinct styles like Modern Spa, Farmhouse, Coastal, or Luxury Hotel, showing you how different layouts (wet room, shower-tub combo, walk-in shower) would appear. This level of realism and iterative refinement is unparalleled for comprehensive renovations.
Use Case Example: You have an outdated master bathroom and want to explore a complete transformation into a “Modern Spa” retreat. You upload a photo of your existing space. Then, you prompt the AI: “Modern spa aesthetic, large format concrete-look tiles on walls and floor, floating double vanity, freestanding oval tub, and a spacious walk-in shower with a rain head. Matte black fixtures.” The AI instantly generates several photorealistic options. You can then refine: “Change floor tiles to a light wood look,” or “Add more natural light through a virtual skylight.” This iterative process lets you explore countless possibilities without any commitment or design expertise.
Your Step-by-Step Guide to Using a Bathroom Visualizer Tool Effectively
Regardless of the specific bathroom visualizer tool you choose, a methodical approach will yield the best results. Here’s how to navigate the process:
Step 1: Define Your Vision (Initial Brainstorm)
Before you even open a visualizer, take a moment to understand what you want. What’s bothering you about your current bathroom? What feelings do you want the new space to evoke (calm, vibrant, luxurious)? Jot down keywords, save inspiration images, and identify your “must-haves” vs. “nice-to-haves.” This initial clarity will guide your choices within the tool.
Step 2: Choose the Right Tool for the Job (Matching Needs to Features)
Consider your project scope:
- Simple surface updates (tiles, paint, backsplash)? A material-focused visualizer (like MSI Surfaces) is likely sufficient.
- Layout changes, new fixture placement, understanding spatial flow? A 2D/3D planner (like Planner 5D) is your best bet.
- Complete overhaul, exploring styles, or want photorealistic renders of your actual space? An AI-powered tool (like Visualizee.ai) will deliver the most immersive experience.
Quick Decision Guide:
| Project Type | Best Tool Type | Key Features to Look For |
| :—————————- | :————————————— | :————————————————————— |
| Surface Refresh | Material Visualizer | Extensive tile/surface library, color matching, save/share |
| Layout Overhaul | 2D/3D Floor Planner | Drag-and-drop layout, dimensioning, fixture library, 2D to 3D |
| Full Transformation | AI-Powered Visualizer | Photo upload, natural language prompts, photorealism, style presets |
Step 3: Input Your Space (Photos, Dimensions, or Starting Fresh)
This is where you bridge reality with the virtual:
- For AI Tools (like Visualizee.ai): Upload a well-lit, clear photo of your current bathroom. Ensure the entire space – vanity, shower/tub, toilet, and walls – is visible. The better the input photo, the more accurate and impressive the AI’s output.
- For 2D/3D Planners (like Planner 5D): You’ll either start with a blank canvas and draw your room dimensions precisely, or load a pre-existing template. Accurate measurements are crucial here for spatial planning.
- For Surface Visualizers (like MSI Surfaces): You’ll typically pick from a gallery of common bathroom layouts that most closely resemble your own, then apply materials.
Step 4: Design and Experiment (The Fun Part!)
Now, unleash your creativity!
- Mix and Match: Cycle through different combinations of tiles, vanity styles, cabinet finishes, and fixture types. Don’t be afraid to try combinations you might not have considered initially.
- Leverage AI Prompts: If using an AI tool, be specific with your language. Instead of “modern bathroom,” try “minimalist modern bathroom with a floating vanity, large format gray tiles, and chrome fixtures.” Refine iteratively: “Make the tiles lighter,” “Change vanity to wood tone,” “Add a freestanding tub.”
- Iterate and Refine: Save multiple versions of your design. A bathroom visualizer tool is all about iteration – testing ideas, tweaking elements, and perfecting the vision. See how different lighting conditions or material choices affect the overall feel.
Step 5: Review, Save & Share (Making It Real)
Once you have a few strong contenders, it’s time to solidify your decisions:
- Compare: Look at your saved designs side-by-side. Which one truly captures your vision?
- Get Feedback: Share your designs with family, friends, or even your contractor. Their fresh perspective can reveal details you might have overlooked.
- Document: Most tools allow you to save, print, or email your final design. This documentation becomes an invaluable reference for communicating with contractors, making purchases, and staying true to your plan.
Maximizing Your Visualizer Experience: Pro Tips & Pitfalls to Avoid
To truly get the most out of your bathroom visualizer tool, keep these expert tips in mind:
- Be Specific with AI Prompts: The more detailed your textual description for AI tools, the better the output. Mentioning tile size (e.g., “12×24 white subway tiles”), vanity type (“floating vanity with marble top”), and fixture finishes (“matte black fixtures”) will yield superior results. Also, tell the AI what to avoid (“no pedestal sink,” “avoid dark walls”).
- Consider Lighting Scenarios: Some advanced visualizers allow you to preview your design under different lighting conditions (daylight, warm evening, bright morning). This is crucial, as light dramatically alters how colors and textures appear.
- Don’t Forget the Small Details: While the big elements are exciting, remember the grout color, hardware finishes, mirror styles, and even small decorative touches. These contribute significantly to the overall aesthetic.
- Understand Tool Limitations: While powerful, no visualizer perfectly replicates every single product on the market. Some tools have limited libraries, so you might need to find a visually similar alternative if your exact choice isn’t available. For highly custom fixtures, the tool might give you a representative placeholder.
- Save Multiple Iterations: Think of each design as a draft. Save variations of different tile patterns, vanity colors, or shower configurations. This allows for easy comparison and refinement without losing previous ideas.
- Start Broad, Then Refine: Especially with AI tools, begin with general style directives (“modern farmhouse bathroom”), then progressively add detail (“add a barn door, shiplap walls, and a clawfoot tub”).
Quick Answers: Your Bathroom Visualizer Tool FAQs
Q: Are these tools really accurate?
A: Accuracy varies by tool type. Surface visualizers are accurate for material representation. 2D/3D planners are accurate for spatial relationships and dimensions. AI-powered tools are impressively photorealistic, especially with good input photos, but are visualizations—not blueprints. Always consult with a professional contractor for precise measurements and structural feasibility.
Q: Can I use them for small updates, or just full remodels?
A: Absolutely for both! A bathroom visualizer tool is equally useful for deciding on a new paint color and swapping out a vanity as it is for planning a complete gut renovation. Their flexibility makes them suitable for any scale of project.
Q: Do I need design experience to use a bathroom visualizer tool?
A: Generally, no! Most modern visualizers are designed with user-friendliness in mind, often featuring intuitive drag-and-drop interfaces or natural language AI prompts. This democratizes design, allowing anyone to achieve professional-looking results.
Q: Are bathroom visualizer tools always free?
A: Many excellent bathroom visualizer tool options offer a free basic version, while premium features (like larger asset libraries, advanced rendering, or professional design assistance) might come with a subscription or one-time fee. The free versions are often more than enough for exploring initial ideas.
Q: How do I translate the visualizer design to a contractor?
A: The best way is to print out or email your saved designs, showing multiple angles and details. If the tool provides a list of chosen materials or colors, include that too. This clear visual reference will help your contractor understand your vision precisely, leading to more accurate estimates and fewer miscommunications.
Bringing Your Dream Bathroom to Life
Embarking on a bathroom remodel no longer has to be a journey filled with uncertainty. A bathroom visualizer tool acts as your personal design studio, giving you the power to explore, experiment, and refine your vision with unprecedented clarity. From testing out bold tile patterns to reimagining entire layouts with the help of AI, these tools empower you to make confident decisions that transform your bathroom into the functional, beautiful space you’ve always envisioned. Stop wondering, start visualizing—your dream bathroom is just a few clicks away.

- Bathroom Visualizer Tool Lets You Preview Your Remodel - November 11, 2026
- A Bathroom Visualizer Brings Your Design Ideas to Life - November 10, 2026
- Smart Bathroom Drawer Organizers Declutter Your Vanity and Maximize Space - November 9, 2026