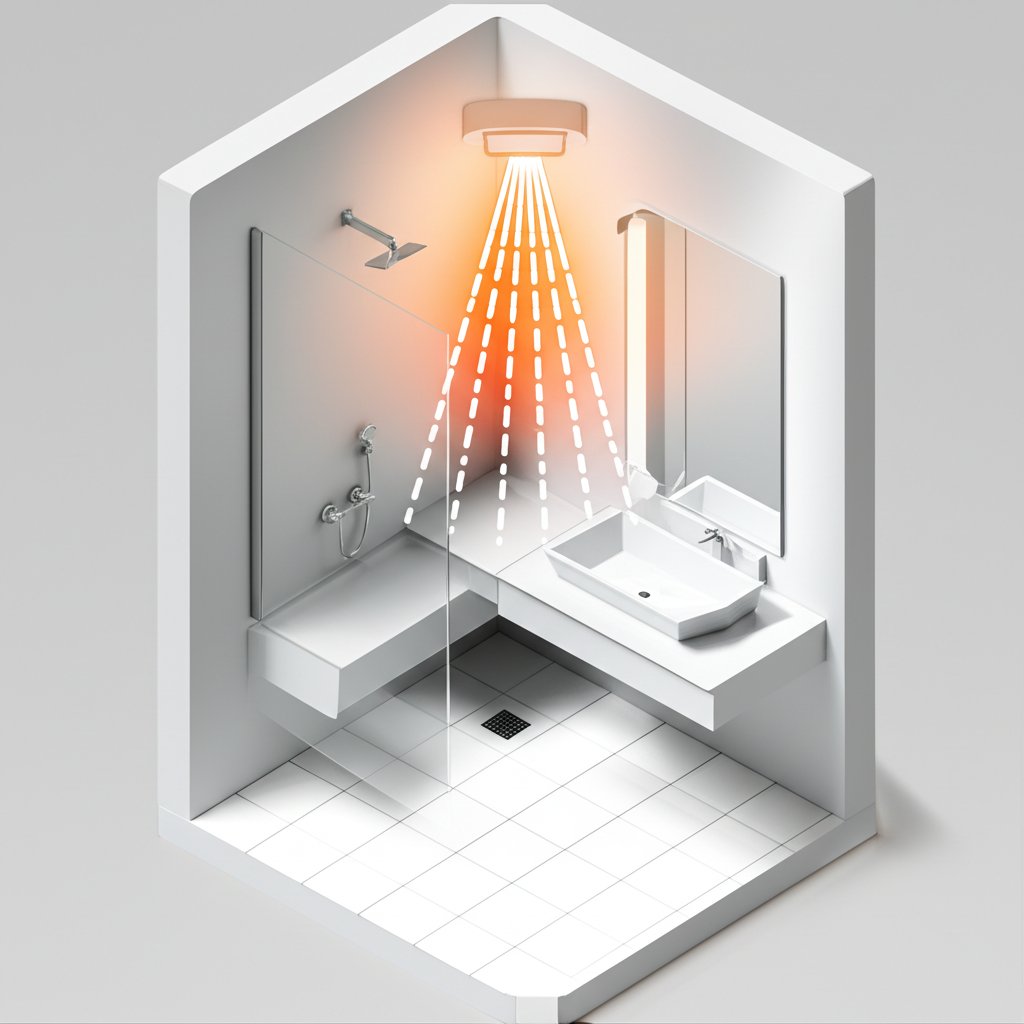
Here is the comprehensive pillar article on shower ceiling lights, crafted according to your specifications.
That dim, flickering bulb in your shower isn’t just a minor annoyance—it’s a daily compromise. You squint to read the shampoo bottle, you shave in the shadows, and you start your day in a space that feels more like a cave than a sanctuary. The right shower ceiling light can completely transform this experience, turning a purely functional space into one that’s safer, more efficient, and genuinely pleasant to be in. But navigating the world of wet-rated fixtures, lumens, and electrical codes can feel daunting.
This guide changes that. We’ll cut through the technical jargon and give you the clear, practical advice you need to choose and install the perfect light for your shower. No more guesswork, just bright, beautiful, and safe results.
At a Glance: Your Shower Lighting Cheat Sheet
- Safety First, Always: A shower light must be “wet location rated.” This is a non-negotiable safety standard to protect against water and steam. No exceptions.
- Brightness Matters: Look for a fixture that provides 500-800 lumens for a standard-sized shower to ensure clear visibility for tasks like shaving.
- Get the Color Right: The color temperature (measured in Kelvin) sets the mood. 3000K offers a soft, welcoming white, while 4000K-5000K provides a crisp, daylight-like feel.
- Know Your Types: The most common options are sleek recessed lights, easy-to-install surface-mount lights, and multitasking exhaust fan/light combos.
- When in Doubt, Hire a Pro: While replacing an existing fixture can be a DIY job for the experienced, new installations or complex wiring demand a licensed electrician. Water and electricity are a dangerous mix.
More Than Just a Light: Why Your Shower Lighting Deserves an Upgrade
It’s easy to overlook the single fixture in your shower stall, but its impact is threefold. A poor light doesn’t just fail at its primary job; it creates a cascade of daily frustrations.
The Safety Factor: Slipping and Tripping in the Shadows
A poorly lit shower is a legitimate safety hazard. Shadows can obscure a stray bar of soap on the floor, hide the edge of a built-in bench, or make it difficult to gauge depth. Bright, even illumination reduces the risk of slips and falls, especially for children and older adults. Proper lighting is one of the simplest and most effective safety upgrades you can make in a bathroom.
The Functionality Factor: Can You Even Read the Bottle?
From shaving your legs to washing your hair, a shower is a task-oriented space. Dim, yellowed light makes these simple routines more difficult. It can lead to missed spots while shaving or struggling to differentiate between your shampoo and conditioner. A well-chosen shower light provides crisp, clear visibility, making your daily routine faster and more effective.
The Ambiance Factor: From Dungeon to Spa
Lighting is the cornerstone of atmosphere. A harsh, dim, or poorly colored light can make your shower feel clinical and uninviting. The right fixture, however, can elevate the entire experience. Imagine stepping into a shower filled with clean, bright light that mimics natural daylight or a warm, soft glow that helps you unwind at the end of the day. This small change can make your bathroom feel less like a utility closet and more like a personal spa.
The Golden Rule: Decoding Wet and Damp Location Ratings
Before we talk about style or brightness, we need to cover the most critical aspect of any shower light: its safety rating. Water and electricity are a lethal combination, and building codes are extremely strict for a reason.
Every light fixture sold in the U.S. is tested and certified by an independent lab like Underwriters Laboratories (UL) or Intertek (ETL). They assign it a rating based on where it can be safely installed.
- Dry Location Rated: For indoor spaces that never experience moisture, like bedrooms and hallways.
- Damp Location Rated: For areas with ambient moisture or condensation, but no direct water contact. Think of the area above your vanity or in a well-ventilated laundry room.
- Wet Location Rated: This is the only acceptable rating for a light installed inside a shower or tub enclosure. These fixtures are sealed and gasketed to withstand direct exposure to water spray, steam, and high humidity without short-circuiting or causing an electrical hazard.
Think of it like this: a damp-rated light is a water-resistant jacket—it can handle some fog and mist. A wet-rated light is a deep-sea diving suit—it’s built to be fully submerged in the elements. For the area directly over your shower head, you need the diving suit. Using anything less is a serious fire and electrocution risk that violates the National Electrical Code (NEC).
Finding the Right Fixture for Your Space
Once you’ve committed to only looking at wet-rated options, you can start exploring the different types of fixtures available. Your choice will depend on your ceiling height, existing setup, and desired aesthetic.
The Sleek Minimalist: Recessed Lights
Also known as can lights or downlights, recessed fixtures are installed flush with the ceiling, offering a clean, modern, and unobtrusive look. They are the most popular choice for modern bathrooms.
- How they work: A housing unit sits inside your ceiling, and a “trim” kit is the visible part you see from the shower. For showers, you must use a specific wet-rated trim that includes a lens and gasket to seal the unit from moisture.
- Best for: Homeowners who want a seamless, integrated look. They work beautifully in contemporary, minimalist, and transitional bathrooms.
- Considerations: Installation is more involved, especially in a ceiling without existing fixtures. The placement is also crucial; a single light placed directly overhead can cast shadows on your face. For larger showers, two smaller recessed lights might be better than one large one.
The Easy Upgrade: Surface-Mount Fixtures
A surface-mount light attaches directly to a junction box on the surface of the ceiling. These come in a wide variety of styles, from simple, low-profile “puck” lights to more decorative designs.
- How they work: The fixture body covers the electrical box in the ceiling and is secured with screws. They are completely self-contained units.
- Best for: Replacing an old, outdated fixture without having to do major ceiling work. If you already have a junction box in your shower ceiling, this is often the fastest and most straightforward upgrade.
- Considerations: While many modern designs are very slim, they will never be as flush as a recessed light. Be sure to choose a style that complements your other bathroom hardware.
The Multitasker: Exhaust Fan and Light Combos
For a truly efficient upgrade, consider a unit that combines a high-powered ventilation fan with an integrated LED light. This is a brilliant solution for bathrooms that lack proper ventilation, helping to fight mold and mildew while also illuminating your shower.
- How they work: A single unit houses both the fan motor and the light source, requiring one installation and one spot on your ceiling.
- Best for: Small to medium-sized bathrooms, renovations where you’re addressing both lighting and ventilation, or anyone looking to streamline their ceiling fixtures.
- Considerations: Pay close attention to the fan’s power (measured in CFM, or Cubic Feet per Minute) and its noise level (measured in sones—lower is quieter). Look for models under 1.5 sones for quiet operation.
Speaking the Language of Light: A Plain-English Guide to Specs
When you start shopping, you’ll see terms like Lumens, Kelvin, and CRI on the packaging. Understanding these three specs is the key to choosing a light you’ll actually love.
| Specification | What It Measures | What to Look For in a Shower |
|---|---|---|
| Lumens (lm) | Brightness | 500-800 lumens. This range is bright enough for tasks without being blinding. A small, 3’x3′ shower can use 500 lm, while a larger walk-in might need 800 lm or more. |
| Kelvin (K) | Color Temperature | 3000K to 5000K. This is personal preference. 3000K is a soft, warm white (like a halogen bulb). 4000K is a neutral white. 5000K is a cool, crisp white that mimics daylight. |
| CRI | Color Accuracy | 90+ CRI. The Color Rendering Index (from 0-100) measures how accurately a light shows colors. A high CRI ensures skin tones, hair color, and tile look natural and true. |
| Many modern LED fixtures now offer selectable color temperature (CCT). A small switch on the fixture allows you to choose between 3000K, 4000K, and 5000K during installation, giving you the flexibility to find the perfect shade of white for your bathroom. |
To Hire or To DIY? A Realistic Look at Installation
This is where you need to be honest about your skills and experience. A mistake here isn’t just a cosmetic issue; it’s a serious safety risk.
When DIY Might Be an Option
You might be able to handle this project yourself if all of the following are true:
- You are replacing an existing, properly installed, wet-rated shower light.
- You are 100% comfortable with basic electrical work, like connecting wires with wire nuts.
- You know how to turn off the correct breaker at your electrical panel and have a voltage tester to confirm the power is off.
- The new fixture is a simple surface-mount or a retrofit LED designed to pop into an existing recessed can.
When to Call a Licensed Electrician (The Safer Bet)
For your safety and peace of mind, you should hire a professional if you are:
- Installing a new light where one didn’t exist before. This involves running new wire, which is a complex job.
- Unsure if the existing wiring is up to code.
- Not 100% confident in your ability to make safe, secure electrical connections.
- Dealing with an old house with outdated wiring.
- Installing a fan/light combo that requires new or different wiring and ductwork.
An electrician will ensure the fixture is connected to a GFCI-protected circuit (Ground Fault Circuit Interrupter), which is a mandatory safety device that instantly shuts off power if it detects a fault, preventing electric shock. The complexity of the job can also depend on the type of fixture you choose, and the market for specific light fixtures for showers is vast, with different models having unique installation requirements.
Your Shower Light Questions, Answered
Let’s tackle some of the most common questions that come up during a shower lighting project.
Can I just use a “regular” light fixture in my shower?
Absolutely not. Any fixture inside the shower enclosure (the area with the shower head) must be UL or ETL listed for wet locations. A standard, dry-rated fixture will corrode, short-circuit, and create a severe risk of fire or electrocution when exposed to shower steam and spray.
What is a GFCI and why do I need it for a shower light?
A GFCI is a special type of outlet or breaker that monitors the flow of electricity. If it senses an imbalance—like electricity flowing through water or a person instead of back through the neutral wire—it cuts the power in a fraction of a second. The NEC requires all bathroom receptacles and lighting circuits in wet areas to have GFCI protection. It’s a lifesaver.
What’s the best color temperature (Kelvin) for a shower?
This is subjective. For a relaxing, spa-like feel, 3000K (Soft White) is a great choice. For a clean, energizing, and true-to-life light that’s excellent for grooming tasks, 4000K (Neutral White) or 5000K (Daylight) are ideal. If you’re unsure, look for a fixture with selectable CCT technology.
How much does it cost to have a shower light installed?
Costs vary widely by location and job complexity. If you’re just having an electrician swap an existing fixture, you might pay $150-$300. If they need to run new wiring for a brand-new installation, the cost could be $400-$800 or more, depending on the accessibility of your ceiling and wiring.
Your Next Step to a Brighter, Safer Shower
Upgrading your shower ceiling light is one of the highest-impact projects you can undertake in a bathroom. It enhances safety, improves functionality, and elevates the entire feel of the space, turning a daily chore into a more pleasant ritual.
Don’t spend another morning squinting in a dim, dreary shower. Your path forward is clear:
- Assess Your Goal: Are you replacing an old fixture or installing a new one? Do you want a simple light, or a fan/light combo?
- Measure and Plan: Note the size of your shower and decide on the best placement to avoid shadows.
- Shop Smart: Filter your search for “wet location rated” fixtures only. Then, compare lumens, Kelvin, and CRI to find the perfect light for your needs.
- Decide on Installation: Be realistic about your skill level. When it comes to electricity and water, the safest choice is always the right one.
With the right knowledge, you can confidently choose a fixture that will brighten your shower and your daily routine for years to come.

- Bathroom Materials Selection Offers Quality Fixtures for Home Design Projects - October 9, 2026
- Best Cosmetic Storage Containers For a Tidy Vanity - October 8, 2026
- Best Makeup Storage Boxes to Keep Your Vanity Spotless - October 7, 2026










