Want a deck that looks fantastic, is exceptionally durable, easy to install, and eco-friendly? Recycled rubber deck tiles could be exactly what you need! This guide provides everything you need to know, from selecting the ideal tiles to maintaining their pristine condition for years. We’ll cover various types, thicknesses, and colors, assisting you in determining the best fit for your space. You’ll also find simple, step-by-step instructions for installation and upkeep, allowing you to create a stunning, long-lasting deck hassle-free. For added privacy, consider deck screens. Let’s get started on building your dream deck!
Rubber Deck Tiles: Your Guide to a Stylish and Durable Outdoor Oasis
Are you prepared to transform your deck into a stunning space without significant expenses or endless maintenance? Rubber deck tiles are exceptionally versatile, providing a durable and stylish alternative to traditional decking materials such as wood or composite. Given the wide array of options available, selecting the right tiles may initially seem complex. Let’s explore all you need to know to revamp your outdoor area, focusing on durability, safety, and aesthetics. Consider factors like UV resistance to prevent fading and cracking, and slip resistance for safety.
Choosing the Right Rubber Deck Tiles: A Deep Dive
Selecting the perfect rubber deck tiles involves considering several key factors. First, consider the tile type. The two main types are interlocking, sheet and rolled. Interlocking tiles are easy to install, typically resembling giant puzzle pieces, and are perfect for DIY enthusiasts; these are also simple to replace if damaged. Sheet tiles provide a sleek, continuous look ideal for larger decks aiming for a modern, minimalist aesthetic. Damaged sheet tiles are more complex to repair. Rolled rubber provides similar benefits to sheet rubber, but is ideal for covering very large areas.
Next, consider thickness. Thicker tiles, generally ¾ inch or more, offer superior durability, provide a more comfortable feel underfoot, and better resist heavy use and impact. They are also ideal for rooftop decks where sound dampening is desired. Thinner tiles are more budget-friendly but demonstrate wear and tear over time and may not offer the same degree of cushioning or sound insulation.
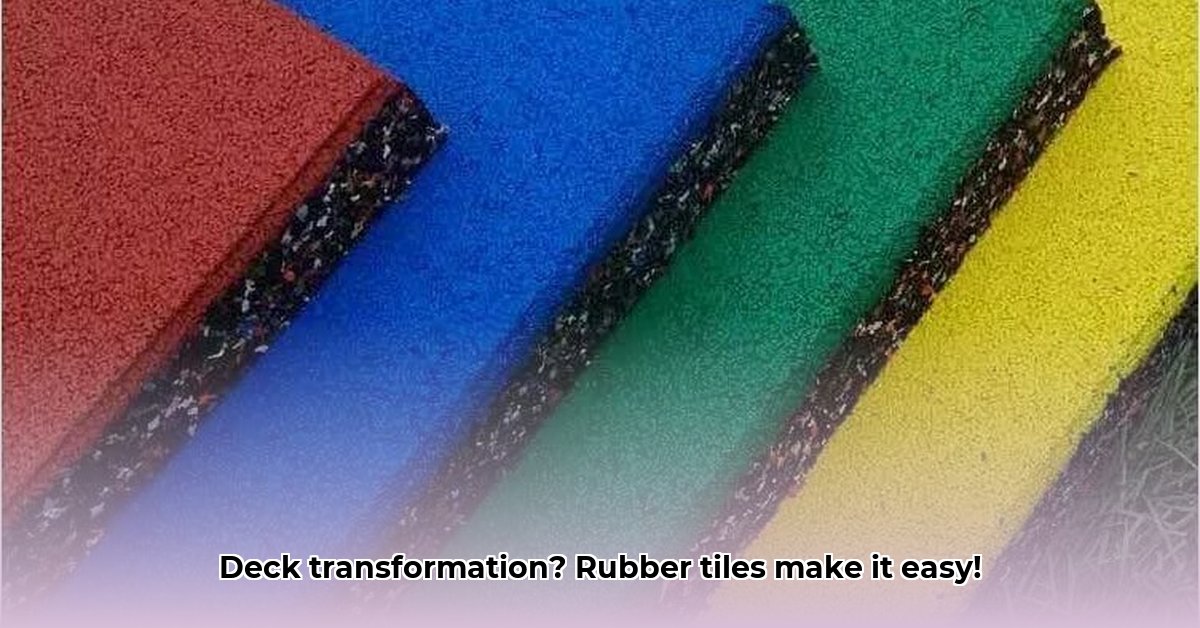
Finally, don’t underestimate the power of texture and color! The texture dramatically enhances slip resistance, which is especially important in rainy climates or near pools. Some textures, such as those mimicking wood grain or stone, can also enhance the aesthetic appeal. Color choices are practically limitless, allowing you to perfectly complement your home’s style. Lighter colors can help reduce heat absorption in sunny areas.
Key Considerations Before You Buy
Before you get swept away by the array of colors and styles, consider these factors to make an informed choice about your deck tiles. Understanding these elements ensures lasting satisfaction with your investment.
- Material Toughness and UV Resistance: How important is it that your tiles withstand the elements year after year and avoid color fading?
- Slip Resistance Rating: What is the tile’s slip resistance rating (ASTM D2047)? This is crucial for safety, especially in wet areas.
- Installation Ease: Are you a DIY enthusiast, or would you rather hire a professional for deck installation?
- The Price Tag: Remember that the total deck cost includes the tiles, underlayment, adhesive (if needed), and labor if hiring an installer. Get quotes from multiple suppliers and installers.
- Eco-Friendly Choices: Are you prioritizing sustainability with recycled materials for decking? Look for certifications like GreenCircle.
- Warranty Coverage: What is the length and scope of the warranty offered by the manufacturer?
- Fire Resistance: Check the fire resistance rating, especially for rooftop decks or areas with fire pits.
Installing Your Rubber Deck Tiles: A Step-by-Step Guide
Installation differs based on whether you have chosen interlocking or sheet tiles. Always consult the manufacturer’s instructions for your specific tile type. These instructions are a general guideline.
Interlocking Tiles:
- Prep the Surface: Clean your deck thoroughly, remove any loose debris, and ensure it’s level and dry. If the surface is uneven, use a self-leveling compound to create a smooth base.
- Plan Your Layout: Dry-fit the tiles to plan your layout, considering obstacles and ensuring a balanced look.
- Lay the First Row: Start at a corner and work outwards, ensuring each tile is laid straight and evenly spaced. Use spacers if necessary to maintain consistent gaps.
- Interlock the Tiles: Carefully push each tile into the adjacent one until you hear a secure click. Use a rubber mallet to gently tap the tiles together for a tight fit.
- Trimming: You’ll likely need to trim the final row with a sharp utility knife or circular saw (using the appropriate blade designed for rubber). Measure carefully and make clean, precise cuts.
- Edging (Optional): Install edging strips to create a finished look and prevent tripping hazards.
- Finishing Touches: Inspect for any gaps or misalignments, making adjustments.
Sheet Tiles:
- Precise Measurements: Accurately measure your deck’s dimensions to avoid wasting material. Create a template to ensure accurate cuts.
- Cutting the Sheets: Use a sharp, heavy-duty utility knife or specialized cutting tool to carefully cut the sheet tiles. Multiple passes with the knife may be necessary for thicker sheets.
- Dry Fit: Before applying adhesive, dry-fit the sheets to ensure a proper fit and make any necessary adjustments.
- Apply Adhesive: Apply a construction adhesive specified by the manufacturer to promote strong bonds. Use a notched trowel to ensure even distribution of the adhesive.
- Secure the Tiles: Firmly press the sheet tiles onto the adhesive using a heavy roller to remove air pockets and ensure full contact.
- Sealing (Optional): Seal the seams with a rubber sealant to prevent water penetration and ensure a watertight surface.
- Setting Time: Allow the adhesive to dry completely (typically 24-48 hours) before placing any weight or furniture on the tiles.
Rolled Rubber:
- Surface Preparation: As with sheet tiles, ensure the surface is clean, dry, and level.
- Unrolling and Acclimation: Unroll the rubber and allow it to acclimate to the outdoor temperature for several hours to reduce wrinkles.
- Cutting: Measure and cut the roll to fit the deck’s dimensions, allowing for slight overhang.
- Adhesive Application: Apply adhesive according to the manufacturer’s instructions.
- Rolling: Use a heavy roller to ensure the rubber adheres firmly to the surface, eliminating air pockets.
- Sealing (Optional): Seal the edges to prevent moisture from seeping underneath.
Keeping Your Rubber Deck Tiles Looking Great: Maintenance Tips
Rubber deck tiles are remarkably low maintenance. Regular sweeping removes most dirt and debris. For tougher stains, a mild detergent solution and a firm scrubbing brush usually do the trick. Avoid using harsh chemicals or abrasive cleaners, as they can damage the rubber.
- Regular Cleaning: Sweep or vacuum regularly to remove dirt and debris.
- Stain Removal: Use a mild detergent and water solution for stains. For tougher stains, try a rubber cleaner.
- Pressure Washing (Use Caution): If pressure washing, use a low-pressure setting and a wide nozzle to avoid damaging the tiles.
- Winter Care: In climates with heavy snowfall, some experts suggest covering your deck during winter to prevent potential damage from rapid temperature fluctuations and ice formation. Remove snow promptly to prevent ice buildup.
- Inspect Regularly: Check for any signs of damage, such as cracks or tears, and repair them promptly to prevent further deterioration.
Rubber Deck Tiles vs. Other Decking Materials: A Cost Comparison
The initial cost of rubber deck tiles might seem higher than pressure-treated wood, but consider the long game. Rubber tiles are durable and require minimal maintenance, potentially saving money in the long run on repairs and replacements. Their long lifespan makes them a solid contender for cost-effectiveness when you factor in longevity, minimizing recurring costs and offering long-term value. Also factor in the cost of labor if you are not a DIYer.
Here’s a general cost comparison (per square foot, installed):
- Pressure-Treated Wood: \$3 – \$7
- Composite Decking: \$8 – \$15
- Rubber Deck Tiles: \$7 – \$20
- PVC Decking: \$9 – \$16
These are estimates and vary based on location, material quality, and labor costs.
Weighing the Pros and Cons: The Rubber Deck Tile Verdict
| Feature | Pros | Cons |
|---|---|---|
| Durability | Extremely durable; withstands heavy use, UV exposure, and harsh weather | May show minor wear and tear over many years of use; this is usually minor. |
| Maintenance | Super easy to clean and maintain | Stubborn stains may require more effort to remove. |
| Installation | Interlocking tiles are DIY-friendly; sheet tiles are easier for pros | Sheet tiles need precise cutting and application of adhesive. |
| Environmental | Often made from recycled materials; a more sustainable option | Manufacturing processes still have an environmental footprint; some experts are analyzing and working on reducing them. |
| Cost | Potentially cost-effective long |

- Kitchen tiling wall: Elevate your kitchen with stylish wall tiles - December 16, 2025
- Gray Kitchen Backsplash Tile: Ideas for a Stylish Upgrade - December 14, 2025
- Backsplash For Gray Cabinets: Choosing the Right Backsplash Style - December 13, 2025