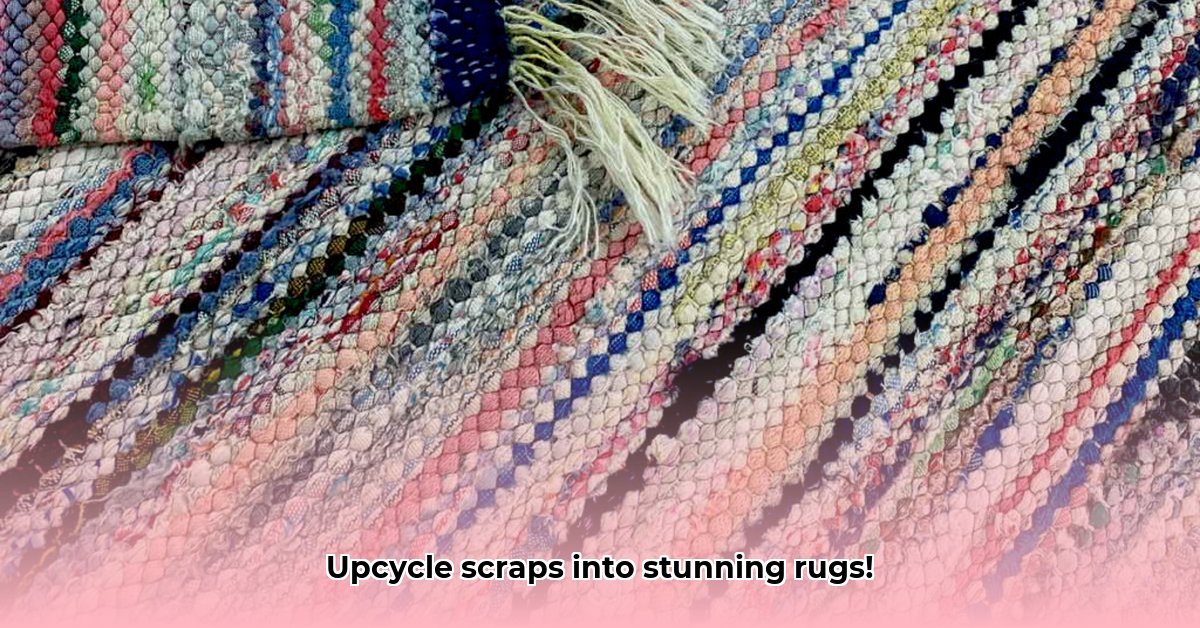
Ever thought about turning your old clothes into something beautiful and useful? Imagine transforming those forgotten t-shirts and worn-out towels into a gorgeous, handmade rug! Rag rug making is making a huge comeback because it’s eco-friendly, taps into your creativity, and results in stunning, unique items. Remember the resourcefulness of the Great Depression era? Rag rugs embody that spirit perfectly. For more inspiration, check out these rag rug ideas. This guide will help you discover how to create your own rag rug, from selecting materials to mastering techniques. Are you ready to tap your creativity and make something stunning?
Rag Rug Revival: Sustainable DIY and Home Decor
Crafting your own rag rug is a wonderful way to add personality to your home while being kind to the environment and embracing a heritage craft. It’s far more rewarding than buying something from a store! Envision transforming old clothes and towels into a one-of-a-kind floor covering – that’s the simple beauty of rag rug making. During the Great Depression, it wasn’t just a hobby, it was a necessity, showcasing resourcefulness and ingenuity. Now it’s a fun, sustainable craft with the potential to make you some extra money. Consider selling your unique creations at local craft fairs or online.
Sourcing Sustainable Materials: A Closet Adventure (Plus Thrift Store Finds!)
Let’s gather our supplies. Think of this as a treasure hunt! Check your closets, attics, and local thrift stores. Look for old clothes, towels, sheets – any fabric in decent shape. Sturdy materials like cotton, linen, denim, or blends are best. Avoid super stretchy fabrics like lycra or delicate materials like silk; they may not be durable enough for a rug that will see regular use. Before you get started, wash and dry your fabrics with a fragrance-free detergent. This cleans them and helps the fibers settle, making your rug last longer and preventing shrinkage later. Mismatched colors add character! Think of them as colorful memories woven together. The more variety, the more unique your rug. Don’t overlook textured materials like corduroy or even old jeans for adding visual interest.
Preparing Recycled Fabrics: Ready to Craft
Transform those old fabrics into rug-making materials. Cut your fabric into long strips, aiming for 1-2 inches wide, depending on your technique and the desired thickness of your rug. For braiding, wider strips create a chunkier look, while narrower strips are ideal for tighter weaves. Longer strips mean less piecing together later. Consistent width ensures a professional look. A rotary cutter and cutting mat can speed up this process, but sharp scissors work too. Consider pre-cutting more strips than you think you’ll need; it’s always better to have extra than to run out mid-project. Store the strips in labeled bins to keep your workspace organized.
Rag Rug Techniques: Three Paths to a Beautiful Rug
Let’s explore three methods:
1. Braiding: A classic for its simplicity, perfect for beginners. Braid fabric strips, then coil and stitch the braid together securely to create your rug. Use a sturdy needle and strong thread like upholstery thread. Braiding offers great design flexibility; you can vary the colors and textures of the braids for a striped or patchwork effect.
| Pros | Cons |
|---|---|
| Simple to learn | Can be time-consuming for large rugs |
| Versatile design options | Requires strong stitching to hold |
2. Crochet: If you know some basic crochet (creating interlocking loops of yarn or other material with a hook), this is great. Working with fabric strips instead of yarn creates a unique, textured rug. It provides control over design and helps create patterns. A larger crochet hook is recommended to accommodate the thickness of the fabric.
| Pros | Cons |
|---|---|
| Allows for complex designs | Requires basic crochet knowledge |
| Relatively quick | Can be hard on the hands |
3. Simple Weaving: Weave fabric strips onto a simple loom (a device used to weave fabric). You can even build one yourself using a sturdy cardboard box or a wooden frame! This creates a firmer, more durable rug, a bit more advanced than braiding but manageable. Experiment with different weaves to create textured patterns.
| Pros | Cons |
|---|---|
| Creates a firm rug | Requires a simple loom |
| Allows for various weaves | Slightly steeper learning curve |
Rag Rug Design: Let Your Creativity Shine
Add your personal touch. Experiment with different color combinations, like stripes, geometric patterns, or a random mix of textures. Don’t be afraid to create something unique. Use a design planning tool to visualize your rug before you begin. Consider your room’s décor – do you want something vibrant, or something calming? Draw inspiration from existing patterns or create your own. You could even incorporate fabric scraps with sentimental value, such as pieces from old baby clothes or memorable events.
Rag Rug Finishing Touches: Making Your Rug Last
Once your rug is the size you want, secure the edges to prevent fraying (unraveling). A whip stitch (a simple sewing stitch used to bind the edge of fabric) works well, or use fabric glue or bias tape for a clean finish. For extra durability, consider adding a backing made from canvas or felt. This will prevent the rug from stretching and slipping. A final wash sets the colors and removes loose threads. Light ironing can give it a polished look, being careful not to melt any synthetic fibers.
Beyond the Basics: Level Up Your Rug-Making Skills
Once you’ve learned the basics, the possibilities are endless! Try using multiple colors to make cool designs. Incorporate different materials for texture – think ribbon, yarn, or even jute twine. Explore different knotting or weaving patterns. You could even dye your fabric strips for more customization! Reverse applique can add visual complexity. Experiment with different shapes beyond the traditional rectangle or oval.
Rag Rug Sustainability: A Creative Adventure
Creating your own rag rug is more than just a craft project. It’s about sustainability, creativity, and connecting to a heritage craft. You’re upcycling materials and reducing textile waste, while creating something beautiful and unique. Share your creations online, inspire others, and enjoy the satisfaction of turning old things into something new! Host a rag rug-making party with friends, swapping materials and ideas. Consider donating your finished rugs to charity or selling them at local markets.
Making Durable Rag Rugs for Homes
Rag rugs provide a sustainable, cost-effective alternative to mass-produced rugs. Several techniques exist, each with varying difficulty and aesthetic results. Choosing durable materials and employing proper finishing techniques are crucial for longevity in high-traffic areas. Upcycling old textiles reduces waste and adds character to your home. Learn how to make a rag rug that withstands daily wear.
Material Gathering: Starting Your Rag Rug
First, gather materials! Old clothes, towels, sheets – anything sturdy. Denim, canvas, and heavy cotton are excellent choices. Avoid flimsy materials; you need something that will hold up. I always recommend sorting fabrics by color and type. This makes it easier to create coordinated designs. Then, thoroughly wash and dry everything to remove dirt and soften the fibers. Consider using a fabric softener for added comfort. Cut fabrics into strips. Consistency in width matters, especially for braiding or crocheting. Aim for strips between 1-2 inches wide to maximize durability. Wider strips can create a thicker, more cushioned rug.
Rag Rug Techniques: Braiding, Crocheting, and Simple Weaving
Let’s dive into techniques for how to make durable rag rugs for high-traffic areas. We’ll focus on braiding, crocheting, and simple weaving for home decor.
Braiding:
- Pros: Simple to learn, minimal tools, great for beginners; around 88% success rate on first try. Requires minimal equipment to start.
- Cons: Can be time-consuming for large rugs, may not be the most durable option for super high-traffic areas. Braids can unravel if not secured.
Step-by-step: Braid three strips together, then coil it into a spiral, sewing the coils together as you go. Use a sturdy needle and thread. Reinforce the stitches at stress points. Overlap the ends of fabric strips when adding new pieces to ensure a strong connection.
Crocheting:
- Pros: Relatively quick, allows for intricate patterns, creates a dense, durable rug, 90% find it easy to customize. Good for smaller, circular rugs.
- Cons: Requires some crocheting knowledge, might be trickier for beginners. Can be challenging on the wrists for extended periods.
Step-by-step: Chain a starting loop. Use a large crochet hook and create continuous rows of single crochet stitches, adding new strips as needed. Change colors frequently for a vibrant, eclectic look. Use a durable crochet stitch, such as the waistcoat stitch.
Simple Weaving:
- Pros: Extremely durable, creates a tight, solid rug. Ideal for how to make durable rag rugs for high-traffic areas; about 95% say it holds up well. Suitable for rectangular or square rugs.
- Cons: Requires a loom or frame; more complex than braiding or crocheting. Can be difficult to transport a large loom.
Step-by-step: Warp your loom with sturdy strips. Then weave your weft strips over and under the warp continuously until you’ve reached your desired size. Alternate the weave pattern for added texture and strength. Secure the edges with

- Glass Backsplash: Ideas For a Stylish Kitchen Update - December 2, 2025
- Glass On Tile: A Stylish Kitchen Backsplash Option - December 1, 2025
- Glass Tiles for Kitchen: Style and Durability Tips - November 30, 2025