“`markdown
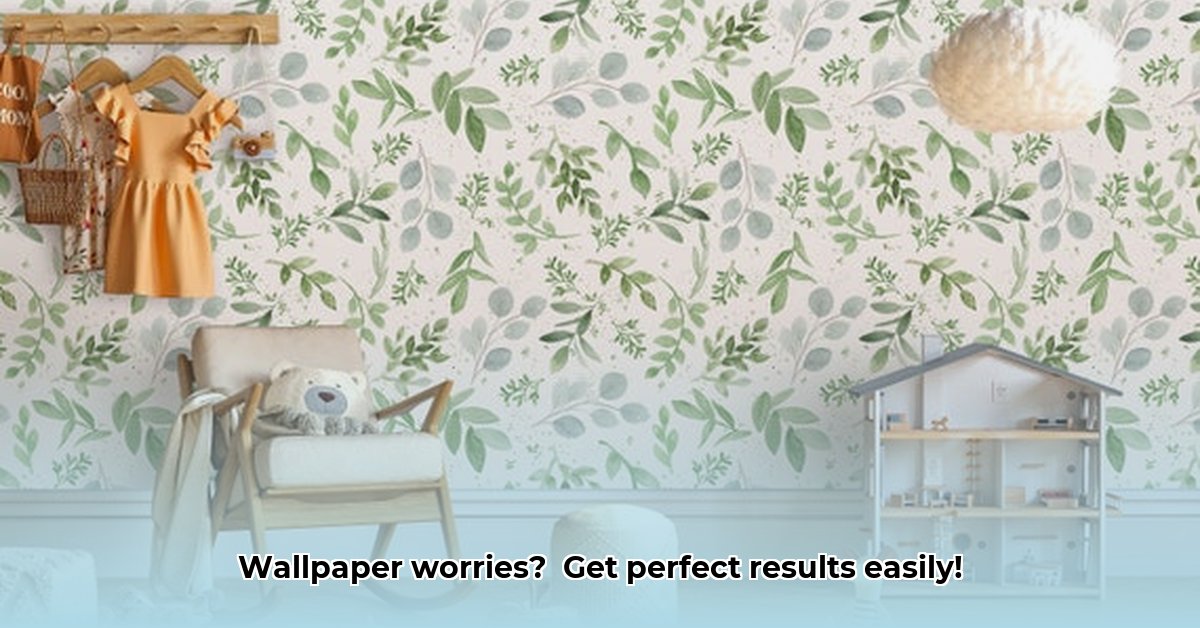
Easy Pasting Prepasted Wallpaper: Perfect Results Guide
Wallpapering can transform your home, and prepasted wallpaper makes it more manageable, even for beginners. This guide offers step-by-step instructions, from preparing your walls to achieving a seamless, professional-looking finish. Learn to avoid common pitfalls and keep your wallpaper looking its best for years to come.
Pasting Prepasted Wallpaper: Your Guide to a Perfectly Papered Room
Ready to revitalize your walls? Prepasted wallpaper is easier than you think! This guide simplifies each step, helping you achieve professional results. Let’s begin this exciting interior journey!
Getting Your Walls Ready: The Foundation for Success
Wall preparation is essential. Think of it as prepping a canvas for a painting.
- Clean: Scrub walls thoroughly with a sponge and mild detergent to remove dirt, grease, and any existing residue. Rinse with clean water and allow to dry completely.
- Repair: Fill holes, dents, and cracks with spackle or joint compound, allowing it to dry completely according to the manufacturer’s instructions. For larger repairs, multiple applications may be needed.
- Sand: Gently sand repaired areas with fine-grit sandpaper (120-grit or higher) for a smooth, even surface. Feather the edges of the repaired areas to blend seamlessly with the surrounding wall. Remove all sanding dust with a tack cloth or damp sponge.
- Prime (Recommended): Apply a wallpaper primer, especially if the walls are porous, have been previously wallpapered, or painted with a glossy finish. Primer seals the surface, promotes better adhesion, and makes future wallpaper removal easier. Let the primer dry completely.
Proper preparation ensures a flawless finish.
Measuring and Cutting: Achieving Precision
Accuracy is paramount for a professional result.
- Measure: Carefully measure your wall’s height in several places, as walls are not always perfectly even. Use the longest measurement as your guide.
- Add Extra: Add 4-6 inches (10-15 cm) to each strip for trimming at the top and bottom. This allows for adjustments and ensures a perfect fit, even if the ceiling or baseboard isn’t perfectly level.
- Cut: Use a sharp utility knife or razor blade with a fresh blade for clean, straight cuts. A long metal ruler or straightedge will also help achieve precision. Cutting on a protected surface, like a cutting mat, is recommended.
- Number Strips: If you are using a patterned wallpaper, lightly number each strip on the back in the order they will be hung. This will help to avoid mistakes, especially when matching patterns.
Clean cuts are crucial for seamless application.
Awakening the Adhesive: Activating Your Wallpaper
Prepasted wallpaper requires adhesive activation, usually by wetting the back.
- Read Instructions: Always consult the manufacturer’s instructions for specific activation times and methods. Activation methods can vary between brands.
- Water Tray Method: Fill a water tray (wallpaper tray) with clean, lukewarm water. Loosely roll the cut strip of wallpaper with the patterned side facing inward. Submerge the rolled wallpaper completely in the water for the recommended time (usually 10-15 seconds).
- Spray Bottle Method: Lay the cut strip of wallpaper pattern side down on a clean, protected surface. Use a spray bottle filled with clean, lukewarm water to generously spray the back of the wallpaper until it is thoroughly wet.
- Sponge Method: Lay the cut strip of wallpaper pattern side down on a clean, protected surface. Use a clean, damp sponge to thoroughly wet the back of the wallpaper.
- Experiment: Consider testing on a scrap piece to determine the ideal soaking time, which can range from a few seconds to a minute, depending on the wallpaper. Look for the adhesive to become tacky.
- Avoid Guesswork: Following instructions avoids common application issues like weak adhesion or over-saturation.
Booking Your Wallpaper: The Folding Technique
“Booking” involves folding the wallpaper strip paste-to-paste (adhesive sides together) after activating the adhesive.
- Why Book?: Booking allows the adhesive to activate evenly, prevents the edges from drying out too quickly, and makes the wallpaper easier to handle.
- How to Book: After activating the adhesive, gently fold the top half of the strip down, paste side to paste side, aligning the edges. Then, fold the bottom half of the strip up, paste side to paste side, aligning the edges. Be careful not to crease the folds.
- Booking Time: Allow the booked wallpaper to sit for the amount of time recommended by the manufacturer (usually 5-10 minutes). This allows the adhesive to fully activate and the paper to become more pliable.
Checking manufacturer’s instructions is always a good idea, as some wallpapers might not require booking. Booking helps evenly distribute adhesive, minimizing wrinkles for smoother results.
Applying the Wallpaper: Creating a New Look
Choose a starting point, often a corner or defined vertical line. Using a plumb bob or level, draw a vertical line to ensure the first strip is perfectly straight.
- Unfold Top: Carefully unfold the top half of the booked wallpaper strip.
- Position: Align the top edge of the wallpaper strip with the ceiling (allowing for the extra inches for trimming) and align the edge of the strip with your plumb line.
- Smooth: Gently smooth the wallpaper onto the wall using a smoothing tool (plastic smoother) or a clean, damp cloth. Start at the center and work outwards and downwards, removing air bubbles and wrinkles.
- Unfold Bottom: Carefully unfold the bottom half of the booked wallpaper strip and repeat the smoothing process.
- Seams: When hanging subsequent strips, carefully align the edges of the wallpaper strips, matching the pattern if necessary. Use a seam roller to gently press the seam and ensure a tight, clean join.
- Eliminate Air Bubbles: If air bubbles persist, gently poke them with a needle or pin and smooth the area again. Patience is key to achieving a seamless application.
Pattern Matching: Aligning for Visual Harmony
If your wallpaper has a pattern, alignment is essential.
- Match at Eye Level: Focus on matching the pattern at eye level first, as this is the most noticeable area.
- Overlap and Double Cut (Optional): For complex patterns or difficult seams, consider using the overlap and double-cut method. Overlap the edges of the two strips by a small amount (about 1/8 inch). Use a sharp utility knife to cut through both layers of wallpaper along the overlapped seam. Remove the top layer of waste from both strips and smooth the edges together for a perfectly matched seam. This requires practice and a steady hand.
- Work in Small Sections: Work in small sections to match the pattern on each strip, ensuring a cohesive look.
- Reference Point: Once you have a few strips aligned, they will serve as a reference point for the rest of the installation.
Trimming and Finishing: The Final Touches
Once the wallpaper is up, trim excess paper at the top and bottom using a sharp blade.
- Straightedge: Use a wide, flexible straightedge to guide your blade for clean, straight cuts.
- Trim Excess: Hold the straightedge firmly against the wall and trim the excess wallpaper with a sharp utility knife, using a fresh blade.
- Clean Excess Adhesive: Wipe away any excess adhesive with a damp cloth, being careful not to damage the wallpaper. Rinse the cloth frequently with clean water.
- Inspect: Step back and admire your newly transformed space, looking for any imperfections or areas that need attention.
Troubleshooting: Addressing Common Issues
Even experienced wallpaperers encounter hiccups. Here’s how to address them:
- Bubbling: If small bubbles appear after the wallpaper has dried, they may disappear on their own. If they persist, pierce bubbles with a pin or needle, gently squeeze out any trapped air, and smooth the area.
- Wrinkles: Carefully lift the affected section, reapply adhesive if necessary (using a small brush), and smooth. Use a heat gun or hairdryer on a low setting to gently warm the wallpaper and make it more pliable.
- Seams Not Matching: If seams are not aligning properly, peel back the strip and reposition it, paying close attention to the pattern match. If the adhesive has dried, re-wet the back of the wallpaper.
- Loose Edges: If edges are lifting, apply a small amount of wallpaper paste to the back of the loose edge with a small brush and press firmly against the wall. Hold in place with painter’s tape until the adhesive dries.
Addressing issues promptly ensures a flawless finish.
Pasting Prepasted Wallpaper: A Quick Reference Table
| Step | Description | Tips |
|---|---|---|
| Wall Preparation | Clean, repair, sand, and prime walls. | Use primer for porous surfaces, previously wallpapered walls, or glossy paint. |
| Measurement & Cutting | Accurate measurements + extra length. Use a sharp blade and straightedge for clean cuts. | Double-check your measurements before cutting! Number strips on the back if using patterned wallpaper. |
| Adhesive Activation | Follow manufacturer’s instructions – wet or spray. | Don’t rush this step; it’s crucial for proper adhesion. Test on a scrap piece first. |
| Booking | Fold the wallpaper paste-to-paste and allow to sit for the recommended time. |

- Backsplash For Gray Cabinets: Choosing the Right Backsplash Style - December 13, 2025
- Gray And White Backsplash: Ideas For Timeless Style - December 12, 2025
- Gray Kitchen Backsplash Ideas: Find Your Perfect Gray Tile - December 11, 2025