Building a mezzanine floor? It’s a significant undertaking, but with meticulous planning and the right approach, you can create exceptional new space. This guide provides a comprehensive walkthrough, from initial concept to long-term upkeep. Consider it your essential construction handbook! For more detailed information, check out this mezzanine construction guide.
Phase 1: Planning and Design – Laying the Solid Foundation
Before even considering raising a beam, detailed planning is paramount. This extends beyond mere aesthetics; it’s about ensuring structural integrity and regulatory compliance for your new mezzanine. The planning and design phase requires understanding load requirements, building permits, and structural design.
1. Site Assessment: Envision the area where your mezzanine will stand. What is the current floor’s composition? What is its strength, and can it support additional weight? You must determine the load-bearing capacity of your existing floor, which dictates the size and type of mezzanine you can construct. Factors such as soil composition (if applicable), existing structural supports, and potential utility conflicts should be carefully analyzed. This site evaluation is a crucial part of mezzanine floor planning. A geotechnical report may be necessary for comprehensive analysis.
2. Defining Your Needs: What will your new mezzanine serve as: storage, office space, manufacturing, or something else? This heavily influences the layout, materials, and required load capacity. Detailed drawings are vital, considering access (stairs, ladders, or lifts), electrical requirements, lighting, HVAC (heating, ventilation, and air conditioning) systems, plumbing (if needed), and fire suppression systems. Consider future expansion or changes in use when designing the layout.
3. Load Calculations: Engineering expertise is vital. Precise calculations are needed to determine your mezzanine’s weight-bearing capacity. This includes dead load (weight of the structure itself), live load (weight of people, equipment, and stored items), and any potential dynamic loads (such as machinery vibration). Underestimation poses risks, while overestimation wastes resources. Consulting a structural engineer is best. They can offer certified calculations compliant with building codes, ensuring your mezzanine meets all safety standards. These calculations should also consider seismic activity, wind loads, and other environmental factors specific to your location.
4. Material Selection – Choosing the Right Building Blocks:
There are multiple material options. Steel, wood, and concrete are popular, each with its advantages and disadvantages:
| Material | Pros | Cons | Best For… |
|---|---|---|---|
| Steel | Strong, long-lasting, versatile, fire-resistant | Can be expensive, requires specialized skills | Heavy-duty applications, large spans, industrial settings |
| Wood | Cost-effective, aesthetically pleasing, renewable | Not as strong as steel, susceptible to damage, less fire-resistant | Lighter loads, smaller mezzanines, simpler designs, office environments |
| Concrete | Extremely durable, fire-resistant, sound dampening | Very heavy, complex installation, less design flexibility | Situations requiring exceptional strength & fire safety, minimal vibration |
Your budget and intended use will determine your material choice. Consider the environmental impact of each material, including sourcing and manufacturing processes. It is useful to compare mezzanine floor materials before construction.
5. Permits and Approvals: This critical step cannot be skipped! Check with your local building department to identify required permits. Requirements vary based on location, mezzanine size, and building codes. These might include building permits, electrical permits, plumbing permits, and fire safety permits. Be prepared to submit detailed plans, structural calculations, and other documentation. Securing necessary paperwork prevents delays, fines, and legal issues.
6. Contractor Selection – Finding Your Expert Partner: Choosing the right contractor is crucial. Don’t prioritize lowest cost alone. Seek a contractor with proven mezzanine floor installation experience, solid references, and a strong safety history. Verify their licenses and insurance. Obtain and compare multiple quotes, ensuring each quote includes a detailed breakdown of costs and timelines. Discuss the project in detail, and ensure the contractor understands your needs and expectations.
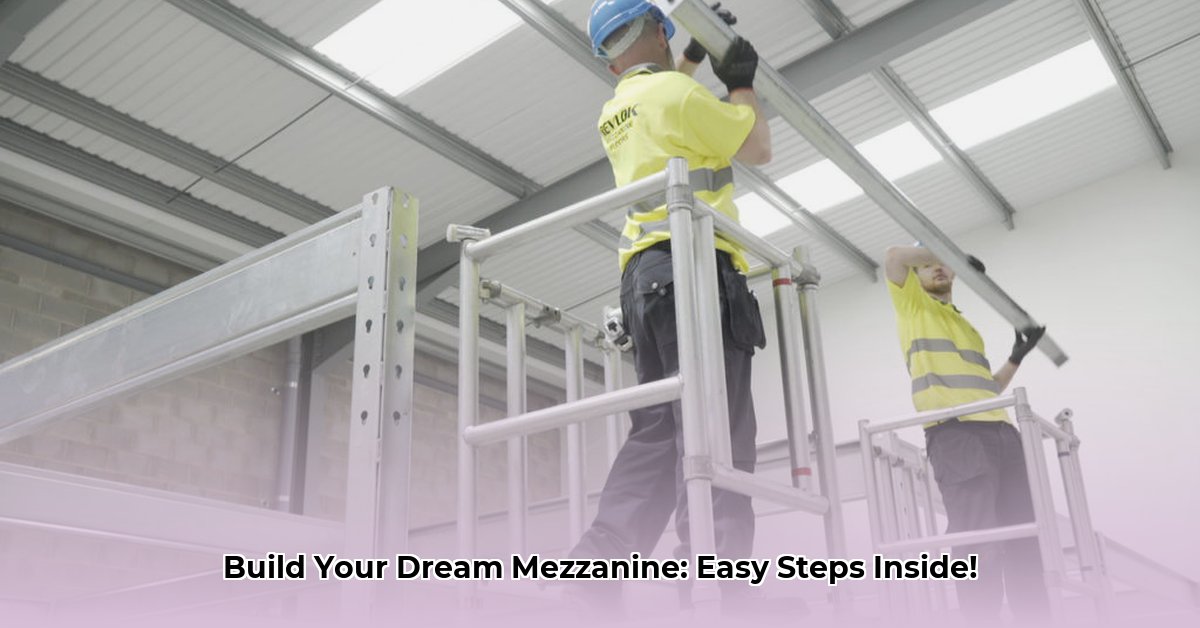
Phase 2: The Installation Process – Building Your Mezzanine Floor
Here, your plans come to life. Remember, safety is paramount. This is a staged approach like assembling furniture, but with higher stakes involved! You can ensure effective structural design by hiring a professional contractor.
1. Site Preparation: Before installation begins, clear the area of any obstructions, equipment, or materials. Ensure the existing floor is clean and level. Verify the delivery of all materials and inspect them for any damage. Establish a safe work zone with appropriate signage and barriers.
2. Column Erection: These vertical supports bear the entire structure’s weight. Columns must be perfectly plumb (vertical) and positioned per designs, as errors here impact structural stability. Use shims or leveling plates to ensure proper alignment. Secure the columns to the existing floor with appropriate anchors, following the engineer’s specifications.
3. Beam Installation: These horizontal supports connect the columns. Accurate alignment and secure fastening are vital. Think of it as the mezzanine’s skeleton, where accuracy is paramount. Use appropriate connectors (bolts, welds) to attach the beams to the columns, ensuring they are properly torqued or welded according to the engineer’s instructions.
4. Decking Installation: You create the actual floor using plywood, steel grating, or other specialized decking materials depending on expected weight, intended use and cost. Ensure the decking is properly aligned and securely fastened to the beams. Use appropriate fasteners (screws, bolts, or welds) and follow the manufacturer’s recommendations for installation.
5. Railing and Access Installation: Safety is critical! Install sturdy perimeter railings to prevent falls. It is non-negotiable. Access points like stairs or ladders must also be properly installed and meet safety regulations, including handrail height, stair tread depth, and landing size. Consider adding safety gates or barriers to restrict access to authorized personnel only.
6. Electrical and Plumbing Installation: If your mezzanine requires electrical or plumbing services, hire qualified professionals to perform these installations. Ensure all electrical and plumbing work complies with local codes and regulations.
7. Fire Suppression System Installation: Install a suitable fire suppression system (sprinklers, fire extinguishers) to protect the mezzanine and its occupants in case of a fire. Ensure the fire suppression system is properly designed and installed to meet local fire codes.
Phase 3: Safety First – Protecting Your Crew and Yourself
Construction sites inherently possess hazards that must not be taken lightly.
- Personal Protective Equipment (PPE): Hard hats, safety glasses, hearing protection, and appropriate footwear are essential at all times. Depending on the tasks being performed, other safety equipment such as harnesses (fall arrest system), gloves, and respirators may also be necessary. Ensure all PPE is properly fitted and maintained.
- Fall Protection: When working at heights, fall arrest systems are crucial, including safety harnesses, guardrails, or safety nets. Never underestimate fall risks, as consequences can be severe. Regularly inspect fall protection equipment for any signs of damage or wear.
- Load Handling: Handling heavy materials requires proper lifting techniques and machinery to prevent injuries and structural damage. Using appropriate equipment and safe techniques is significant. Train workers on proper lifting techniques and the safe operation of material handling equipment.
- Electrical Safety: Comply with all electrical safety rules, ensuring qualified electricians perform all electrical work to prevent electrocution, fire, or other serious building accidents. Use ground fault circuit interrupters (GFCIs) to protect against electrical shock.
- Regular Inspections: Conduct frequent inspections during construction, addressing safety issues promptly with a proactive approach is essential. Document all safety inspections and corrective actions taken.
Here’s a quick risk assessment matrix to better understand safety regulations:
| Risk Factor | Likelihood | Severity | Mitigation Strategy |
|---|---|---|---|
| Falls from Heights | High | High | Fall protection systems, safety harnesses, guardrails |
| Crushing Injuries | Moderate | High | Proper load handling, shoring and bracing, clear communication |
| Electrocution | Low | High | Safe electrical practices, appropriate groundings, lockout/tagout procedures |
| Material Handling Accidents | Moderate | Moderate | Safe lifting techniques, appropriate machinery, proper training |
Phase 4: Post-Installation and Maintenance – Keeping Your Mezzanine in Top Shape
Ongoing care is essential for mezzanine longevity and safety.
- Initial Inspection: Have a qualified professional inspect post-installation that it meets specifications and is structurally sound. This inspection should include verification of all connections, load-bearing capacity, and safety features.
- Load Testing: Verify if the mezzanine handles its intended load, ensuring that structural calculations were accurate and installation was properly performed. Conduct load testing according to industry standards and engineering recommendations.
- Regular Inspections: Schedule regular inspections – at least annually – to identify wear, damage, or other issues, addressing early problems before they escalate. These inspections should include checking for loose connections, corrosion, damaged decking, and any signs of structural deterioration.
- Maintenance Schedule: Develop and follow a schedule addressing cleaning, lubrication, and necessary repairs to prevent small issues from becoming larger and more expensive. This schedule should include routine cleaning, tightening of connections, and replacement of worn or damaged components.
Phase 5: Troubleshooting – Addressing Common Issues
Even with the best planning and installation, problems can occur. Here are a few common issues and potential solutions:
- Sagging Floor: Often signifies overloading. Review load calculations, ensure that the mezzanine is not carrying more weight

- Glass Tile Shower Ideas to Create a Stunning Bathroom Space - December 7, 2025
- Glass Wall Tile Ideas for Kitchens and Bathrooms - December 6, 2025
- Glass Tile Bathroom: Create a Beautiful, Easy-Clean Space - December 5, 2025