Dreaming of a kitchen where everyone gathers, meals are prepped with ease, and storage is never a problem? A huge kitchen island might be the answer. But before you expand, it’s crucial to consider the design elements that will make it both functional and stylish within your space.
At a glance:
- Determine if your kitchen layout can realistically accommodate a huge kitchen island without feeling cramped.
- Explore multi-zone layouts to maximize the island’s utility: cooking, prep, dining, and storage.
- Evaluate different shapes (rectangular, L-shaped, T-shaped) to best suit your workflow and available space.
- Select durable, visually appealing materials that align with your overall kitchen design.
- Plan for adequate seating and consider varying countertop heights for different functions.
Is a Huge Kitchen Island Right for You? Assessing Your Space
Before diving into design specifics, realistically evaluate your kitchen’s dimensions. A huge kitchen island can be a fantastic addition, but only if the surrounding walkways remain comfortable. Consider the work triangle (sink, stove, refrigerator) and ensure the island doesn’t impede the flow.
- Minimum walkway: Aim for at least 42 inches of clearance around the island. Less than that, and you risk a cramped and frustrating cooking experience.
- Overall kitchen size: Huge islands generally require kitchens that are at least 12 feet wide and 16 feet long. Smaller kitchens might benefit from a peninsula or smaller, mobile island instead.
- Consider scale: The island should be proportionate to the rest of the kitchen. A massive island in a modestly sized kitchen will look out of place, even if the walkways technically meet the minimum requirement.
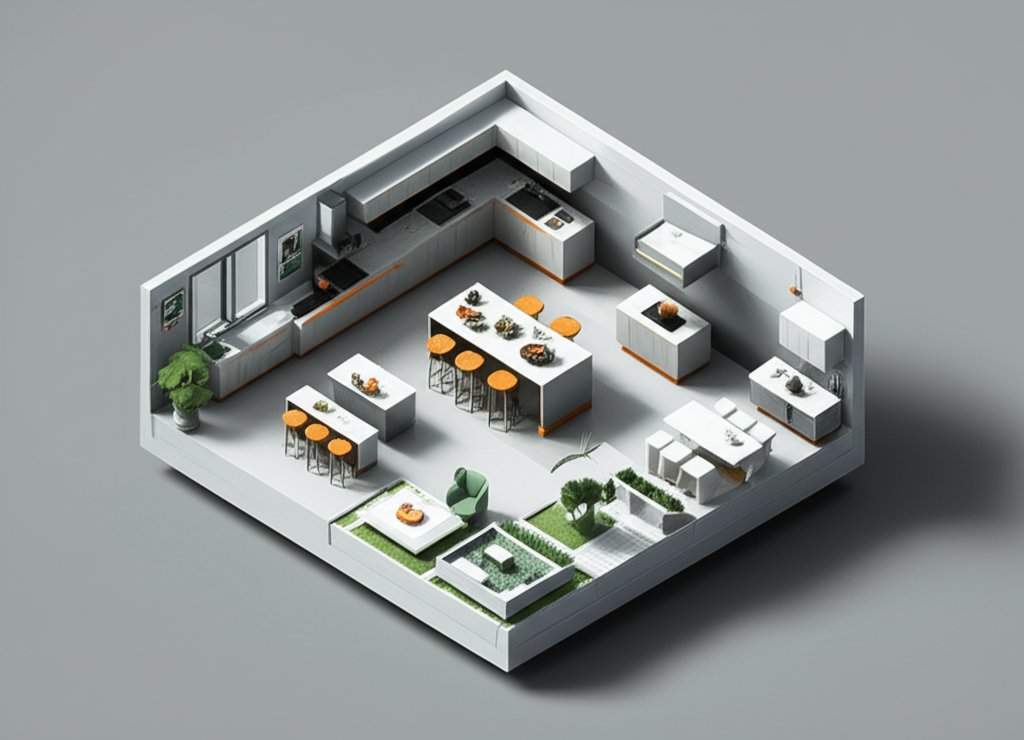
Designing a Multi-Zone Island: Functionality First
A huge kitchen island offers the opportunity to create distinct zones for various activities. This maximizes its usability and streamlines your kitchen workflow.
- Prep zone: A dedicated section for chopping, mixing, and assembling ingredients. Consider incorporating a prep sink and pull-out cutting board.
- Cooking zone: Integrate a cooktop or induction range directly into the island. Ensure proper ventilation with a downdraft system or overhead range hood.
- Serving/Dining zone: Extend the countertop to create an overhang for seating. This transforms the island into a casual dining space or buffet area.
- Storage zone: Utilize drawers, cabinets, and shelves to store cookware, utensils, and other kitchen essentials. Think about incorporating specialized storage solutions like spice racks or pull-out organizers.
For example, imagine an “L” shaped island. The shorter leg could house a prep sink and dishwasher, while the longer leg features seating and storage. This creates a natural flow from prep to clean-up, with a social space integrated.
Island Shape: Choosing the Right Configuration
The shape of your huge kitchen island significantly impacts its functionality and visual appeal.
- Rectangular: The most common and versatile shape. Ideal for long, narrow kitchens and offers ample counter space and storage.
- L-Shaped: Works well in corner kitchens or spaces where you want to create a distinct division between the cooking and dining areas. It allows for multiple workstations and can facilitate conversation.
- T-Shaped: A modern option that extends from the main island, creating a peninsula-like extension. Great for adding extra seating or a baking center. This layout promotes seamless interaction between hosts and guests, making it ideal for social and family gatherings.
Consider how you primarily use your kitchen when selecting a shape. If you frequently entertain, an L-shaped or T-shaped island might be more conducive to socializing. If you prioritize workspace, a rectangular island might be the best choice.
Material Selection: Balancing Durability and Style
The materials you choose for your huge kitchen island will influence its appearance and longevity.
- Countertop: Granite, quartz, marble, and butcher block are popular options. Granite and quartz are durable and low-maintenance, while marble offers a luxurious look. Butcher block adds warmth and is ideal for prep areas.
- Cabinetry: Wood, painted MDF, and thermofoil are common choices. Wood offers a classic look, while painted MDF provides a smooth, modern finish. Thermofoil is a budget-friendly option that’s easy to clean.
- Base: Consider adding decorative elements to the island base, such as Shaker-style panels, beadboard, or furniture-style legs. This can enhance its visual appeal and tie it in with the rest of the kitchen.
Don’t be afraid to mix and match materials. For example, you could pair a granite countertop with painted cabinets and a butcher block accent for a visually interesting and functional island.
Seating and Countertop Height: Comfort and Function
Adequate and comfortable seating is crucial for making your huge kitchen island a gathering place.
- Counter height (36 inches): Requires counter-height stools (24-26 inches seat height). Suitable for casual dining and food prep.
- Bar height (42 inches): Requires bar-height stools (30-32 inches seat height). Creates a more elevated and bar-like atmosphere.
- Table height (30 inches): Can be achieved with a lowered section of the island. Requires standard dining chairs (18 inches seat height). Ideal for formal dining or creating a more intimate seating area.
Varying countertop heights can also delineate different zones within the island. For instance, a raised bar-height section can separate the cooking area from the seating area.
Lighting the Island: Task and Ambient Illumination
Proper lighting is essential for both functionality and ambiance.
- Pendant lights: Hang pendant lights above the island to provide task lighting for food preparation and dining. Choose fixtures that complement your kitchen style.
- Recessed lighting: Install recessed lighting around the perimeter of the island to provide ambient illumination.
- Under-cabinet lighting: Add under-cabinet lighting to illuminate the countertop and highlight the island’s design features.
Consider using dimmers to adjust the lighting level and create different moods.
Incorporating Appliances: Streamlining Your Workflow
A huge kitchen island can accommodate a variety of appliances, making it a central hub for cooking and entertaining.
- Cooktop: Install a cooktop with a downdraft ventilation system to keep the air clean.
- Oven/Microwave: Integrate a built-in oven or microwave into the island to save space.
- Dishwasher: Install a dishwasher near the prep sink for easy clean-up.
- Wine refrigerator: Add a wine refrigerator to the island to keep your favorite wines chilled.
Carefully consider the placement of appliances to ensure they don’t impede workflow or create safety hazards.
Remember that kitchen design trends evolve. For broader context and updated looks for your space, you might find some Island kitchen design inspiration useful.
Practical Playbook: Designing Your Huge Kitchen Island
Here’s a step-by-step guide to designing your huge kitchen island:
- Measure your kitchen: Accurately measure your kitchen’s dimensions and create a floor plan.
- Determine your needs: Identify your primary needs and how you plan to use the island (prep, cooking, dining, storage).
- Choose a shape: Select a shape that complements your kitchen layout and meets your functional requirements.
- Plan the layout: Design the layout of the island, including zones for prep, cooking, dining, and storage.
- Select materials: Choose durable and visually appealing materials for the countertop, cabinetry, and base.
- Plan seating: Determine the number of seats you need and choose the appropriate countertop height.
- Incorporate appliances: Integrate appliances into the island to streamline your workflow.
- Plan lighting: Select lighting fixtures that provide both task and ambient illumination.
- Consult with a professional: Work with a kitchen designer or contractor to finalize your design and ensure it meets building codes.
Quick Answers: Common Questions About Huge Kitchen Islands
Q: How much space do I need around a kitchen island?
A: Aim for at least 42 inches of walkway space around the island. This allows for comfortable movement and prevents the kitchen from feeling cramped.
Q: What’s the ideal height for a kitchen island countertop?
A: The standard countertop height is 36 inches, but you can vary the height to create different zones. A raised bar-height section (42 inches) is ideal for seating, while a lowered table-height section (30 inches) is suitable for formal dining.
Q: What’s the best material for a kitchen island countertop?
A: Granite and quartz are durable and low-maintenance options, while marble offers a luxurious look. Butcher block adds warmth and is ideal for prep areas. The best material depends on your budget, style preferences, and functional needs.
Q: Can I put a cooktop in my kitchen island?
A: Yes, you can install a cooktop in your kitchen island. Ensure proper ventilation with a downdraft system or overhead range hood.
Q: How do I choose the right size stools for my kitchen island?
A: Select stools that are the appropriate height for your countertop. Counter-height stools (24-26 inches seat height) are suitable for 36-inch countertops, while bar-height stools (30-32 inches seat height) are ideal for 42-inch countertops.
Make It Happen: Your Island Design Decision Tree
This decision tree will help guide your choices.
- Kitchen Size: Is your kitchen at least 12′ x 16′?
- Yes: Proceed to Question 2.
- No: Consider a smaller island or peninsula.
- Primary Use: Will the island be primarily for prep, cooking, dining, or storage? Identify your top 2 needs.
- Shape Preference: Do you prefer a rectangular, L-shaped, or T-shaped island?
- Material Budget: What’s your budget for countertop and cabinetry materials? (Entry-level, Mid-range, High-end)
- Seating Style: Do you prefer counter-height, bar-height, or table-height seating?
- Appliance Integration: Do you want to integrate a cooktop, sink, dishwasher, or wine refrigerator?
By answering these questions, you’ll narrow down your options and create a design that meets your specific needs and preferences.
Designing a huge kitchen island requires careful planning and attention to detail. By considering the size of your kitchen, your functional needs, your style preferences, and budget constraints, you can create a stunning and functional centerpiece that transforms your kitchen into the heart of your home.

- Glass On Tile: A Stylish Kitchen Backsplash Option - December 1, 2025
- Glass Tiles for Kitchen: Style and Durability Tips - November 30, 2025
- Decorative Wall Tiles for Kitchen: Stylish Design Ideas - November 29, 2025