Good lighting goes beyond mere visibility; it significantly impacts the ambiance, functionality, and aesthetics of your home. This instructional guide details how to plan and install recessed lighting—fixtures built into your ceiling—to achieve optimal illumination in every room. We’ll cover everything from sketching your floor plan to choosing the right light bulbs and safely installing the fixtures. Ready to transform your house into a beautifully lit home? Let’s begin! For a visual aid, check out this helpful resource on electrical symbols.
Floor Plan with Lighting Layout: Designing Your Dream Lighting Scheme
Let’s optimize your home’s look and feel! This guide provides a comprehensive approach to designing a lighting plan that’s both practical and visually appealing, including smart lighting integration and strategic fixture placement. Ready to brighten your living space? Let’s dive in.
Mapping Your Space: The Foundation of Effective Lighting
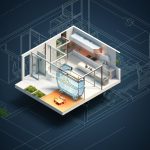
Before selecting any light fixtures, you need a solid foundation: a detailed floor plan. Grab some graph paper, a measuring tape, and a pencil—your essential tools! Precisely measure each room’s length and width, and draw its layout, including walls, windows, doors, and any permanent architectural features. Note the location of electrical outlets and switches. This detailed floor plan serves as your roadmap to designing a well-lit space and helps refine fixture specifications. Think of this as creating a blueprint for your lighting masterpiece.
Consider your ceiling height carefully. A useful guideline suggests spacing light fixtures approximately half the ceiling height apart. For example, in an 8-foot ceiling, space lights about 4 feet apart. However, this is merely a starting point. Account for furniture placement and areas requiring more targeted light, such as task lighting for reading nooks, kitchen countertops, or home office workspaces. Customize your plan to meet the specific needs of your home and consider energy-efficient LED options to improve room brightness and save on energy costs.
Picking Your Lighting Stars: Fixtures and Their Roles
Recessed lighting is incredibly versatile, offering a multitude of options! Consider the mood that you would like to create. The right fixtures can create a bright and cheerful space, or one that is cozy and intimate. Make the right choice to make all the difference!
| Fixture Type | Great For | How the Light Spreads | Things to Keep in Mind |
|---|---|---|---|
| Recessed Lighting | General lighting, task lighting | Wide, focused, adjustable | Careful placement for even light is key |
| Pendant Lights | Accent, dining areas, focal points | Mostly downward | Consider height and style carefully |
| Track Lighting | Flexible lighting, art displays | Adjustable | Needs installation on a track system |
Consider light temperature, measured in Kelvin (K). Cooler temperatures (4000K-5000K) create an energetic, bright ambiance, ideal for kitchens and workspaces, while warmer temperatures (2700K-3000K) evoke relaxation and comfort, perfect for bedrooms and living rooms. Lumens quantify brightness, with higher values indicating a brighter light. Prioritize a high Color Rendering Index (CRI) of 80 or above for accurate and vibrant color representation. Bulbs with a CRI of 90+ offer even better color accuracy.
Also, consider the housing types for your light fixtures. Select housings based on whether the installation is for new construction (NH), a remodeling project (RH), or proximity to insulation (IC-rated housings are fire-safe). Airtight (AT) housings prevent air leakage, improving energy efficiency. Safety is and should be your top priority!
Bringing It All Together: Making Your Lighting Plan a Reality
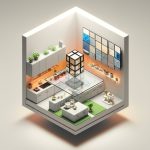
Carefully position your chosen fixtures on your floor plan. Be mindful of potential shadows to avoid creating dark areas. Ensure adequate coverage in corners and along walls. Walk through the space mentally (or physically) to visualize the lighting effect. Refine your plan and continuously re-evaluate until it feels perfect. The ideal well-planned lighting design should leave you with a space that feels illuminated and inviting.
Going Beyond the Basics: Smart Lighting and More
Smart lighting—incorporating dimmers, automated controls, and color-changing bulbs—grows more accessible. This provides personalization and convenience in your lighting experience. Control your lights with your smartphone, set schedules, and create custom lighting scenes. Lighting design software can streamline the entire process. Explore the possibilities to optimize your lighting design with ease.
Consult with a qualified electrician to ensure your lighting plan meets local electrical codes and safety standards. A well-constructed lighting plan is a worthwhile investment in the comfort, beauty, and value of your home and can be achieved with the right tools. Enhance your space today!
How to Calculate Lumens Needed for Recessed Lighting in Different Rooms
Proper illumination is essential to room functionality and mood.
* Lumens are a key measure for light output.
* Optimal light levels are directly related to room size and activity.
* Ceiling height requires careful monitoring for adequate lumens.
Planning Your Lighting Scheme
Before determining how to calculate lumens needed for recessed lighting in different rooms, planning is essential. Start by measuring each room and sketching it out using grid paper to visualize fixture placement. Apply the ceiling-height-divided-by-2 rule to determine fixture spacing. Remember, this is flexible. Consider the room’s purpose; a kitchen needs brighter task lighting than a bedroom, and strategically space dimmable lights to reduce glare and shadows. Think about creating layers of light with ambient, task, and accent lighting. Use dimmers to adjust light levels based on your needs and preferences.
Different lighting types have unique purposes. Recessed lights provide excellent general lighting. Think about your needs for accent lighting for artwork or task lighting for reading or cooking.
Choose fixtures with the right trim and light distribution. A wide beam provides broad coverage, while a narrow beam offers focus. Consider adjustable trims to direct light where you need it most.
Choosing the Right Fixtures
Selecting the correct recessed lighting fixtures is vital to the success of calculating the correct amount of lumens needed. Consider these factors:
- Types: Choose between downlights, adjustable trims, wall washers, and other specialized fixtures.
- Color Temperature (Kelvin): Select cooler temperatures (4000K+) for brighter, energetic spaces and warmer temperatures (2700K-3000K) for relaxing spaces. Consider tunable white fixtures that allow you to adjust the color temperature.
- Lumens and Lux: A kitchen needs substantially more lumens than a bedroom. A general guideline:
- Living Rooms: 10-20 foot-candles
- Kitchens: 30-40 foot-candles
- Bathrooms: 50-60 foot-candles
- Bedrooms: 5-10 foot-candles
- CRI (Color Rendering Index): Aim for a CRI above 80 for accurate color rendering.
- Housing Types: Choose between new construction, remodeling, and IC-rated housings for insulation contact. Also, consider airtight housings to prevent energy loss.
Calculating Lumens: A Step-by-Step Guide
Here’s a simple method for how to calculate lumens needed for recessed lighting in different rooms:
- Measure Room Area: Calculate the square footage (length x width).
- Determine Foot-Candles: Select desired foot-candle level based on room function.
- Multiply: Multiply square footage by desired foot-candles for total lumens.
- Fixture Selection: Choose fixtures with appropriate lumens. Use multiple fixtures for uniform coverage. Consider the beam angle of each fixture to ensure proper light distribution.
Installation and Troubleshooting
Recessed lighting requires special attention to electrical work. If you are not well-versed, hire a professional. Ensure that all wiring meets local electrical codes.
Uneven lighting can be easily avoided with the assurance of correct fixture spacing, in addition to wall and ceiling reflectance. Aim fixtures away from the sight path to reduce glare. Use a light meter to measure light levels and make adjustments as needed.
University of Oregon, “Lighting Design for Homes”
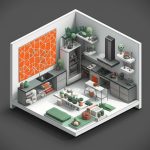
Recessed Lighting Design for Kitchen Islands and Accent Walls
Proper lighting in the kitchen is essential to functionality.
Strategic installation minimizes shadowing.
Appropriate fixtures increase aesthetic and financial costs.
Planning Your Lighting Scheme
Before you plan how to flip the switch, plan ahead using design software. Start by measuring your kitchen in detail to create a floor plan with islands, and cabinet locations. Note the dimensions of your kitchen island and the location of any appliances. Ensure you use grid paper to make planning light fixture placements easier. The ceiling height/2 rule is a great starting point, but it is not mandatory. Base your fixture selection from the desired look, and the height of the ceiling. Plan your recessed lighting design for kitchen islands around how you intend to use your kitchen. Consider brighter task lighting above the island for food prep and softly-lit accent walls to give warmth. Select various fixtures. Recessed lights are versatile with excellent illumination depending on trim style. Track lighting offers flexibility to direct light to where you need it, making it a very helpful type for accent walls. Pendants are a great aesthetic that is perfect over islands. Use a combination of these lighting types to create a layered lighting scheme.
Choosing the Right Fixtures
There are many types of recessed

- Gray Kitchen Backsplash Ideas: Find Your Perfect Gray Tile - December 11, 2025
- Glass Wall Tiles For Bathroom: A Stylish, Durable Choice - December 10, 2025
- Glass Mosaic Kitchen Backsplash: Add Shimmer and Style - December 9, 2025