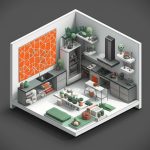
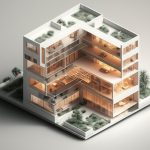
Ever wished you could design your perfect home, without all the confusing jargon and frustrating trial-and-error? This guide will show you exactly how to do it. We’ll walk you through each step, from measuring your space and avoiding common mistakes to choosing the right tools and making sure your design works for years to come. Whether you’re a complete beginner or already have some experience with home design software, we’ll give you the confidence and know-how to create a floor plan that’s both beautiful and functional. For more on floor plans, check out this helpful resource: What is a floor plan?. Let’s build your dream home together!
Your Comprehensive Guide to Floor Plan Layout and Design
Let’s turn your house into the home of your dreams, one perfectly planned room at a time! This guide will walk you through creating a floor plan that’s uniquely yours, reflecting your lifestyle and personal style. Are you ready to get started with home design and space optimization? Let’s dive in!
Step 1: Precise Measurements: The Bedrock of Your Floor Plan
Before you unleash your inner interior designer, arm yourself with a reliable measuring tape and notebook. Accurate measurements are non-negotiable for a successful floor plan. This isn’t just about the length and width of each room; you need to meticulously record the dimensions of:
- Every wall (including nooks and alcoves)
- Doorways (width and height, plus swing direction)
- Windows (width, height, and distance from the floor)
- Existing fixtures (fireplaces, built-in shelves, radiators)
- Ceiling height
Double-check everything! Even small errors can lead to significant problems down the road. Consider using a laser measuring tool for increased accuracy, especially in larger spaces. Create a detailed sketch as you measure, noting each dimension clearly.
Step 2: Choosing Your Design Medium: From Paper to Pixels
The digital age offers a plethora of floor plan software options, but the classic hand-drawn method still holds its charm. Consider the pros and cons of each:
Hand-Drawn Floor Plans:
- Pros: Intuitive, fosters creativity, no software costs, ideal for initial brainstorming.
- Cons: Less precise, time-consuming for revisions, difficult to scale accurately, challenging to share digitally.
Floor Plan Software:
- Pros: Precise measurements, easy editing and revisions, vast libraries of furniture and fixtures, 3D visualization capabilities, seamless digital sharing.
- Cons: Learning curve, subscription costs for advanced features, can feel less personal than hand-drawing.
Popular software options include:
- Free Options: SketchUp Free, Floorplanner, Planner 5D (often with limited features)
- Paid Options: AutoCAD, Revit, Chief Architect (professional-grade software with steep learning curves), RoomSketcher
Experiment with both methods to find what suits your style.
Step 3: Mastering Scale: Ensuring Proportionality and Accuracy
Scale is the ratio between the measurements on your floor plan and the actual dimensions of your space. Choosing the right scale is crucial for accurately representing the size and proportions of your rooms and furniture.
Common scales include:
- 1/4″ = 1 foot (suitable for smaller spaces and detailed plans)
- 1/8″ = 1 foot (ideal for larger homes and less detailed plans)
- 1/2″ = 1 foot (for very small areas such as bathrooms)
Whatever scale you choose, maintain consistency throughout your plan. Use a ruler or scale ruler to ensure all elements are drawn to the correct proportions. If using software, set the scale at the beginning of your project to avoid distortion.
Step 4: Space Planning: Defining Rooms and Features
This is where your vision starts to take shape. Begin by blocking out the basic layout of your rooms, considering factors such as:
- Natural Light: Orient living spaces towards natural light sources (south-facing windows are ideal).
- Traffic Flow: Ensure smooth and logical movement between rooms, avoiding bottlenecks.
- Privacy: Locate bedrooms and bathrooms away from high-traffic areas.
- Views: Position rooms with desirable views to maximize enjoyment.
- Functionality: Group related rooms together (e.g., kitchen and dining room).
Once you’ve established the basic layout, add in permanent features such as:
- Doors (indicate swing direction)
- Windows
- Fireplaces
- Built-in cabinets and shelving
- Staircases
- Structural columns
Step 5: Furniture Placement: Optimizing Functionality and Flow
Furniture placement is crucial for creating a comfortable and functional living space. Consider the following:
- Traffic Flow: Leave ample space (at least 30-36 inches) for walkways between furniture pieces.
- Focal Points: Arrange furniture around a focal point, such as a fireplace or a large window.
- Conversation Areas: Create intimate seating arrangements that encourage conversation.
- Scale and Proportion: Choose furniture that is appropriately sized for the room. Avoid overcrowding small spaces.
- Functionality: Place furniture to support its intended use (e.g., a reading chair near a lamp).
Use furniture templates (either physical cut-outs or digital representations) to experiment with different layouts before committing to a final arrangement.
Step 6: Refine and Optimize: Achieving Perfection
Once you have a draft of your floor plan, take a break and then revisit it with a critical eye. Ask yourself the following questions:
- Does the layout meet your needs and lifestyle?
- Is there enough storage space?
- Is the traffic flow smooth and efficient?
- Are there any awkward spaces or wasted areas?
- Is the layout accessible and user-friendly?
- Does the floor plan maximize natural light and views?
Make revisions as needed until you are completely satisfied with the design.
Step 7: Adding Essential Details: Electrical and Plumbing
Don’t forget the crucial details that make a house a home:
- Electrical Outlets: Strategically place outlets throughout each room, considering furniture placement and appliance locations.
- Light Switches: Position switches near doorways for easy access.
- Lighting Fixtures: Indicate the location of ceiling lights, wall sconces, and lamps.
- Plumbing Fixtures: Accurately represent the location of sinks, toilets, showers, and bathtubs.
- HVAC Vents: Mark the location of heating and cooling vents.
These details are essential for a functional and comfortable living space.
Step 8: Communicating Your Vision: Clarity and Precision
Your floor plan is a communication tool. Make sure it’s clear, concise, and easy to understand.
- Label all rooms and features clearly.
- Use consistent symbols and notations.
- Include dimensions for all walls, doorways, and windows.
- Provide a legend to explain any symbols or abbreviations.
- Use a consistent line weight for different elements.
- Print your plan on a large format for easy viewing.
A well-presented floor plan will facilitate clear communication between you, your architect, your contractor, and any other parties involved in the project.
Pro-Tips for Floor Plan Success
- Consider Universal Design Principles: Design for accessibility and inclusivity from the outset.
- Think Vertically: Don’t forget about ceiling height and vertical space.
- Visualize in 3D: Use software or physical models to visualize your design in three dimensions.
- Embrace Technology: Use apps to measure spaces, capture inspiration, and manage your project.
- Consult with Professionals: Don’t hesitate to seek expert advice from architects or interior designers.
- Document Everything: Keep detailed records of your measurements, sketches, and revisions.
This floor plan guide provides a solid foundation for creating your dream home. Remember, the design process is iterative and requires patience and creativity. Embrace the challenge, have fun, and enjoy the journey!
Future-Proofing Your Floor Plan: Adaptability and Longevity
Designing a home that adapts to your changing needs is essential for long-term satisfaction. This involves considering accessibility, flexibility, and technological advancements.
Prioritizing Flexibility and Openness: The Key to Adaptability
Open floor plans offer unparalleled flexibility, allowing you to reconfigure your living space as your needs evolve. Consider these strategies:
- Minimize Load-Bearing Walls: Design with fewer load-bearing walls to facilitate future renovations.
- Create Multi-Functional Spaces: Design rooms that can serve multiple purposes (e.g., a living room that can be converted into a guest room).
- Utilize Flexible Furniture: Choose furniture that can be easily moved or reconfigured (e.g., modular sofas, foldable tables).
- Design for Future Expansion: Consider the possibility of adding on to your home in the future.
Designing for Accessibility: Universal Design Principles
Universal design aims to create spaces that are usable by people of all ages and abilities. Key considerations include:
- Wider Doorways and Hallways: Accommodate wheelchairs and walkers.
- Ramps Instead of Stairs: Provide step-free access to all areas of the home.
- Accessible Bathrooms: Include grab bars, roll-in showers, and adjustable-height sinks.
- Lever Handles Instead of Knobs: Easier to operate for people with limited dexterity
- Gray Kitchen Backsplash Ideas: Find Your Perfect Gray Tile - December 11, 2025
- Glass Wall Tiles For Bathroom: A Stylish, Durable Choice - December 10, 2025
- Glass Mosaic Kitchen Backsplash: Add Shimmer and Style - December 9, 2025


